Public guided demos use fictional data. Live modules require an assigned account. Provider-dependent features retain the limitations in their individual guides.
Academics · Module guide
Academic setup
Create the academic structure that attendance, admissions, examinations and timetables share.
Use the public sample demo to learn this flow. Your assigned ERP account determines access to actual school records.
STEP BY STEP
How the workflow works
01
Create an academic session with dates
An assigned school account with the required permissions.
02
Add classes and their sections
Classes and sections is part of the documented workflow.
03
Create subjects and select the current session
Subject catalogue is part of the documented workflow.
04
Close the books only after the year-end review
Review the result in the connected record or workspace before moving on.
Request fields to understand
Source-declared fields used by related operations; each operation has its own validation and scope.
Field
Declared type
Input
name
string
Required by declaration
startDate
string
Required by declaration
endDate
string
Required by declaration
isCurrent
boolean
Optional
sessionId
string
Required by declaration
numericLevel
number
Optional
streamId
string
Optional
sortOrder
number
Optional
classId
string
Required by declaration
capacity
number
Optional
classTeacherId
string
Optional
roomNo
string
Optional
code
string
Optional
type
string
Optional
isElective
boolean
Optional
credits
number
Optional
locked
boolean
Required by declaration
reason
string
Optional
CURRENT BEHAVIOUR
Rules & current limits
Session ownership and closed-year checks apply to connected workflows.
Source inventory checked on 11 October 2026. Guide availability confirms documentation publication, not certification of every external service or device flow.
Administration · Module guide
Roles & permissions
Control which school users can view, create, edit, export and manage records.
Use the public sample demo to learn this flow. Your assigned ERP account determines access to actual school records.
STEP BY STEP
How the workflow works
01
Open a role and inspect its existing permissions
An assigned school account with the required permissions.
02
Choose only the required permission keys
Permission catalogue is part of the documented workflow.
03
Save the role and assign eligible users
Role grants is part of the documented workflow.
04
Sign in as the affected role to review access
Review the result in the connected record or workspace before moving on.
Request fields to understand
Source-declared fields used by related operations; each operation has its own validation and scope.
Field
Declared type
Input
name
string
Optional
key
string
Required by declaration
description
string
Optional
permissionKeys
string[]
Required by declaration
userId
string
Required by declaration
CURRENT BEHAVIOUR
Rules & current limits
A role name alone does not grant platform administration. School scope and explicit guards still apply.
Source inventory checked on 11 October 2026. Guide availability confirms documentation publication, not certification of every external service or device flow.
School office · Module guide
Admissions & applicant journey
Connect family enquiries, counsellor follow-ups, reviewed applications and student admission.
Use the public sample demo to learn this flow. Your assigned ERP account determines access to actual school records.
STEP BY STEP
How the workflow works
01
Record or select an enquiry and log the next follow-up
An assigned school account with the required permissions.
02
Open a linked application and review guardian details
Contact attempts is part of the documented workflow.
03
Receive and verify required documents and review readiness
Application stages is part of the documented workflow.
04
Select session, class and section before admitting the applicant
Review the result in the connected record or workspace before moving on.
Request fields to understand
Source-declared fields used by related operations; each operation has its own validation and scope.
Field
Declared type
Input
purpose
'APPLICANT' | 'PARENT_INVITE'
Required by declaration
version
string
Required by declaration
studentName
string
Required by declaration
classApplying
string
Required by declaration
guardianName
string
Required by declaration
phone
string
Required by declaration
email
string
Optional
relationship
string
Required by declaration
dateOfBirth
string
Optional
previousSchool
string
Optional
address
string
Optional
preferredAt
string
Required by declaration
notes
string
Optional
kind
string
Required by declaration
password
string
Required by declaration
summary
string
Required by declaration
channel
string
Optional
outcome
string
Optional
status
string
Required by declaration
followUpAt
string
Optional
byStaffId
string
Optional
counsellorId
string
Required by declaration
reason
string
Optional
parentName
string
Required by declaration
CURRENT BEHAVIOUR
Rules & current limits
Application access links and parent invitations are separate from an existing family login. Admission is subject to readiness and school/session ownership.
Source inventory checked on 11 October 2026. Guide availability confirms documentation publication, not certification of every external service or device flow.
Intelligence · Module guide
AI tools & decision support
Use assisted writing, learning support and forecasts while reviewing the provider state and human decisions.
Use the public sample demo to learn this flow. Your assigned ERP account determines access to actual school records.
STEP BY STEP
How the workflow works
01
Review the provider-status banner before requesting assistance
An assigned school account with the required permissions.
02
Choose the school context, topic or forecast period
Academic assistance is part of the documented workflow.
03
Run the relevant tool and inspect its output and evidence
Learning gaps is part of the documented workflow.
04
Review or edit the result before using it with learners
Review the result in the connected record or workspace before moving on.
Request fields to understand
Source-declared fields used by related operations; each operation has its own validation and scope.
Field
Declared type
Input
studentId
string
Required by declaration
examId
string
Optional
subject
string
Required by declaration
topic
string
Optional
difficulty
string
Optional
count
number
Optional
questionType
string
Optional
question
string
Required by declaration
lessonId
string
Required by declaration
bulletPoints
string
Required by declaration
language
string
Optional
interestArea
string
Optional
sectionId
string
Required by declaration
transcript
string
Required by declaration
date
string
Optional
imageUrl
string
Required by declaration
claimedName
string
Optional
visitorLogId
string
Optional
referenceImageUrl
string
Optional
sourceImageUrl
string
Required by declaration
targetImageUrl
string
Required by declaration
days
number
Optional
regenerate
boolean
Optional
status
'DRAFT' | 'PUBLISHED' | 'PRIVATE' | 'ARCHIVED'
Required by declaration
CURRENT BEHAVIOUR
Rules & current limits
The current provider can return sample output. Configured credentials do not prove a verified provider, live GPS feed or reliable prediction.
Source inventory checked on 11 October 2026. Guide availability confirms documentation publication, not certification of every external service or device flow.
Community · Module guide
Alumni records
Maintain alumni information and keep former learners connected to the school community.
Use the public sample demo to learn this flow. Your assigned ERP account determines access to actual school records.
STEP BY STEP
How the workflow works
01
Open the alumni directory
An assigned school account with the required permissions.
02
Add the alumnus and relevant year/contact details
Record creation is part of the documented workflow.
03
Update the record as information changes
Profile updates is part of the documented workflow.
04
Review scope before removing an entry
Review the result in the connected record or workspace before moving on.
Request fields to understand
Source-declared fields used by related operations; each operation has its own validation and scope.
Field
Declared type
Input
firstName
string
Required by declaration
lastName
string
Optional
graduationYear
number
Required by declaration
studentId
string
Optional
currentOccupation
string
Optional
company
string
Optional
email
string
Optional
phone
string
Optional
linkedinUrl
string
Optional
addressJson
Record<string, unknown>
Optional
notes
string
Optional
CURRENT BEHAVIOUR
Rules & current limits
A directory record does not automatically provision an alumni login or send invitations.
Source inventory checked on 11 October 2026. Guide availability confirms documentation publication, not certification of every external service or device flow.
Academics · Module guide
Homework & assignments
Create and distribute class work, collect student submissions and record grading feedback.
Use the public sample demo to learn this flow. Your assigned ERP account determines access to actual school records.
STEP BY STEP
How the workflow works
01
Select the teaching section and create an assignment
An assigned school account with the required permissions.
02
Add the instructions, due date and supported files
Assignment attachments is part of the documented workflow.
03
Review submitted or pending work
Submission queue is part of the documented workflow.
04
Grade the submission and review the activity history
Review the result in the connected record or workspace before moving on.
Request fields to understand
Source-declared fields used by related operations; each operation has its own validation and scope.
Field
Declared type
Input
assignmentId
string
Optional
dueInDays
number
Optional
title
string
Required by declaration
classId
string
Optional
sectionId
string
Optional
subjectId
string
Optional
instructions
string
Optional
maxMarks
number
Optional
dueDate
string
Optional
status
'DRAFT' | 'PUBLISHED' | 'CLOSED'
Optional
version
string
Optional
correctionReason
string
Optional
outcome
'GRADED' | 'RETURNED'
Optional
marksObtained
number
Optional
remarks
string
Optional
CURRENT BEHAVIOUR
Rules & current limits
Attachment access and learner submissions follow school and child ownership. Reminder delivery depends on the configured channel.
Source inventory checked on 11 October 2026. Guide availability confirms documentation publication, not certification of every external service or device flow.
Academics · Module guide
Student attendance
Complete a daily class register and review attendance history, shortages and family alerts.
Intended access: Assigned account with the required permissions.
An assigned school account with the required permissions.
The academic, student or staff setup used by this workflow.
Required permission keys
attendance:viewattendance:createattendance:manage
Use the public sample demo to learn this flow. Your assigned ERP account determines access to actual school records.
STEP BY STEP
How the workflow works
01
Choose a permitted section and date
An assigned school account with the required permissions.
02
Mark the roster and review the section completion summary
Daily marking is part of the documented workflow.
03
Save the register and inspect corrections/history
Section completion is part of the documented workflow.
04
Review shortages and recorded alerts before reminding families
Review the result in the connected record or workspace before moving on.
Request fields to understand
Source-declared fields used by related operations; each operation has its own validation and scope.
Field
Declared type
Input
sectionId
string
Optional
date
string
Required by declaration
session
string
Optional
records
AttendanceRecordInput[]
Required by declaration
version
string
Optional
correctionReason
string
Optional
force
boolean
Optional
notifyGuardians
boolean
Optional
from
string
Required by declaration
to
string
Required by declaration
message
string
Optional
studentIds
string[]
Optional
CURRENT BEHAVIOUR
Rules & current limits
Holiday and attendance policy affect denominators. Only permitted sections are visible; recording an absence is distinct from approving leave.
Source inventory checked on 11 October 2026. Guide availability confirms documentation publication, not certification of every external service or device flow.
Administration · Module guide
Audit trail
Review the recorded actions taken on school records and trace related entities.
Intended access: Assigned account with the required permissions.
An assigned school account with the required permissions.
The academic, student or staff setup used by this workflow.
Required permission keys
settings:view
Use the public sample demo to learn this flow. Your assigned ERP account determines access to actual school records.
STEP BY STEP
How the workflow works
01
Select an entity or activity filter
An assigned school account with the required permissions.
02
Locate the relevant actor and time
Actor and action is part of the documented workflow.
03
Open the recorded change and its entity reference
Entity references is part of the documented workflow.
04
Compare the trail with the current record
Review the result in the connected record or workspace before moving on.
CURRENT BEHAVIOUR
Rules & current limits
The audit view records permitted activity; it is not an editor for rewriting historical actions.
Source inventory checked on 11 October 2026. Guide availability confirms documentation publication, not certification of every external service or device flow.
Administration · Module guide
Sign-in & account sessions
Sign in with assigned account details and keep platform support access separate from school accounts.
An assigned school account with the required permissions.
The academic, student or staff setup used by this workflow.
Use the public sample demo to learn this flow. Your assigned ERP account determines access to actual school records.
STEP BY STEP
How the workflow works
01
Open the ERP sign-in page
An assigned school account with the required permissions.
02
Enter the assigned identifier and school code when required
Current profile is part of the documented workflow.
03
Use the workspace available to the signed-in role
Token refresh is part of the documented workflow.
04
Log out when the session is finished
Review the result in the connected record or workspace before moving on.
Request fields to understand
Source-declared fields used by related operations; each operation has its own validation and scope.
Field
Declared type
Input
identifier
string
Required by declaration
password
string
Required by declaration
schoolCode
string
Optional
tenantSlug
string
Optional
deviceName
string
Optional
refreshToken
string
Optional
userId
string
Required by declaration
reason
string
Required by declaration
minutes
number
Optional
sessionId
string
Optional
CURRENT BEHAVIOUR
Rules & current limits
Public guided demos do not issue ERP credentials. Impersonation is restricted to platform administrators and is audited.
Source inventory checked on 11 October 2026. Guide availability confirms documentation publication, not certification of every external service or device flow.
School office · Module guide
Student & staff import/export
Prepare spreadsheet records using the provided templates and use the bulk student/staff operations.
Intended access: Assigned account with the required permissions.
An assigned school account with the required permissions.
The academic, student or staff setup used by this workflow.
Required permission keys
student:createstudent:viewhr:createhr:view
Use the public sample demo to learn this flow. Your assigned ERP account determines access to actual school records.
STEP BY STEP
How the workflow works
01
Download the template for the chosen record type
An assigned school account with the required permissions.
02
Fill the required columns with school-owned references
Student import and export is part of the documented workflow.
03
Submit through the permitted bulk workflow and inspect its result
Staff template is part of the documented workflow.
04
Export and reconcile the accepted records
Review the result in the connected record or workspace before moving on.
CURRENT BEHAVIOUR
Rules & current limits
Imports can modify many records. A template or export endpoint does not imply a separate bulk-import page exists.
Source inventory checked on 11 October 2026. Guide availability confirms documentation publication, not certification of every external service or device flow.
School office · Module guide
School calendar & holidays
Publish the dates, events and holiday settings that support school planning and attendance.
Use the public sample demo to learn this flow. Your assigned ERP account determines access to actual school records.
STEP BY STEP
How the workflow works
01
Review the selected calendar period
An assigned school account with the required permissions.
02
Add or update a permitted holiday or event
Working days is part of the documented workflow.
03
Check applicability to students and staff
Holiday settings is part of the documented workflow.
04
Review working days and RSVP summaries
Review the result in the connected record or workspace before moving on.
Request fields to understand
Source-declared fields used by related operations; each operation has its own validation and scope.
Field
Declared type
Input
weekOffDays
number[]
Optional
minAttendancePercent
number
Optional
dayStartsAt
string
Optional
name
string
Optional
description
string
Optional
startDate
string
Optional
endDate
string
Optional
type
string
Optional
appliesToStudents
boolean
Optional
appliesToStaff
boolean
Optional
sessionId
string
Optional
status
string
Required by declaration
guests
number
Optional
remark
string
Optional
CURRENT BEHAVIOUR
Rules & current limits
Declaring a holiday requires its own permission. The attendance and timetable workflows use their documented calendar rules.
Source inventory checked on 11 October 2026. Guide availability confirms documentation publication, not certification of every external service or device flow.
School office · Module guide
Certificates & verification
Manage certificate templates, issue documents and provide token-based verification.
Use the public sample demo to learn this flow. Your assigned ERP account determines access to actual school records.
STEP BY STEP
How the workflow works
01
Choose or create a certificate template
An assigned school account with the required permissions.
02
Select the eligible recipient and issue the document
Individual and bulk issue is part of the documented workflow.
03
Review the generated certificate record
Generated records is part of the documented workflow.
04
Use the document verification token to check validity
Review the result in the connected record or workspace before moving on.
Request fields to understand
Source-declared fields used by related operations; each operation has its own validation and scope.
Field
Declared type
Input
name
string
Required by declaration
type
string
Required by declaration
bodyHtml
string
Optional
paperSize
string
Optional
isActive
boolean
Optional
templateId
string
Required by declaration
studentId
string
Optional
staffId
string
Optional
dataJson
Record<string, unknown>
Optional
items
BulkGenerateItemDto[]
Required by declaration
CURRENT BEHAVIOUR
Rules & current limits
Verification requires an actual generated token. Sample demo certificates are not school-issued documents.
Source inventory checked on 11 October 2026. Guide availability confirms documentation publication, not certification of every external service or device flow.
Institutions · Module guide
College administration
Manage department and semester structures, electives, internal marks, placements and research records.
Use the public sample demo to learn this flow. Your assigned ERP account determines access to actual school records.
STEP BY STEP
How the workflow works
01
Create the department and semester structure
An assigned school account with the required permissions.
02
Offer electives with the required limits
Semesters is part of the documented workflow.
03
Record eligible enrollments and internal marks
Electives and enrollment is part of the documented workflow.
04
Maintain placement and research records
Review the result in the connected record or workspace before moving on.
Request fields to understand
Source-declared fields used by related operations; each operation has its own validation and scope.
Field
Declared type
Input
name
string
Optional
code
string
Required by declaration
hodStaffId
string
Optional
description
string
Optional
totalSeats
number
Optional
departmentId
string
Required by declaration
semesterNo
number
Required by declaration
type
SemesterType
Required by declaration
startDate
string
Optional
endDate
string
Optional
totalCredits
number
Optional
isActive
boolean
Optional
subjectId
string
Required by declaration
semesterId
string
Required by declaration
maxStudents
number
Optional
credits
number
Optional
teacherStaffId
string
Optional
status
string
Optional
electiveId
string
Required by declaration
studentId
string
Required by declaration
assignment1
number
Optional
assignment2
number
Optional
midSem
number
Optional
attendance
number
Optional
CURRENT BEHAVIOUR
Rules & current limits
College workflows share the school account and permission context; college-specific setup must exist.
Source inventory checked on 11 October 2026. Guide availability confirms documentation publication, not certification of every external service or device flow.
Community · Module guide
Notices, announcements & messages
Coordinate school notices, events, complaints, audience-based announcements and direct conversations.
Use the public sample demo to learn this flow. Your assigned ERP account determines access to actual school records.
STEP BY STEP
How the workflow works
01
Choose the notice, announcement or conversation workflow
An assigned school account with the required permissions.
02
Select the permitted audience and prepare the content
Announcement templates is part of the documented workflow.
03
Preview reachability before sending where available
Audience preview is part of the documented workflow.
04
Review delivery reports, replies or complaint status
Review the result in the connected record or workspace before moving on.
Request fields to understand
Source-declared fields used by related operations; each operation has its own validation and scope.
Field
Declared type
Input
name
string
Optional
category
string
Optional
subject
string
Optional
body
string
Required by declaration
channels
string[]
Optional
isActive
boolean
Optional
audience
string
Optional
targeting
AudienceTargetingDto
Optional
title
string
Required by declaration
message
string
Optional
templateId
string
Optional
scheduledAt
string
Optional
isPinned
boolean
Optional
classId
string
Optional
sectionId
string
Optional
expiresAt
string
Optional
description
string
Optional
startAt
string
Required by declaration
endAt
string
Optional
venue
string
Optional
rsvpEnabled
boolean
Optional
isAllDay
boolean
Optional
priority
string
Optional
studentId
string
Optional
CURRENT BEHAVIOUR
Rules & current limits
External SMS, email and WhatsApp delivery requires configured providers. A saved record is not evidence that every recipient received it.
Source inventory checked on 11 October 2026. Guide availability confirms documentation publication, not certification of every external service or device flow.
Student care · Module guide
Discipline & behaviour
Record incidents, review student standing and manage sanctions through dedicated access.
Use the public sample demo to learn this flow. Your assigned ERP account determines access to actual school records.
STEP BY STEP
How the workflow works
01
Locate the student within your permitted scope
An assigned school account with the required permissions.
02
Record the incident and relevant context
Watchlist is part of the documented workflow.
03
Review standing and any suggested threshold action
Policy thresholds is part of the documented workflow.
04
Schedule or close the appropriate sanction
Review the result in the connected record or workspace before moving on.
Request fields to understand
Source-declared fields used by related operations; each operation has its own validation and scope.
Field
Declared type
Input
windowDays
number
Optional
warnAt
number
Optional
detentionAt
number
Optional
parentMeetingAt
number
Optional
suspensionReviewAt
number
Optional
notifyFamilyOnIncident
boolean
Optional
scheduledFor
string
Required by declaration
notes
string
Optional
served
boolean
Required by declaration
reason
string
Optional
studentId
string
Required by declaration
incidentDate
string
Required by declaration
category
string
Optional
description
string
Required by declaration
severity
string
Optional
actionTaken
string
Optional
demeritPoints
number
Optional
status
string
Optional
CURRENT BEHAVIOUR
Rules & current limits
Behaviour records have dedicated sensitive-data permissions; general student access does not imply access.
Source inventory checked on 11 October 2026. Guide availability confirms documentation publication, not certification of every external service or device flow.
Academics · Module guide
Examinations & results
Plan examinations and seating, record marks, review rechecks and publish report cards.
Use the public sample demo to learn this flow. Your assigned ERP account determines access to actual school records.
STEP BY STEP
How the workflow works
01
Create the exam and its subject schedules
An assigned school account with the required permissions.
02
Review the candidates, seating and completion status
Marks entry and history is part of the documented workflow.
03
Record and verify marks, then generate report cards
Completion status is part of the documented workflow.
04
Publish approved results; use the correction workflow when required
Review the result in the connected record or workspace before moving on.
Request fields to understand
Source-declared fields used by related operations; each operation has its own validation and scope.
Field
Declared type
Input
title
string
Required by declaration
subjectId
string
Required by declaration
classId
string
Required by declaration
sectionId
string
Optional
targetCount
number
Optional
durationMin
number
Optional
maxAttempts
number
Optional
questionIds
string[]
Optional
publishResults
boolean
Optional
text
string
Required by declaration
options
string[]
Required by declaration
correctAnswer
string
Required by declaration
difficulty
string
Optional
chapter
string
Optional
marks
number
Optional
status
string
Optional
name
string
Required by declaration
rows
number
Optional
seatsPerRow
number
Optional
blockedSeats
number
Optional
building
string
Optional
floor
string
Optional
isActive
boolean
Optional
scheduleId
string
Required by declaration
CURRENT BEHAVIOUR
Rules & current limits
Published results are distinct from draft marks. Adaptive question attempts and paper rechecks have separate workflows.
Source inventory checked on 11 October 2026. Guide availability confirms documentation publication, not certification of every external service or device flow.
Finance · Module guide
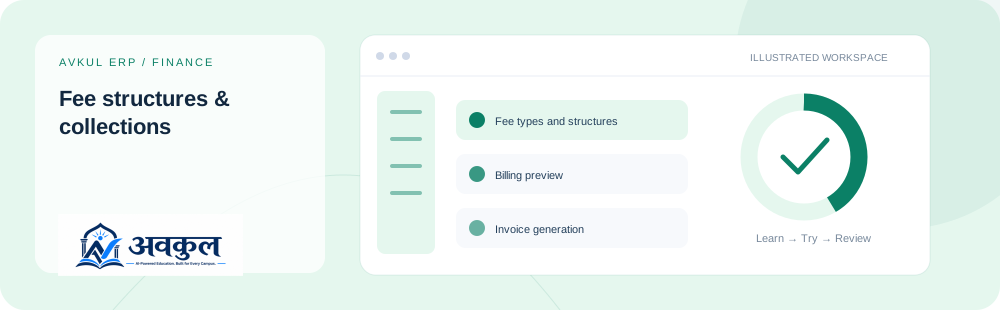
Fee structures & collections
Configure charges, preview billing, issue invoices and record collections and adjustments.
Intended access: Assigned account with the required permissions.
An assigned school account with the required permissions.
The academic, student or staff setup used by this workflow.
Required permission keys
fee:viewfee:managefee:createfee:updatefee:delete
Use the public sample demo to learn this flow. Your assigned ERP account determines access to actual school records.
STEP BY STEP
How the workflow works
01
Create the required fee structure and installments
An assigned school account with the required permissions.
02
Preview eligible students and existing invoices
Billing preview is part of the documented workflow.
03
Generate invoices and record a valid collection
Invoice generation is part of the documented workflow.
04
Review the receipt, remaining balance and adjustment history
Review the result in the connected record or workspace before moving on.
Request fields to understand
Source-declared fields used by related operations; each operation has its own validation and scope.
Field
Declared type
Input
reference
string
Optional
note
string
Optional
amount
number
Optional
reason
string
Required by declaration
name
string
Optional
code
string
Optional
isRecurring
boolean
Optional
isOptional
boolean
Optional
classId
string
Optional
studentId
string
Required by declaration
sessionId
string
Optional
items
InvoiceItemInput[]
Required by declaration
structureId
string
Required by declaration
installmentNo
number
Optional
sectionId
string
Optional
dueDate
string
Optional
notes
string
Optional
type
string
Required by declaration
value
number
Required by declaration
feeTypeId
string
Optional
isActive
boolean
Optional
discountId
string
Optional
status
string
Required by declaration
studentIds
string[]
Optional
CURRENT BEHAVIOUR
Rules & current limits
A collection record is distinct from online gateway settlement. Adjustment and refund actions require the appropriate permission and validation.
Source inventory checked on 11 October 2026. Guide availability confirms documentation publication, not certification of every external service or device flow.
Student care · Module guide
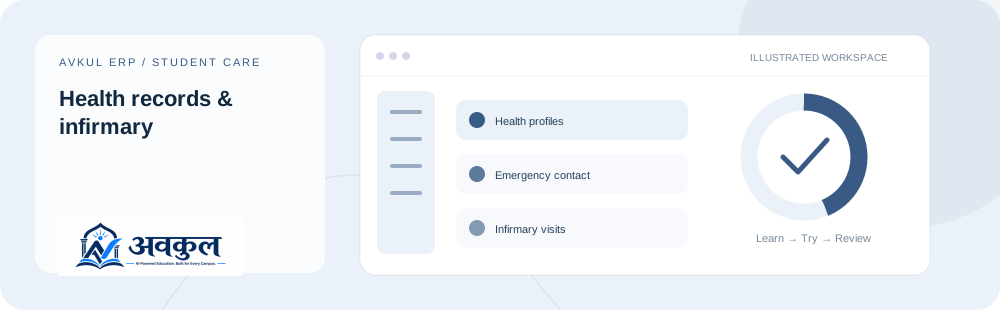
Health records & infirmary
Maintain school health information and record infirmary visits, medication entries and closures.
Access is restricted by dedicated health permissions. Sample walkthrough information is fictional and is not medical advice.
Source inventory checked on 11 October 2026. Guide availability confirms documentation publication, not certification of every external service or device flow.
Campus · Module guide
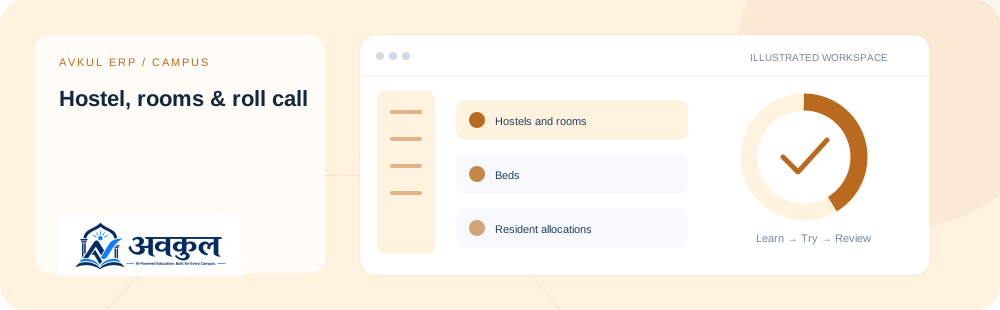
Hostel, rooms & roll call
Manage residence capacity, room/bed allocations, visitor logs and nightly attendance.
Use the public sample demo to learn this flow. Your assigned ERP account determines access to actual school records.
STEP BY STEP
How the workflow works
01
Set up the hostel, rooms and beds
An assigned school account with the required permissions.
02
Allocate eligible residents to available accommodation
Beds is part of the documented workflow.
03
Record and check out permitted visitors
Resident allocations is part of the documented workflow.
04
Open the roll call, mark residents and close the register
Review the result in the connected record or workspace before moving on.
Request fields to understand
Source-declared fields used by related operations; each operation has its own validation and scope.
Field
Declared type
Input
name
string
Required by declaration
type
string
Optional
wardenStaffId
string
Optional
address
string
Optional
hostelId
string
Required by declaration
roomNo
string
Required by declaration
floor
string
Optional
capacity
number
Optional
fare
number
Optional
roomId
string
Required by declaration
bedNo
string
Required by declaration
studentId
string
Optional
bedId
string
Required by declaration
fromDate
string
Required by declaration
toDate
string
Optional
visitorName
string
Required by declaration
purpose
string
Optional
idProof
string
Optional
outTime
string
Optional
date
string
Optional
marks
ResidentMarkDto[]
Required by declaration
force
boolean
Optional
notes
string
Optional
CURRENT BEHAVIOUR
Rules & current limits
Capacity and allocation state must be reviewed before assignment. Family notification delivery depends on the available channel.
Source inventory checked on 11 October 2026. Guide availability confirms documentation publication, not certification of every external service or device flow.
People · Module guide
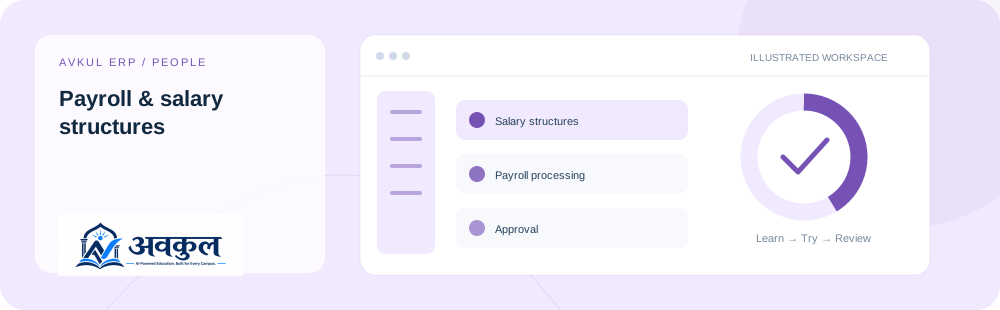
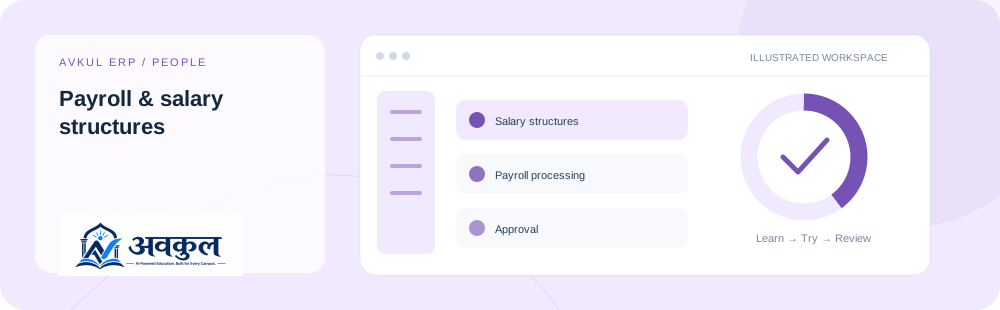
Payroll & salary structures
Prepare salary structures, process payroll, review approvals and maintain salary slips.
Use the public sample demo to learn this flow. Your assigned ERP account determines access to actual school records.
STEP BY STEP
How the workflow works
01
Create the applicable salary structure
An assigned school account with the required permissions.
02
Process payroll for the selected period
Payroll processing is part of the documented workflow.
03
Review calculations and approve the run
Approval is part of the documented workflow.
04
Record payment status and review salary slips
Review the result in the connected record or workspace before moving on.
Request fields to understand
Source-declared fields used by related operations; each operation has its own validation and scope.
Field
Declared type
Input
name
string
Required by declaration
staffId
string
Optional
basic
number
Required by declaration
componentsJson
SalaryComponentDto[]
Optional
ctc
number
Optional
effectiveFrom
string
Optional
isActive
boolean
Optional
month
number
Required by declaration
year
number
Required by declaration
applyLossOfPay
boolean
Optional
paidDays
number
Optional
loanRecovery
number
Optional
tax
number
Optional
CURRENT BEHAVIOUR
Rules & current limits
Marking payroll paid records an administrative state; this feature does not by itself transfer money to a bank.
Source inventory checked on 11 October 2026. Guide availability confirms documentation publication, not certification of every external service or device flow.
Campus · Module guide
Inventory & purchases
Manage supplies, procurement, stock movements and issued school property.
Use the public sample demo to learn this flow. Your assigned ERP account determines access to actual school records.
STEP BY STEP
How the workflow works
01
Create an item and supplier with the relevant stock unit
An assigned school account with the required permissions.
02
Prepare and submit a purchase order for review
Purchase orders is part of the documented workflow.
03
Receive accepted quantities and inspect stock movements
Approval and partial receipt is part of the documented workflow.
04
Issue or return property and review outstanding balances
Review the result in the connected record or workspace before moving on.
Request fields to understand
Source-declared fields used by related operations; each operation has its own validation and scope.
Field
Declared type
Input
name
string
Required by declaration
category
string
Optional
sku
string
Optional
unit
string
Optional
quantity
number
Required by declaration
reorderLevel
number
Optional
unitPrice
number
Optional
contact
string
Optional
phone
string
Optional
email
string
Optional
gstin
string
Optional
address
string
Optional
poNumber
string
Required by declaration
vendorId
string
Required by declaration
expectedAt
string
Optional
notes
string
Optional
items
InvPoLineDto[]
Required by declaration
id
string
Optional
version
string
Optional
reason
string
Optional
action
string
Required by declaration
reference
string
Required by declaration
lines
InvReceiveLineDto[]
Required by declaration
itemId
string
Required by declaration
CURRENT BEHAVIOUR
Rules & current limits
Purchase totals exclude tax/freight and supplier accounting. Valuation uses reference prices, not FIFO or weighted-average accounting.
Source inventory checked on 11 October 2026. Guide availability confirms documentation publication, not certification of every external service or device flow.
People · Module guide
Staff leave & student absences
Keep staff leave requests and student absence reports in their respective review workflows.
Intended access: Assigned account with the required permissions.
An assigned school account with the required permissions.
The academic, student or staff setup used by this workflow.
Required permission keys
hr:viewhr:updateattendance:viewattendance:manage
Use the public sample demo to learn this flow. Your assigned ERP account determines access to actual school records.
STEP BY STEP
How the workflow works
01
Choose staff leave or student absence reporting
An assigned school account with the required permissions.
02
Enter the applicable dates and reason
Pending review is part of the documented workflow.
03
Submit or review through the permitted role
Approve or reject is part of the documented workflow.
04
Check the final decision and attendance impact
Review the result in the connected record or workspace before moving on.
Request fields to understand
Source-declared fields used by related operations; each operation has its own validation and scope.
Field
Declared type
Input
leaveType
string
Optional
fromDate
string
Required by declaration
toDate
string
Optional
reason
string
Optional
status
'APPROVED' | 'REJECTED'
Required by declaration
autoAssignCover
boolean
Optional
remark
string
Optional
studentId
string
Required by declaration
attachmentUrl
string
Optional
approve
boolean
Required by declaration
CURRENT BEHAVIOUR
Rules & current limits
Staff and student approval rules differ. The family view resolves linked-child ownership.
Source inventory checked on 11 October 2026. Guide availability confirms documentation publication, not certification of every external service or device flow.
Finance · Module guide
General ledger
Maintain account records and post balanced double-entry journals with auditable reversals.
Intended access: Assigned account with the required permissions.
An assigned school account with the required permissions.
The academic, student or staff setup used by this workflow.
Required permission keys
fee:viewfee:manage
Use the public sample demo to learn this flow. Your assigned ERP account determines access to actual school records.
STEP BY STEP
How the workflow works
01
Review or seed the chart of accounts
An assigned school account with the required permissions.
02
Prepare matching debit and credit lines
Balanced journals is part of the documented workflow.
03
Post the balanced journal and inspect its record
Journal reversal is part of the documented workflow.
04
Use a reversal to correct an entry without erasing the original
Review the result in the connected record or workspace before moving on.
Request fields to understand
Source-declared fields used by related operations; each operation has its own validation and scope.
Field
Declared type
Input
name
string
Required by declaration
code
string
Optional
type
string
Required by declaration
parentId
string
Optional
isPostable
boolean
Optional
isActive
boolean
Optional
lines
JournalLineDto[]
Required by declaration
entryDate
string
Optional
narration
string
Optional
source
string
Optional
sourceRef
string
Optional
CURRENT BEHAVIOUR
Rules & current limits
Debits and credits must balance. Ledger recording is not a bank settlement or a statutory filing.
Source inventory checked on 11 October 2026. Guide availability confirms documentation publication, not certification of every external service or device flow.
Campus · Module guide
Library & circulation
Maintain titles and copies, lend books, manage reservations and handle fines.
Use the public sample demo to learn this flow. Your assigned ERP account determines access to actual school records.
STEP BY STEP
How the workflow works
01
Create a title and its physical copies
An assigned school account with the required permissions.
02
Check borrower eligibility and issue an available copy
Copy availability is part of the documented workflow.
03
Return or renew the loan and review reservations
Issue and return is part of the documented workflow.
04
Review overdue items and any permitted fine action
Review the result in the connected record or workspace before moving on.
Request fields to understand
Source-declared fields used by related operations; each operation has its own validation and scope.
Field
Declared type
Input
title
string
Required by declaration
author
string
Optional
publisher
string
Optional
isbn
string
Optional
category
string
Optional
edition
string
Optional
rackNo
string
Optional
price
number
Optional
id
string
Optional
version
string
Optional
reason
string
Optional
bookId
string
Required by declaration
barcode
string
Required by declaration
status
string
Optional
copyId
string
Required by declaration
dueDate
string
Optional
condition
string
Required by declaration
additionalCharge
number
Optional
loanDays
number
Optional
finePerDay
number
Optional
graceDays
number
Optional
maxBooksPerBorrower
number
Optional
maxFinePerIssue
number
Optional
blockIssueOverDues
number
Optional
CURRENT BEHAVIOUR
Rules & current limits
Availability, borrower policy and reservation rules affect issue/renewal. A fine record is distinct from a fee gateway payment.
Source inventory checked on 11 October 2026. Guide availability confirms documentation publication, not certification of every external service or device flow.
Academics · Module guide
Live classes & recordings
Schedule live lessons, manage their lifecycle and maintain recordings where configured.
Use the public sample demo to learn this flow. Your assigned ERP account determines access to actual school records.
STEP BY STEP
How the workflow works
01
Create the class for the intended learners
An assigned school account with the required permissions.
02
Review the scheduled time and class details
Start and end is part of the documented workflow.
03
Start the class and use the available joining experience
Learner join view is part of the documented workflow.
04
End the session and review an available recording
Review the result in the connected record or workspace before moving on.
Request fields to understand
Source-declared fields used by related operations; each operation has its own validation and scope.
Field
Declared type
Input
title
string
Optional
classId
string
Required by declaration
sectionId
string
Optional
subjectId
string
Optional
scheduledAt
string
Optional
durationMin
number
Optional
CURRENT BEHAVIOUR
Rules & current limits
Camera/microphone, media delivery and recordings depend on browser permissions and service configuration; a schedule alone does not prove media connectivity.
Source inventory checked on 11 October 2026. Guide availability confirms documentation publication, not certification of every external service or device flow.
Academics · Module guide
Courses & lessons
Build a course structure and let learners open lessons and record progress.
Intended access: Assigned account with the required permissions.
An assigned school account with the required permissions.
The academic, student or staff setup used by this workflow.
Required permission keys
lms:viewlms:createlms:updatelms:delete
Use the public sample demo to learn this flow. Your assigned ERP account determines access to actual school records.
STEP BY STEP
How the workflow works
01
Create a course and its details
An assigned school account with the required permissions.
02
Add modules and lessons in the intended order
Modules is part of the documented workflow.
03
Attach supported learning media and review visibility
Lessons is part of the documented workflow.
04
Open the learner course view and track lesson progress
Review the result in the connected record or workspace before moving on.
Request fields to understand
Source-declared fields used by related operations; each operation has its own validation and scope.
Field
Declared type
Input
title
string
Required by declaration
description
string
Optional
subjectId
string
Optional
classId
string
Optional
isPublished
boolean
Optional
sortOrder
number
Optional
contentType
string
Required by declaration
videoUrl
string
Optional
body
string
Optional
durationMin
number
Optional
CURRENT BEHAVIOUR
Rules & current limits
A course must be available to the learner before it appears in self-service. Video delivery depends on the stored asset and browser support.
Source inventory checked on 11 October 2026. Guide availability confirms documentation publication, not certification of every external service or device flow.
Growth · Module guide
Marketing & conversion workspace
Connect the public AVKUL ERP website with enquiries, campaign performance, content management and follow-up work.
The academic, student or staff setup used by this workflow.
Use the public sample demo to learn this flow. Your assigned ERP account determines access to actual school records.
STEP BY STEP
How the workflow works
01
Publish reviewed landing content and choose its media
A platform administrator account.
02
Create a trackable campaign link
Demo calendar and tasks is part of the documented workflow.
03
Review accepted walkthrough enquiries in CRM
Campaign Manager is part of the documented workflow.
04
Schedule demos and follow-ups and monitor measured conversion
Review the result in the connected record or workspace before moving on.
Request fields to understand
Source-declared fields used by related operations; each operation has its own validation and scope.
Field
Declared type
Input
content
Record<string,unknown>
Required by declaration
draftId
string
Required by declaration
revisionId
string
Required by declaration
source
string
Required by declaration
medium
string
Required by declaration
version
number
Required by declaration
status
string
Required by declaration
assignedToId
string|null
Optional
followUpAt
string | null
Optional
demoAt
string | null
Optional
note
string
Optional
name
string
Required by declaration
title
string
Required by declaration
altText
string
Required by declaration
folderId
string|null
Required by declaration
x
number
Required by declaration
y
number
Required by declaration
width
number
Required by declaration
height
number
Required by declaration
dueAt
string
Required by declaration
priority
string
Required by declaration
leadId
string|null
Optional
action
string
Required by declaration
at
string
Optional
CURRENT BEHAVIOUR
Rules & current limits
Campaign links are tracked only where collection is enabled. In-app reminders do not send outbound messages. Marketing administration requires the platform-admin flag.
Source inventory checked on 11 October 2026. Guide availability confirms documentation publication, not certification of every external service or device flow.
Family portal · Module guide
Family & personal workspace
Let families, learners and staff see only their linked children or personal records.
An assigned school account with the required permissions.
The academic, student or staff setup used by this workflow.
Use the public sample demo to learn this flow. Your assigned ERP account determines access to actual school records.
STEP BY STEP
How the workflow works
01
Sign in with the assigned account
An assigned school account with the required permissions.
02
Select the linked child where a selector is available
Attendance and fees is part of the documented workflow.
03
Open the relevant learning or school-service screen
Published results is part of the documented workflow.
04
Review the record or complete the permitted self-service action
Review the result in the connected record or workspace before moving on.
Request fields to understand
Source-declared fields used by related operations; each operation has its own validation and scope.
Field
Declared type
Input
token
string
Required by declaration
platform
string
Required by declaration
studentId
string
Optional
interests
string
Optional
psychometric
Record<string, number>
Optional
opportunityType
string
Optional
interestArea
string
Optional
CURRENT BEHAVIOUR
Rules & current limits
Child ownership is resolved on the server. Family views omit staff-only notes, rosters and administrative controls.
Source inventory checked on 11 October 2026. Guide availability confirms documentation publication, not certification of every external service or device flow.
Finance · Module guide
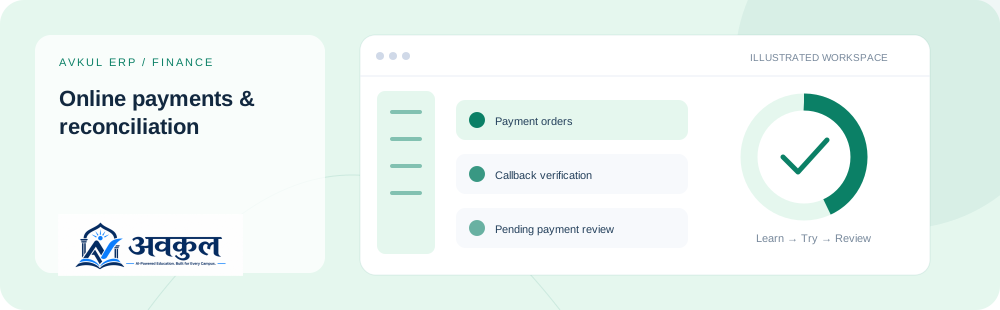
Online payments & reconciliation
Create gateway orders, verify callbacks and investigate payments that remain pending.
Intended access: Assigned account with the required permissions.
An assigned school account with the required permissions.
The academic, student or staff setup used by this workflow.
Required permission keys
fee:viewfee:managefee:create
Use the public sample demo to learn this flow. Your assigned ERP account determines access to actual school records.
STEP BY STEP
How the workflow works
01
Review the invoice and provider readiness
An assigned school account with the required permissions.
02
Create an order through the permitted checkout workflow
Callback verification is part of the documented workflow.
03
Verify the gateway response before treating the invoice as paid
Pending payment review is part of the documented workflow.
04
Investigate a pending payment through reconciliation
Review the result in the connected record or workspace before moving on.
Request fields to understand
Source-declared fields used by related operations; each operation has its own validation and scope.
Field
Declared type
Input
abandon
boolean
Optional
reason
string
Optional
invoiceId
string
Required by declaration
amount
number
Optional
paymentId
string
Required by declaration
razorpayPaymentId
string
Optional
razorpaySignature
string
Optional
CURRENT BEHAVIOUR
Rules & current limits
External collection requires approved gateway credentials and verified callbacks. The public guided demo does not charge money.
Source inventory checked on 11 October 2026. Guide availability confirms documentation publication, not certification of every external service or device flow.
Administration · Module guide
Notifications & integrations
Review notifications, integration settings, webhook records and shared AI request state.
Use the public sample demo to learn this flow. Your assigned ERP account determines access to actual school records.
STEP BY STEP
How the workflow works
01
Open the relevant integration or notification view
An assigned school account with the required permissions.
02
Review status and permitted settings
Integration status is part of the documented workflow.
03
Configure a provider using approved credentials outside public documentation
Integration configuration is part of the documented workflow.
04
Use a controlled test and inspect the actual result
Review the result in the connected record or workspace before moving on.
Request fields to understand
Source-declared fields used by related operations; each operation has its own validation and scope.
Field
Declared type
Input
title
string
Required by declaration
body
string
Optional
userId
string
Optional
channel
string
Optional
dataJson
Record<string, unknown>
Optional
feature
string
Required by declaration
provider
string
Required by declaration
model
string
Optional
promptJson
Record<string, unknown>
Optional
responseJson
Record<string, unknown>
Optional
promptTokens
number
Optional
completionTokens
number
Optional
status
string
Optional
errorMessage
string
Optional
prompt
string
Required by declaration
category
string
Optional
configJson
Record<string, unknown>
Optional
secretsRef
string
Optional
isActive
boolean
Optional
integrationId
string
Optional
event
string
Required by declaration
targetUrl
string
Required by declaration
secret
string
Optional
CURRENT BEHAVIOUR
Rules & current limits
Saving settings is not proof of external delivery. No credential values are included in this documentation.
Source inventory checked on 11 October 2026. Guide availability confirms documentation publication, not certification of every external service or device flow.
School office · Module guide
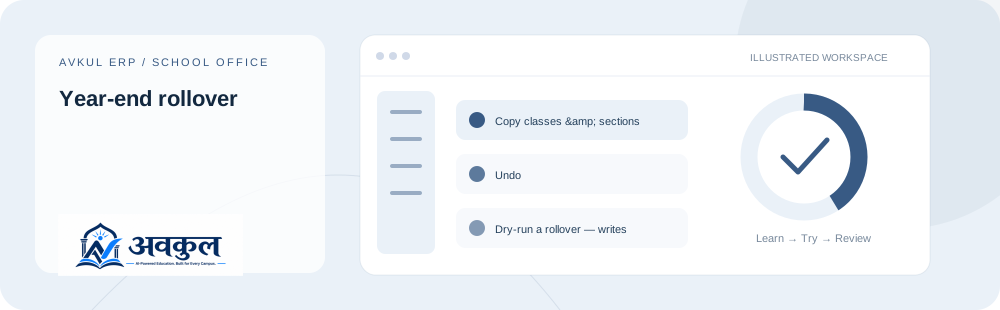
Year-end rollover
Preview new-session student placement and apply or revert a recorded promotion batch.
Use the public sample demo to learn this flow. Your assigned ERP account determines access to actual school records.
STEP BY STEP
How the workflow works
01
Choose the source and target academic sessions
An assigned school account with the required permissions.
02
Clone or prepare the target class structure
Structure clone is part of the documented workflow.
03
Review the dry-run placement and exceptions
Promotion commit is part of the documented workflow.
04
Commit only the reviewed batch and keep its reversal reference
Review the result in the connected record or workspace before moving on.
Request fields to understand
Source-declared fields used by related operations; each operation has its own validation and scope.
Field
Declared type
Input
fromSessionId
string
Required by declaration
toSessionId
string
Required by declaration
criteria
PromotionCriteriaDto
Optional
includeTimetables
boolean
Optional
decisions
StudentDecisionDto[]
Required by declaration
activateTargetSession
boolean
Optional
notes
string
Optional
graduationYear
number
Optional
CURRENT BEHAVIOUR
Rules & current limits
Preview writes nothing; commit changes enrollment. Locked sessions and school ownership checks still apply.
Source inventory checked on 11 October 2026. Guide availability confirms documentation publication, not certification of every external service or device flow.
Community · Module guide
Parent–teacher meetings
Publish meeting slots, book families, record discussion outcomes and manage follow-up tasks.
Use the public sample demo to learn this flow. Your assigned ERP account determines access to actual school records.
STEP BY STEP
How the workflow works
01
Create or choose the permitted teacher meeting slot
An assigned school account with the required permissions.
02
Book the linked child and verify availability
Family bookings is part of the documented workflow.
03
Record the meeting outcome with the correct note visibility
Reschedule and cancel is part of the documented workflow.
04
Assign and complete any follow-up action
Review the result in the connected record or workspace before moving on.
Request fields to understand
Source-declared fields used by related operations; each operation has its own validation and scope.
Field
Declared type
Input
id
string
Optional
staffId
string
Required by declaration
date
string
Required by declaration
startTime
string
Required by declaration
endTime
string
Required by declaration
capacity
number
Optional
location
string
Optional
isActive
boolean
Optional
version
string
Optional
slotId
string
Required by declaration
studentId
string
Required by declaration
notes
string
Optional
status
string
Required by declaration
reason
string
Optional
privateNotes
string
Optional
feedback
string
Optional
bookingId
string
Required by declaration
title
string
Required by declaration
owner
"SCHOOL" | "FAMILY"
Required by declaration
dueDate
string
Optional
force
boolean
Optional
parentId
string
Optional
CURRENT BEHAVIOUR
Rules & current limits
Private staff notes and family-visible notes differ. Reminder actions do not guarantee external SMS, email or push delivery.
Source inventory checked on 11 October 2026. Guide availability confirms documentation publication, not certification of every external service or device flow.
Finance · Module guide
School reports
Review fee summaries, student distribution and examination summaries from permitted school data.
Intended access: Assigned account with the required permissions.
An assigned school account with the required permissions.
The academic, student or staff setup used by this workflow.
Required permission keys
report:view
Use the public sample demo to learn this flow. Your assigned ERP account determines access to actual school records.
STEP BY STEP
How the workflow works
01
Choose the report and reporting context
An assigned school account with the required permissions.
02
Inspect the totals and available filters
Students by class is part of the documented workflow.
03
Compare the summary with the underlying records
Exam summary is part of the documented workflow.
04
Use the available export or print action when present
Review the result in the connected record or workspace before moving on.
CURRENT BEHAVIOUR
Rules & current limits
A summary is only as current as the entered records. Each report uses its implemented date and scope rules.
Source inventory checked on 11 October 2026. Guide availability confirms documentation publication, not certification of every external service or device flow.
Platform · Module guide
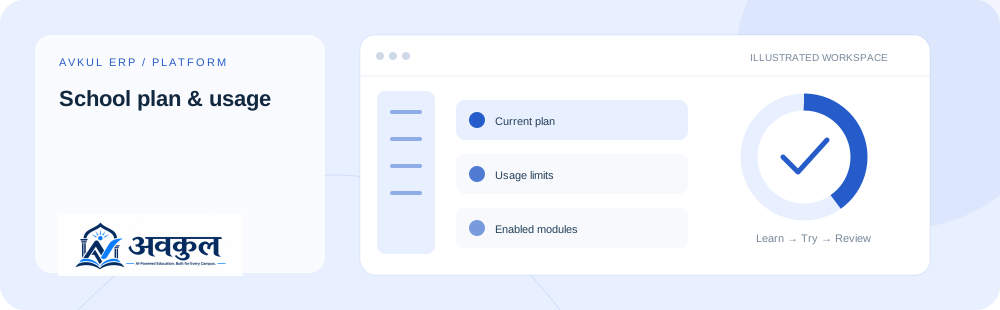
Platform administration
Manage tenants, schools, plans, subscriptions, billing and cross-tenant reporting.
The academic, student or staff setup used by this workflow.
Use the public sample demo to learn this flow. Your assigned ERP account determines access to actual school records.
STEP BY STEP
How the workflow works
01
Select the tenant or platform overview
A platform administrator account.
02
Review plan, subscription, usage and school details
Schools and quotas is part of the documented workflow.
03
Apply an authorized administrative action
Plans and module toggles is part of the documented workflow.
04
Review the resulting invoice, audit or report
Review the result in the connected record or workspace before moving on.
Request fields to understand
Source-declared fields used by related operations; each operation has its own validation and scope.
Field
Declared type
Input
code
string
Required by declaration
description
string
Optional
type
string
Optional
value
number
Required by declaration
maxRedemptions
number
Optional
validFrom
string
Optional
validUntil
string
Optional
isActive
boolean
Optional
question
string
Required by declaration
planCode
string
Optional
amount
number
Optional
paymentLogId
string
Required by declaration
razorpayPaymentId
string
Optional
razorpaySignature
string
Optional
name
string
Required by declaration
billingCycle
string
Optional
priceMonthly
number
Optional
priceYearly
number
Optional
trialDays
number
Optional
maxStudents
number
Optional
maxStaff
number
Optional
maxSchools
number
Optional
maxBranches
number
Optional
isPublic
boolean
Optional
CURRENT BEHAVIOUR
Rules & current limits
Platform access is distinct from a school role. Online SaaS invoice collection and invitation delivery require configured providers.
Source inventory checked on 11 October 2026. Guide availability confirms documentation publication, not certification of every external service or device flow.
School office · Module guide
School dashboard & branches
See school-wide priorities and manage the campus context used by the ERP.
Use the public sample demo to learn this flow. Your assigned ERP account determines access to actual school records.
STEP BY STEP
How the workflow works
01
Review the school dashboard and current session
An assigned school account with the required permissions.
02
Open an outstanding action in the relevant module
Daily Action Center is part of the documented workflow.
03
Inspect the campus counts and permitted branch settings
School profile is part of the documented workflow.
04
Review the consequences before closing a campus
Review the result in the connected record or workspace before moving on.
Request fields to understand
Source-declared fields used by related operations; each operation has its own validation and scope.
Field
Declared type
Input
code
string
Required by declaration
name
string
Required by declaration
addressLine1
string
Optional
city
string
Optional
phone
string
Optional
isMain
boolean
Optional
CURRENT BEHAVIOUR
Rules & current limits
Closing a populated campus is refused. The dashboard aggregates scoped records rather than replacing each module workflow.
Source inventory checked on 11 October 2026. Guide availability confirms documentation publication, not certification of every external service or device flow.
People · Module guide
Staff directory & lifecycle
Maintain staff profiles, inspect connected responsibilities and record departure or reinstatement.
Intended access: Assigned account with the required permissions.
An assigned school account with the required permissions.
The academic, student or staff setup used by this workflow.
Required permission keys
hr:viewhr:createhr:updatehr:manage
Use the public sample demo to learn this flow. Your assigned ERP account determines access to actual school records.
STEP BY STEP
How the workflow works
01
Find or create the staff profile
An assigned school account with the required permissions.
02
Review employment details and linked responsibilities
Staff creation is part of the documented workflow.
03
Inspect clearance before offboarding
Profile 360 is part of the documented workflow.
04
Use reinstatement when returning a former staff member
Review the result in the connected record or workspace before moving on.
Request fields to understand
Source-declared fields used by related operations; each operation has its own validation and scope.
Field
Declared type
Input
employeeCode
string
Required by declaration
firstName
string
Required by declaration
lastName
string
Optional
gender
string
Optional
dateOfBirth
string
Optional
email
string
Optional
phone
string
Optional
branchId
string
Optional
departmentId
string
Optional
designationId
string
Optional
reportsToId
string
Optional
joiningDate
string
Optional
contractType
string
Optional
qualifications
unknown
Optional
exitStatus
'RESIGNED' | 'TERMINATED' | 'RETIRED'
Optional
exitDate
string
Optional
reason
string
Optional
force
boolean
Optional
CURRENT BEHAVIOUR
Rules & current limits
Offboarding is separate from deleting historical school activity. Permission and dependency checks govern each action.
Source inventory checked on 11 October 2026. Guide availability confirms documentation publication, not certification of every external service or device flow.
People · Module guide
Staff attendance
Record staff check-in/out and maintain an administrative daily and monthly register.
Intended access: Assigned account with the required permissions.
An assigned school account with the required permissions.
The academic, student or staff setup used by this workflow.
Required permission keys
hr:viewhr:updatehr:manage
Use the public sample demo to learn this flow. Your assigned ERP account determines access to actual school records.
STEP BY STEP
How the workflow works
01
Check the current personal attendance state
An assigned school account with the required permissions.
02
Clock in or out through the self-service action
Check-in/out is part of the documented workflow.
03
Use the authorized daily roster to correct records
Daily roster is part of the documented workflow.
04
Review the monthly register and holiday policy
Review the result in the connected record or workspace before moving on.
Request fields to understand
Source-declared fields used by related operations; each operation has its own validation and scope.
Field
Declared type
Input
lat
number
Optional
lng
number
Optional
remark
string
Optional
date
string
Required by declaration
records
StaffAttendanceInput[]
Required by declaration
force
boolean
Optional
from
string
Required by declaration
to
string
Required by declaration
CURRENT BEHAVIOUR
Rules & current limits
Self-service acts on the caller’s staff profile. Administrative corrections need separate access.
Source inventory checked on 11 October 2026. Guide availability confirms documentation publication, not certification of every external service or device flow.
School office · Module guide
Student records & lifecycle
Maintain student profiles, guardians and documents, and manage campus release or school exit.
Use the public sample demo to learn this flow. Your assigned ERP account determines access to actual school records.
STEP BY STEP
How the workflow works
01
Create or open the student profile
An assigned school account with the required permissions.
02
Review guardian contacts and required documents
Profile 360 is part of the documented workflow.
03
Use the gate-pass workflow for an authorized early release
Guardians is part of the documented workflow.
04
Use clearance and exit workflows for withdrawal or transfer
Review the result in the connected record or workspace before moving on.
Request fields to understand
Source-declared fields used by related operations; each operation has its own validation and scope.
Field
Declared type
Input
studentId
string
Required by declaration
reason
string
Optional
expectedOutAt
string
Optional
expectedBackAt
string
Optional
releaseToName
string
Optional
releaseToGuardianId
string
Optional
approve
boolean
Required by declaration
guardianId
string
Optional
releaseRelation
string
Optional
overrideReason
string
Optional
notes
string
Optional
type
string
Required by declaration
title
string
Optional
expiresAt
string
Optional
firstName
string
Required by declaration
middleName
string
Optional
lastName
string
Optional
admissionNo
string
Required by declaration
rollNo
string
Optional
gender
string
Optional
dateOfBirth
string
Optional
bloodGroup
string
Optional
sessionId
string
Optional
classId
string
Optional
CURRENT BEHAVIOUR
Rules & current limits
Campus release is distinct from withdrawal from the school rolls. Transfer certificates require a valid exited record.
Source inventory checked on 11 October 2026. Guide availability confirms documentation publication, not certification of every external service or device flow.
Finance · Module guide
Tally export
Prepare accounting vouchers for the configured Tally integration.
Intended access: Assigned account with the required permissions.
An assigned school account with the required permissions.
The academic, student or staff setup used by this workflow.
Required permission keys
settings:viewfee:export
Use the public sample demo to learn this flow. Your assigned ERP account determines access to actual school records.
STEP BY STEP
How the workflow works
01
Review the accounting data and integration settings
An assigned school account with the required permissions.
02
Check the configured connection in a controlled environment
Voucher export is part of the documented workflow.
03
Export the selected voucher records
Voucher export is part of the documented workflow.
04
Reconcile the receiving system with the exported result
Review the result in the connected record or workspace before moving on.
Request fields to understand
Source-declared fields used by related operations; each operation has its own validation and scope.
Field
Declared type
Input
fromDate
string
Required by declaration
toDate
string
Required by declaration
pushToTally
boolean
Optional
CURRENT BEHAVIOUR
Rules & current limits
An export endpoint does not prove that a live Tally instance is connected or that vouchers were imported successfully.
Source inventory checked on 11 October 2026. Guide availability confirms documentation publication, not certification of every external service or device flow.
People · Module guide
Staff tasks
Assign work to school staff and let each user complete their own task list.
Intended access: Assigned account with the required permissions.
An assigned school account with the required permissions.
The academic, student or staff setup used by this workflow.
Required permission keys
hr:viewhr:createhr:updatehr:delete
Use the public sample demo to learn this flow. Your assigned ERP account determines access to actual school records.
STEP BY STEP
How the workflow works
01
Create a task with the intended staff assignment
An assigned school account with the required permissions.
02
Review its due date and current state
Create and edit is part of the documented workflow.
03
The assigned user opens their own task queue
My tasks is part of the documented workflow.
04
Complete the task and review the updated record
Review the result in the connected record or workspace before moving on.
Request fields to understand
Source-declared fields used by related operations; each operation has its own validation and scope.
Field
Declared type
Input
title
string
Optional
description
string
Optional
assignedToId
string
Optional
dueDate
string
Optional
priority
string
Optional
category
string
Optional
checklist
ChecklistItemDto[]
Optional
status
string
Optional
CURRENT BEHAVIOUR
Rules & current limits
School staff tasks are separate from the platform marketing Demo & Follow-up Workspace.
Source inventory checked on 11 October 2026. Guide availability confirms documentation publication, not certification of every external service or device flow.
Academics · Module guide
Timetable & teacher cover
Build recurring class schedules and arrange dated teacher cover with clash checks.
Use the public sample demo to learn this flow. Your assigned ERP account determines access to actual school records.
STEP BY STEP
How the workflow works
01
Select the section, teacher and date
An assigned school account with the required permissions.
02
Create a period with its subject, time and room
Class and teacher filters is part of the documented workflow.
03
Resolve overlap warnings before saving
Periods and rooms is part of the documented workflow.
04
Arrange dated cover and review the daily plan
Review the result in the connected record or workspace before moving on.
Request fields to understand
Source-declared fields used by related operations; each operation has its own validation and scope.
Field
Declared type
Input
version
string
Optional
periodId
string
Required by declaration
date
string
Required by declaration
substituteStaffId
string
Required by declaration
reason
string
Optional
status
'PLANNED' | 'CONFIRMED' | 'CANCELLED'
Required by declaration
sectionId
string
Required by declaration
dayOfWeek
number
Required by declaration
periodNo
number
Required by declaration
startTime
string
Required by declaration
endTime
string
Required by declaration
subjectId
string
Optional
teacherStaffId
string
Optional
roomNo
string
Optional
periodType
string
Optional
force
boolean
Optional
absentStaffId
string
Required by declaration
apply
boolean
Optional
autoGenerated
boolean
Optional
CURRENT BEHAVIOUR
Rules & current limits
Workspace checks include section, teacher and room overlaps. Weekly templates retain the recurring teacher; dated cover appears in the daily view.
Source inventory checked on 11 October 2026. Guide availability confirms documentation publication, not certification of every external service or device flow.
Campus · Module guide
Transport operations
Manage buses, routes, stops and student allocations, then run daily boarding registers.
Use the public sample demo to learn this flow. Your assigned ERP account determines access to actual school records.
STEP BY STEP
How the workflow works
01
Set up the bus, route and ordered stops
An assigned school account with the required permissions.
02
Allocate students within the directional seat capacity
Routes and stops is part of the documented workflow.
03
Start today’s trip and record boarding/drop-off
Pickup/drop allocations is part of the documented workflow.
04
Complete the run and review family-visible updates
Review the result in the connected record or workspace before moving on.
Request fields to understand
Source-declared fields used by related operations; each operation has its own validation and scope.
Field
Declared type
Input
regNo
string
Required by declaration
model
string
Optional
capacity
number
Optional
driverStaffId
string
Optional
helperStaffId
string
Optional
isActive
boolean
Optional
name
string
Required by declaration
vehicleId
string
Required by declaration
routeId
string
Required by declaration
sequence
number
Optional
pickupTime
string
Optional
dropTime
string
Optional
studentId
string
Required by declaration
stopId
string
Optional
direction
string
Optional
id
string
Optional
version
string
Optional
date
string
Required by declaration
status
string
Required by declaration
note
string
Optional
reason
string
Optional
notes
string
Optional
marks
BoardingMarkDto[]
Required by declaration
force
boolean
Optional
CURRENT BEHAVIOUR
Rules & current limits
Drivers see only their assigned operations. Recorded GPS points are not proof of an active device feed; no live tracking hardware is provisioned here.
Source inventory checked on 11 October 2026. Guide availability confirms documentation publication, not certification of every external service or device flow.
Use the public sample demo to learn this flow. Your assigned ERP account determines access to actual school records.
STEP BY STEP
How the workflow works
01
Create the subject and teaching batch
An assigned school account with the required permissions.
02
Enroll the eligible student with the applicable terms
Batches is part of the documented workflow.
03
Schedule and review prospective demo classes
Enrollment is part of the documented workflow.
04
Maintain progress reports and enrollment state
Review the result in the connected record or workspace before moving on.
Request fields to understand
Source-declared fields used by related operations; each operation has its own validation and scope.
Field
Declared type
Input
name
string
Optional
subjectId
string
Required by declaration
teacherStaffId
string
Optional
type
BatchType
Optional
startDate
string
Required by declaration
endDate
string
Optional
maxStudents
number
Optional
monthlyFee
number
Optional
schedule
string
Optional
roomNo
string
Optional
status
DemoStatus
Optional
batchId
string
Required by declaration
studentId
string
Required by declaration
enrolledAt
string
Optional
discountAmount
number
Optional
notes
string
Optional
isActive
boolean
Optional
prospectName
string
Required by declaration
prospectPhone
string
Required by declaration
prospectEmail
string
Optional
scheduledAt
string
Optional
feedbackNotes
string
Optional
converted
boolean
Optional
convertedStudentId
string
Optional
CURRENT BEHAVIOUR
Rules & current limits
Tuition prospect demos are distinct from the platform’s AVKUL ERP product demos.
Source inventory checked on 11 October 2026. Guide availability confirms documentation publication, not certification of every external service or device flow.
Websites · Module guide
School website CMS
Manage school themes, content pages and published website information from the ERP.
Use the public sample demo to learn this flow. Your assigned ERP account determines access to actual school records.
STEP BY STEP
How the workflow works
01
Review the school website theme and branding
An assigned school account with the required permissions.
02
Create or edit the intended content page
Theme activation is part of the documented workflow.
03
Preview and check the content and contact information
Page content is part of the documented workflow.
04
Publish the page and review the public school URL
Review the result in the connected record or workspace before moving on.
Request fields to understand
Source-declared fields used by related operations; each operation has its own validation and scope.
Field
Declared type
Input
name
string
Required by declaration
configJson
Record<string, unknown>
Optional
isActive
boolean
Optional
slug
string
Required by declaration
title
string
Required by declaration
type
string
Optional
themeId
string
Optional
contentJson
Record<string, unknown>
Optional
seoJson
Record<string, unknown>
Optional
sortOrder
number
Optional
status
string
Required by declaration
CURRENT BEHAVIOUR
Rules & current limits
School website content is separate from the platform marketing Landing Page CMS. Publish controls use school ownership and permissions.
Source inventory checked on 11 October 2026. Guide availability confirms documentation publication, not certification of every external service or device flow.
People · Module guide
Approval workflows
Configure approval chains and let the responsible approver act on the current step.
Use the public sample demo to learn this flow. Your assigned ERP account determines access to actual school records.
STEP BY STEP
How the workflow works
01
Create a workflow definition and its ordered steps
An assigned school account with the required permissions.
02
Review the workflow linked to the business record
Approval steps is part of the documented workflow.
03
The current approver opens their pending queue
Pending for me is part of the documented workflow.
04
Record the decision and inspect the next step
Review the result in the connected record or workspace before moving on.
Request fields to understand
Source-declared fields used by related operations; each operation has its own validation and scope.
Field
Declared type
Input
decision
'APPROVED' | 'REJECTED'
Required by declaration
remark
string
Optional
name
string
Optional
entityType
string
Required by declaration
description
string
Optional
steps
WorkflowStepDto[]
Optional
isActive
boolean
Optional
CURRENT BEHAVIOUR
Rules & current limits
Approval is limited to the current eligible approver; it is separate from directly editing the source business record.
Source inventory checked on 11 October 2026. Guide availability confirms documentation publication, not certification of every external service or device flow.
Family portal · Family guide
Ask School Copilot
Ask a school-related question within the signed-in family’s permitted context.
A signed-in account linked to the selected learner or personal staff profile.
Choose the relevant school, academic session or child before working.
Use the public sample demo to learn this flow. Your assigned ERP account determines access to actual school records.
STEP BY STEP
How the workflow works
01
Select the linked child
A signed-in account linked to the selected learner or personal staff profile.
02
Enter a school-related question
Answer review is part of the documented workflow.
03
Review the answer and verify important details with the school
Review the result in the connected record or workspace before moving on.
CURRENT BEHAVIOUR
Rules & current limits
Only linked children and personal records are available. Staff-only notes and administrative controls are not part of this family screen.
Child ownership is resolved on the server. Family views omit staff-only notes, rosters and administrative controls.
Source inventory checked on 11 October 2026. Guide availability confirms documentation publication, not certification of every external service or device flow.
Family portal · Family guide
My attendance
Review daily and calendar attendance for the selected learner.
A signed-in account linked to the selected learner or personal staff profile.
Choose the relevant school, academic session or child before working.
Use the public sample demo to learn this flow. Your assigned ERP account determines access to actual school records.
STEP BY STEP
How the workflow works
01
Choose the linked child
A signed-in account linked to the selected learner or personal staff profile.
02
Inspect the attendance period and status
Attendance calendar is part of the documented workflow.
03
Review the counting explanation and query the school about corrections
Review the result in the connected record or workspace before moving on.
CURRENT BEHAVIOUR
Rules & current limits
Only linked children and personal records are available. Staff-only notes and administrative controls are not part of this family screen.
Child ownership is resolved on the server. Family views omit staff-only notes, rosters and administrative controls.
Source inventory checked on 11 October 2026. Guide availability confirms documentation publication, not certification of every external service or device flow.
Family portal · Family guide
My child’s bus
View assigned routes, stops, schedules and recorded trip status for your child.
A signed-in account linked to the selected learner or personal staff profile.
Choose the relevant school, academic session or child before working.
Use the public sample demo to learn this flow. Your assigned ERP account determines access to actual school records.
STEP BY STEP
How the workflow works
01
Select your child
A signed-in account linked to the selected learner or personal staff profile.
02
Review the bus, route and stop schedule
Pickup/drop stop is part of the documented workflow.
03
Check the recorded trip status and latest available history
Review the result in the connected record or workspace before moving on.
CURRENT BEHAVIOUR
Rules & current limits
Only linked children and personal records are available. Staff-only notes and administrative controls are not part of this family screen.
Child ownership is resolved on the server. Family views omit staff-only notes, rosters and administrative controls.
Source inventory checked on 11 October 2026. Guide availability confirms documentation publication, not certification of every external service or device flow.
Family portal · Family guide
Family complaints
Submit a school complaint and review the visible responses or status.
A signed-in account linked to the selected learner or personal staff profile.
Choose the relevant school, academic session or child before working.
Use the public sample demo to learn this flow. Your assigned ERP account determines access to actual school records.
STEP BY STEP
How the workflow works
01
Review your existing complaints
A signed-in account linked to the selected learner or personal staff profile.
02
Enter the subject and relevant details
New complaint is part of the documented workflow.
03
Submit and review the recorded status
Review the result in the connected record or workspace before moving on.
CURRENT BEHAVIOUR
Rules & current limits
Only linked children and personal records are available. Staff-only notes and administrative controls are not part of this family screen.
Child ownership is resolved on the server. Family views omit staff-only notes, rosters and administrative controls.
Source inventory checked on 11 October 2026. Guide availability confirms documentation publication, not certification of every external service or device flow.
Family portal · Family guide
Online exam attempts
Open an eligible adaptive exam, answer questions and submit the learner’s attempt.
A signed-in account linked to the selected learner or personal staff profile.
Choose the relevant school, academic session or child before working.
Use the public sample demo to learn this flow. Your assigned ERP account determines access to actual school records.
STEP BY STEP
How the workflow works
01
Select an available exam for the learner
A signed-in account linked to the selected learner or personal staff profile.
02
Start the attempt and answer the questions
Start attempt is part of the documented workflow.
03
Review answers before submitting
Answer selection is part of the documented workflow.
04
Inspect the available completion result
Review the result in the connected record or workspace before moving on.
CURRENT BEHAVIOUR
Rules & current limits
Only linked children and personal records are available. Staff-only notes and administrative controls are not part of this family screen.
Child ownership is resolved on the server. Family views omit staff-only notes, rosters and administrative controls.
Source inventory checked on 11 October 2026. Guide availability confirms documentation publication, not certification of every external service or device flow.
Family portal · Family guide
Learning explanations
Request and review a topic explanation in the available language options.
A signed-in account linked to the selected learner or personal staff profile.
Choose the relevant school, academic session or child before working.
Use the public sample demo to learn this flow. Your assigned ERP account determines access to actual school records.
STEP BY STEP
How the workflow works
01
Choose the linked learner and topic
A signed-in account linked to the selected learner or personal staff profile.
02
Select the intended language
Language selection is part of the documented workflow.
03
Review the generated explanation before using it
Review the result in the connected record or workspace before moving on.
CURRENT BEHAVIOUR
Rules & current limits
Only linked children and personal records are available. Staff-only notes and administrative controls are not part of this family screen.
Child ownership is resolved on the server. Family views omit staff-only notes, rosters and administrative controls.
Source inventory checked on 11 October 2026. Guide availability confirms documentation publication, not certification of every external service or device flow.
Family portal · Family guide
My fee invoices & receipts
Review invoices, outstanding balances and recorded receipts for your linked child.
A signed-in account linked to the selected learner or personal staff profile.
Choose the relevant school, academic session or child before working.
Use the public sample demo to learn this flow. Your assigned ERP account determines access to actual school records.
STEP BY STEP
How the workflow works
01
Select your child
A signed-in account linked to the selected learner or personal staff profile.
02
Open the relevant invoice and balance
Payment history is part of the documented workflow.
03
Review the available payment history or receipt
Review the result in the connected record or workspace before moving on.
CURRENT BEHAVIOUR
Rules & current limits
Only linked children and personal records are available. Staff-only notes and administrative controls are not part of this family screen.
Child ownership is resolved on the server. Family views omit staff-only notes, rosters and administrative controls.
Source inventory checked on 11 October 2026. Guide availability confirms documentation publication, not certification of every external service or device flow.
Family portal · Family guide
My homework & learning history
Read assigned class work, submit supported work and review feedback for the selected learner.
A signed-in account linked to the selected learner or personal staff profile.
Choose the relevant school, academic session or child before working.
Use the public sample demo to learn this flow. Your assigned ERP account determines access to actual school records.
STEP BY STEP
How the workflow works
01
Choose your child and open an assignment
A signed-in account linked to the selected learner or personal staff profile.
02
Read the instructions and due date
Due dates is part of the documented workflow.
03
Attach or enter the permitted submission
Supported attachments is part of the documented workflow.
04
Review teacher feedback and learning history
Review the result in the connected record or workspace before moving on.
CURRENT BEHAVIOUR
Rules & current limits
Only linked children and personal records are available. Staff-only notes and administrative controls are not part of this family screen.
Child ownership is resolved on the server. Family views omit staff-only notes, rosters and administrative controls.
Source inventory checked on 11 October 2026. Guide availability confirms documentation publication, not certification of every external service or device flow.
Family portal · Family guide
My learning journey
Review the learner’s progress story and available next actions.
A signed-in account linked to the selected learner or personal staff profile.
Choose the relevant school, academic session or child before working.
Use the public sample demo to learn this flow. Your assigned ERP account determines access to actual school records.
STEP BY STEP
How the workflow works
01
Select the learner
A signed-in account linked to the selected learner or personal staff profile.
02
Read the available progress story
Next actions is part of the documented workflow.
03
Open a suggested next action and review the related record
Review the result in the connected record or workspace before moving on.
Request fields to understand
Source-declared fields used by related operations; each operation has its own validation and scope.
Field
Declared type
Input
studentId
string
Optional
interests
string
Optional
psychometric
Record<string, number>
Optional
opportunityType
string
Optional
interestArea
string
Optional
CURRENT BEHAVIOUR
Rules & current limits
Only linked children and personal records are available. Staff-only notes and administrative controls are not part of this family screen.
Child ownership is resolved on the server. Family views omit staff-only notes, rosters and administrative controls.
Source inventory checked on 11 October 2026. Guide availability confirms documentation publication, not certification of every external service or device flow.
Family portal · Family guide
My learning path
Review available focus areas and update the permitted learning-path item state.
A signed-in account linked to the selected learner or personal staff profile.
Choose the relevant school, academic session or child before working.
Use the public sample demo to learn this flow. Your assigned ERP account determines access to actual school records.
STEP BY STEP
How the workflow works
01
Select the learner
A signed-in account linked to the selected learner or personal staff profile.
02
Review the available focus areas
Suggested activities is part of the documented workflow.
03
Complete a suggested activity and update its permitted state
Review the result in the connected record or workspace before moving on.
CURRENT BEHAVIOUR
Rules & current limits
Only linked children and personal records are available. Staff-only notes and administrative controls are not part of this family screen.
Child ownership is resolved on the server. Family views omit staff-only notes, rosters and administrative controls.
Source inventory checked on 11 October 2026. Guide availability confirms documentation publication, not certification of every external service or device flow.
Family portal · Family guide
Report an absence
Report an absence for your linked child and review the school’s decision.
A signed-in account linked to the selected learner or personal staff profile.
Choose the relevant school, academic session or child before working.
Use the public sample demo to learn this flow. Your assigned ERP account determines access to actual school records.
STEP BY STEP
How the workflow works
01
Choose the linked child
A signed-in account linked to the selected learner or personal staff profile.
02
Enter the absence dates and reason
Dates and reason is part of the documented workflow.
03
Submit the report and review its status
Review the result in the connected record or workspace before moving on.
CURRENT BEHAVIOUR
Rules & current limits
Only linked children and personal records are available. Staff-only notes and administrative controls are not part of this family screen.
Child ownership is resolved on the server. Family views omit staff-only notes, rosters and administrative controls.
Source inventory checked on 11 October 2026. Guide availability confirms documentation publication, not certification of every external service or device flow.
Family portal · Family guide
My library loans & reservations
Review your linked learner’s loans and use available renewal or reservation actions.
A signed-in account linked to the selected learner or personal staff profile.
Choose the relevant school, academic session or child before working.
Use the public sample demo to learn this flow. Your assigned ERP account determines access to actual school records.
STEP BY STEP
How the workflow works
01
Choose the linked learner
A signed-in account linked to the selected learner or personal staff profile.
02
Review issued books and due dates
Due dates is part of the documented workflow.
03
Renew or reserve an eligible title where allowed
Review the result in the connected record or workspace before moving on.
CURRENT BEHAVIOUR
Rules & current limits
Only linked children and personal records are available. Staff-only notes and administrative controls are not part of this family screen.
Child ownership is resolved on the server. Family views omit staff-only notes, rosters and administrative controls.
Source inventory checked on 11 October 2026. Guide availability confirms documentation publication, not certification of every external service or device flow.
Family portal · Family guide
My live classes
Review the learner’s available live lesson schedule and open a class detail.
A signed-in account linked to the selected learner or personal staff profile.
Choose the relevant school, academic session or child before working.
Use the public sample demo to learn this flow. Your assigned ERP account determines access to actual school records.
STEP BY STEP
How the workflow works
01
Choose the learner
A signed-in account linked to the selected learner or personal staff profile.
02
Review the available class schedule
Schedule is part of the documented workflow.
03
Open the intended class and joining details
Review the result in the connected record or workspace before moving on.
CURRENT BEHAVIOUR
Rules & current limits
Only linked children and personal records are available. Staff-only notes and administrative controls are not part of this family screen.
Child ownership is resolved on the server. Family views omit staff-only notes, rosters and administrative controls.
Source inventory checked on 11 October 2026. Guide availability confirms documentation publication, not certification of every external service or device flow.
Family portal · Family guide
Join a live class
Open an eligible live class and use its available live or recorded lesson experience.
A signed-in account linked to the selected learner or personal staff profile.
Choose the relevant school, academic session or child before working.
Use the public sample demo to learn this flow. Your assigned ERP account determines access to actual school records.
STEP BY STEP
How the workflow works
01
Open the class from your class list
A signed-in account linked to the selected learner or personal staff profile.
02
Review its time and current state
Join experience is part of the documented workflow.
03
Join using the available control or open a recording when provided
Review the result in the connected record or workspace before moving on.
CURRENT BEHAVIOUR
Rules & current limits
Only linked children and personal records are available. Staff-only notes and administrative controls are not part of this family screen.
Child ownership is resolved on the server. Family views omit staff-only notes, rosters and administrative controls.
Source inventory checked on 11 October 2026. Guide availability confirms documentation publication, not certification of every external service or device flow.
A signed-in account linked to the selected learner or personal staff profile.
Choose the relevant school, academic session or child before working.
Use the public sample demo to learn this flow. Your assigned ERP account determines access to actual school records.
STEP BY STEP
How the workflow works
01
Select the learner
A signed-in account linked to the selected learner or personal staff profile.
02
Choose an available course
Course details is part of the documented workflow.
03
Open its modules and lessons
Review the result in the connected record or workspace before moving on.
CURRENT BEHAVIOUR
Rules & current limits
Only linked children and personal records are available. Staff-only notes and administrative controls are not part of this family screen.
Child ownership is resolved on the server. Family views omit staff-only notes, rosters and administrative controls.
Source inventory checked on 11 October 2026. Guide availability confirms documentation publication, not certification of every external service or device flow.
Family portal · Family guide
Learn a course lesson
Follow the course’s modules and lessons and record permitted progress.
A signed-in account linked to the selected learner or personal staff profile.
Choose the relevant school, academic session or child before working.
Use the public sample demo to learn this flow. Your assigned ERP account determines access to actual school records.
STEP BY STEP
How the workflow works
01
Open the course from your course list
A signed-in account linked to the selected learner or personal staff profile.
02
Choose the lesson and review its content
Learning content is part of the documented workflow.
03
Record progress through the available lesson control
Review the result in the connected record or workspace before moving on.
CURRENT BEHAVIOUR
Rules & current limits
Only linked children and personal records are available. Staff-only notes and administrative controls are not part of this family screen.
Child ownership is resolved on the server. Family views omit staff-only notes, rosters and administrative controls.
Source inventory checked on 11 October 2026. Guide availability confirms documentation publication, not certification of every external service or device flow.
Family portal · Family guide
My school notices
Read notices available to the signed-in school and family context.
A signed-in account linked to the selected learner or personal staff profile.
Choose the relevant school, academic session or child before working.
Use the public sample demo to learn this flow. Your assigned ERP account determines access to actual school records.
STEP BY STEP
How the workflow works
01
Open the notices screen
A signed-in account linked to the selected learner or personal staff profile.
02
Choose an available notice
Attendance and fees is part of the documented workflow.
03
Read the details and any attached school instructions
Review the result in the connected record or workspace before moving on.
CURRENT BEHAVIOUR
Rules & current limits
Only linked children and personal records are available. Staff-only notes and administrative controls are not part of this family screen.
Child ownership is resolved on the server. Family views omit staff-only notes, rosters and administrative controls.
Source inventory checked on 11 October 2026. Guide availability confirms documentation publication, not certification of every external service or device flow.
Family portal · Family guide
Family overview
See the selected child’s school information and open the available self-service areas.
A signed-in account linked to the selected learner or personal staff profile.
Choose the relevant school, academic session or child before working.
Use the public sample demo to learn this flow. Your assigned ERP account determines access to actual school records.
STEP BY STEP
How the workflow works
01
Select the linked child
A signed-in account linked to the selected learner or personal staff profile.
02
Open attendance, learning, fees or another available service
Quick links is part of the documented workflow.
03
Review the selected child’s information
Review the result in the connected record or workspace before moving on.
CURRENT BEHAVIOUR
Rules & current limits
Only linked children and personal records are available. Staff-only notes and administrative controls are not part of this family screen.
Child ownership is resolved on the server. Family views omit staff-only notes, rosters and administrative controls.
Source inventory checked on 11 October 2026. Guide availability confirms documentation publication, not certification of every external service or device flow.
Family portal · Family guide
My profile & guardians
Review the linked learner’s profile, guardians and available personal information.
A signed-in account linked to the selected learner or personal staff profile.
Choose the relevant school, academic session or child before working.
Use the public sample demo to learn this flow. Your assigned ERP account determines access to actual school records.
STEP BY STEP
How the workflow works
01
Select the learner
A signed-in account linked to the selected learner or personal staff profile.
02
Review the displayed profile and guardians
Guardian information is part of the documented workflow.
03
Contact the school for corrections where editing is not provided
Review the result in the connected record or workspace before moving on.
CURRENT BEHAVIOUR
Rules & current limits
Only linked children and personal records are available. Staff-only notes and administrative controls are not part of this family screen.
Child ownership is resolved on the server. Family views omit staff-only notes, rosters and administrative controls.
Source inventory checked on 11 October 2026. Guide availability confirms documentation publication, not certification of every external service or device flow.
Family portal · Family guide
Book a parent–teacher meeting
Book an eligible teacher slot and review family-visible meeting follow-ups.
A signed-in account linked to the selected learner or personal staff profile.
Choose the relevant school, academic session or child before working.
Use the public sample demo to learn this flow. Your assigned ERP account determines access to actual school records.
STEP BY STEP
How the workflow works
01
Choose the linked child and available teacher slot
A signed-in account linked to the selected learner or personal staff profile.
02
Book the meeting and confirm its time
My bookings is part of the documented workflow.
03
Change the booking if needed
Reschedule/cancel is part of the documented workflow.
04
Review family-visible notes and complete a permitted follow-up
Review the result in the connected record or workspace before moving on.
CURRENT BEHAVIOUR
Rules & current limits
Only linked children and personal records are available. Staff-only notes and administrative controls are not part of this family screen.
Child ownership is resolved on the server. Family views omit staff-only notes, rosters and administrative controls.
Source inventory checked on 11 October 2026. Guide availability confirms documentation publication, not certification of every external service or device flow.
Family portal · Family guide
My published results
Review published report cards for the selected child and open the available printable result.
A signed-in account linked to the selected learner or personal staff profile.
Choose the relevant school, academic session or child before working.
Use the public sample demo to learn this flow. Your assigned ERP account determines access to actual school records.
STEP BY STEP
How the workflow works
01
Select the child
A signed-in account linked to the selected learner or personal staff profile.
02
Choose a published exam result
Exam results is part of the documented workflow.
03
Review the report card and use the available print view
Review the result in the connected record or workspace before moving on.
CURRENT BEHAVIOUR
Rules & current limits
Only linked children and personal records are available. Staff-only notes and administrative controls are not part of this family screen.
Child ownership is resolved on the server. Family views omit staff-only notes, rosters and administrative controls.
Source inventory checked on 11 October 2026. Guide availability confirms documentation publication, not certification of every external service or device flow.
Family portal · Family guide
My timetable
Review the learner’s weekly timetable and daily teacher cover.
A signed-in account linked to the selected learner or personal staff profile.
Choose the relevant school, academic session or child before working.
Use the public sample demo to learn this flow. Your assigned ERP account determines access to actual school records.
STEP BY STEP
How the workflow works
01
Select the child
A signed-in account linked to the selected learner or personal staff profile.
02
Choose the weekly or daily view
Daily date is part of the documented workflow.
03
Inspect the timetable and available cover information
Subjects and times is part of the documented workflow.
04
Print the selected view if needed
Review the result in the connected record or workspace before moving on.
CURRENT BEHAVIOUR
Rules & current limits
Only linked children and personal records are available. Staff-only notes and administrative controls are not part of this family screen.
Child ownership is resolved on the server. Family views omit staff-only notes, rosters and administrative controls.
Source inventory checked on 11 October 2026. Guide availability confirms documentation publication, not certification of every external service or device flow.
Family portal · Family guide
My wellbeing information
Review the wellbeing and health information available to your linked family context.
A signed-in account linked to the selected learner or personal staff profile.
Choose the relevant school, academic session or child before working.
Use the public sample demo to learn this flow. Your assigned ERP account determines access to actual school records.
STEP BY STEP
How the workflow works
01
Choose the linked child
A signed-in account linked to the selected learner or personal staff profile.
02
Review the permitted wellbeing and sick-room information
Available wellbeing information is part of the documented workflow.
03
Contact the school about information requiring attention
Review the result in the connected record or workspace before moving on.
CURRENT BEHAVIOUR
Rules & current limits
Only linked children and personal records are available. Staff-only notes and administrative controls are not part of this family screen.
Child ownership is resolved on the server. Family views omit staff-only notes, rosters and administrative controls.
Source inventory checked on 11 October 2026. Guide availability confirms documentation publication, not certification of every external service or device flow.
Platform · Screen guide
Platform AI Support Center
Ask platform questions with access to the supported aggregate context.
Choose the relevant school, academic session or child before working.
Use the public sample demo to learn this flow. Your assigned ERP account determines access to actual school records.
STEP BY STEP
How the workflow works
01
Review the provider banner
Platform administrator access.
02
Ask a supported platform question
Aggregate context is part of the documented workflow.
03
Check the response against the relevant report
Review the result in the connected record or workspace before moving on.
Request fields to understand
Source-declared fields used by related operations; each operation has its own validation and scope.
Field
Declared type
Input
question
string
Required by declaration
CURRENT BEHAVIOUR
Rules & current limits
Platform access is distinct from a school role. Online SaaS invoice collection and invitation delivery require configured providers.
Source inventory checked on 11 October 2026. Guide availability confirms documentation publication, not certification of every external service or device flow.
Platform · Screen guide
Platform analytics
Review cross-tenant growth, revenue and churn analytics.
Choose the relevant school, academic session or child before working.
Use the public sample demo to learn this flow. Your assigned ERP account determines access to actual school records.
STEP BY STEP
How the workflow works
01
Open platform analytics
Platform administrator access.
02
Review the relevant reporting period and metrics
Revenue is part of the documented workflow.
03
Cross-check the generated narrative against the totals
Review the result in the connected record or workspace before moving on.
CURRENT BEHAVIOUR
Rules & current limits
Platform access is distinct from a school role. Online SaaS invoice collection and invitation delivery require configured providers.
Source inventory checked on 11 October 2026. Guide availability confirms documentation publication, not certification of every external service or device flow.
Platform · Screen guide
Platform audit trail
Inspect platform administrative activity across tenants.
Choose the relevant school, academic session or child before working.
Use the public sample demo to learn this flow. Your assigned ERP account determines access to actual school records.
STEP BY STEP
How the workflow works
01
Choose the available audit filters
Platform administrator access.
02
Find the relevant administrative action
Tenant context is part of the documented workflow.
03
Review its tenant and entity context
Review the result in the connected record or workspace before moving on.
CURRENT BEHAVIOUR
Rules & current limits
Platform access is distinct from a school role. Online SaaS invoice collection and invitation delivery require configured providers.
Source inventory checked on 11 October 2026. Guide availability confirms documentation publication, not certification of every external service or device flow.
Platform · Screen guide
AI tenant provisioning
Provision a tenant from the supported school and owner inputs.
Choose the relevant school, academic session or child before working.
Use the public sample demo to learn this flow. Your assigned ERP account determines access to actual school records.
STEP BY STEP
How the workflow works
01
Enter the intended school and owner details
Platform administrator access.
02
Review the requested setup
Provisioning request is part of the documented workflow.
03
Provision only an approved tenant and review the result
Review the result in the connected record or workspace before moving on.
Request fields to understand
Source-declared fields used by related operations; each operation has its own validation and scope.
Field
Declared type
Input
schoolName
string
Required by declaration
institutionType
(typeof INSTITUTION_TYPES)[number]
Required by declaration
ownerName
string
Required by declaration
ownerEmail
string
Required by declaration
ownerPhone
string
Optional
domain
string
Optional
CURRENT BEHAVIOUR
Rules & current limits
Platform access is distinct from a school role. Online SaaS invoice collection and invitation delivery require configured providers.
Source inventory checked on 11 October 2026. Guide availability confirms documentation publication, not certification of every external service or device flow.
Platform · Screen guide
Subscription coupons
Issue and manage billing discount codes with usage and validity controls.
Choose the relevant school, academic session or child before working.
Use the public sample demo to learn this flow. Your assigned ERP account determines access to actual school records.
STEP BY STEP
How the workflow works
01
Create the approved coupon terms
Platform administrator access.
02
Review dates and redemption caps
Redemption limits is part of the documented workflow.
03
Preview its invoice effect before applying
Review the result in the connected record or workspace before moving on.
Request fields to understand
Source-declared fields used by related operations; each operation has its own validation and scope.
Field
Declared type
Input
code
string
Optional
description
string
Optional
type
string
Required by declaration
value
number
Required by declaration
maxRedemptions
number
Optional
validFrom
string
Optional
validUntil
string
Optional
isActive
boolean
Optional
CURRENT BEHAVIOUR
Rules & current limits
Platform access is distinct from a school role. Online SaaS invoice collection and invitation delivery require configured providers.
Source inventory checked on 11 October 2026. Guide availability confirms documentation publication, not certification of every external service or device flow.
Platform · Screen guide
Support impersonation
Inspect and manage platform support sessions separately from ordinary sign-in.
Choose the relevant school, academic session or child before working.
Use the public sample demo to learn this flow. Your assigned ERP account determines access to actual school records.
STEP BY STEP
How the workflow works
01
Review the permitted support context
Platform administrator access.
02
Start the intended support session only when authorised
Open sessions is part of the documented workflow.
03
Stop the session and review its audit record
Review the result in the connected record or workspace before moving on.
Request fields to understand
Source-declared fields used by related operations; each operation has its own validation and scope.
Field
Declared type
Input
sessionId
string
Optional
CURRENT BEHAVIOUR
Rules & current limits
Public guided demos do not issue ERP credentials. Impersonation is restricted to platform administrators and is audited.
Source inventory checked on 11 October 2026. Guide availability confirms documentation publication, not certification of every external service or device flow.
Platform · Screen guide
Platform invoices
Review subscription billing records across tenants.
Choose the relevant school, academic session or child before working.
Use the public sample demo to learn this flow. Your assigned ERP account determines access to actual school records.
STEP BY STEP
How the workflow works
01
Find the intended tenant invoice
Platform administrator access.
02
Review totals and payment state
Invoice detail is part of the documented workflow.
03
Open invoice details before a payment action
Review the result in the connected record or workspace before moving on.
CURRENT BEHAVIOUR
Rules & current limits
Platform access is distinct from a school role. Online SaaS invoice collection and invitation delivery require configured providers.
Source inventory checked on 11 October 2026. Guide availability confirms documentation publication, not certification of every external service or device flow.
Platform · Screen guide
Platform invoice detail
Review one SaaS invoice and its available gateway collection workflow.
Choose the relevant school, academic session or child before working.
Use the public sample demo to learn this flow. Your assigned ERP account determines access to actual school records.
STEP BY STEP
How the workflow works
01
Open the invoice from the platform invoice list
Platform administrator access.
02
Review its lines and remaining balance
Status and totals is part of the documented workflow.
03
Use online payment only with a configured gateway
Review the result in the connected record or workspace before moving on.
Request fields to understand
Source-declared fields used by related operations; each operation has its own validation and scope.
Field
Declared type
Input
amount
number
Optional
paymentLogId
string
Required by declaration
razorpayPaymentId
string
Optional
razorpaySignature
string
Optional
CURRENT BEHAVIOUR
Rules & current limits
Platform access is distinct from a school role. Online SaaS invoice collection and invitation delivery require configured providers.
Source inventory checked on 11 October 2026. Guide availability confirms documentation publication, not certification of every external service or device flow.
Platform · Screen guide
Landing Page CMS
Edit, preview and publish the public AVKUL ERP landing page with version history.
Choose the relevant school, academic session or child before working.
Use the public sample demo to learn this flow. Your assigned ERP account determines access to actual school records.
STEP BY STEP
How the workflow works
01
Load the current content and edit a draft
Platform administrator access.
02
Select media and review section order and visibility
Section order and visibility is part of the documented workflow.
03
Open the private preview
SEO fields is part of the documented workflow.
04
Publish the reviewed version or restore an earlier version
Review the result in the connected record or workspace before moving on.
Request fields to understand
Source-declared fields used by related operations; each operation has its own validation and scope.
Field
Declared type
Input
content
Record<string,unknown>
Required by declaration
draftId
string
Required by declaration
revisionId
string
Required by declaration
CURRENT BEHAVIOUR
Rules & current limits
Campaign links are tracked only where collection is enabled. In-app reminders do not send outbound messages. Marketing administration requires the platform-admin flag.
Source inventory checked on 11 October 2026. Guide availability confirms documentation publication, not certification of every external service or device flow.
Platform · Screen guide
Campaign Manager
Create trackable campaign links and review attributed visits, enquiries and conversions.
Choose the relevant school, academic session or child before working.
Use the public sample demo to learn this flow. Your assigned ERP account determines access to actual school records.
STEP BY STEP
How the workflow works
01
Create a draft campaign with source, medium and destination
Platform administrator access.
02
Copy its tracking link and use it in the intended campaign
Campaign dates and status is part of the documented workflow.
03
Review visits and accepted enquiries for a UTC period
Tracking link is part of the documented workflow.
04
Update the administrative status without changing the tracking key
Review the result in the connected record or workspace before moving on.
Request fields to understand
Source-declared fields used by related operations; each operation has its own validation and scope.
Field
Declared type
Input
source
string
Required by declaration
medium
string
Required by declaration
CURRENT BEHAVIOUR
Rules & current limits
Campaign links are tracked only where collection is enabled. In-app reminders do not send outbound messages. Marketing administration requires the platform-admin flag.
Source inventory checked on 11 October 2026. Guide availability confirms documentation publication, not certification of every external service or device flow.
Platform · Screen guide
Demo Enquiry CRM
Assign and progress product walkthrough enquiries with contact history and scheduling.
Choose the relevant school, academic session or child before working.
Use the public sample demo to learn this flow. Your assigned ERP account determines access to actual school records.
STEP BY STEP
How the workflow works
01
Find a walkthrough enquiry and assign its owner
Platform administrator access.
02
Record its status, demo date or next follow-up
Search and owner filters is part of the documented workflow.
03
Add an internal note after contacting the school
Demo/follow-up dates is part of the documented workflow.
04
Mark the confirmed outcome and review history
Review the result in the connected record or workspace before moving on.
CURRENT BEHAVIOUR
Rules & current limits
Campaign links are tracked only where collection is enabled. In-app reminders do not send outbound messages. Marketing administration requires the platform-admin flag.
Source inventory checked on 11 October 2026. Guide availability confirms documentation publication, not certification of every external service or device flow.
Platform · Screen guide
Demo Calendar & Follow-ups
Turn CRM dates into daily work and manage product demos and platform follow-up tasks.
Choose the relevant school, academic session or child before working.
Use the public sample demo to learn this flow. Your assigned ERP account determines access to actual school records.
STEP BY STEP
How the workflow works
01
Review today’s or overdue work
Platform administrator access.
02
Schedule the demo or follow-up against an open walkthrough enquiry
UTC calendar is part of the documented workflow.
03
Record the outcome and optional next follow-up
Schedule and reschedule is part of the documented workflow.
04
Complete tasks and review the connected CRM history
Review the result in the connected record or workspace before moving on.
Request fields to understand
Source-declared fields used by related operations; each operation has its own validation and scope.
Field
Declared type
Input
title
string
Required by declaration
dueAt
string
Required by declaration
priority
string
Required by declaration
assignedToId
string|null
Optional
leadId
string|null
Optional
note
string
Required by declaration
CURRENT BEHAVIOUR
Rules & current limits
Campaign links are tracked only where collection is enabled. In-app reminders do not send outbound messages. Marketing administration requires the platform-admin flag.
Source inventory checked on 11 October 2026. Guide availability confirms documentation publication, not certification of every external service or device flow.
Platform · Screen guide
Website Media Library
Upload, organise, crop and reuse supported website images.
Choose the relevant school, academic session or child before working.
Use the public sample demo to learn this flow. Your assigned ERP account determines access to actual school records.
STEP BY STEP
How the workflow works
01
Upload a supported image and enter its descriptive metadata
Platform administrator access.
02
Organise it into a folder
Folders and search is part of the documented workflow.
03
Create a crop if needed and select it from the CMS
Desktop/mobile/thumbnail variants is part of the documented workflow.
04
Archive only when no published, draft or historical version references it
Review the result in the connected record or workspace before moving on.
Request fields to understand
Source-declared fields used by related operations; each operation has its own validation and scope.
Field
Declared type
Input
name
string
Required by declaration
CURRENT BEHAVIOUR
Rules & current limits
Campaign links are tracked only where collection is enabled. In-app reminders do not send outbound messages. Marketing administration requires the platform-admin flag.
Source inventory checked on 11 October 2026. Guide availability confirms documentation publication, not certification of every external service or device flow.
Platform · Screen guide
Platform overview
Review platform footprint, revenue indicators and tenant status.
Choose the relevant school, academic session or child before working.
Use the public sample demo to learn this flow. Your assigned ERP account determines access to actual school records.
STEP BY STEP
How the workflow works
01
Open the platform overview
Platform administrator access.
02
Review the current footprint and billing totals
Subscription summary is part of the documented workflow.
03
Open the relevant tenant or report
Review the result in the connected record or workspace before moving on.
CURRENT BEHAVIOUR
Rules & current limits
Platform access is distinct from a school role. Online SaaS invoice collection and invitation delivery require configured providers.
Source inventory checked on 11 October 2026. Guide availability confirms documentation publication, not certification of every external service or device flow.
Platform · Screen guide
Subscription plans & modules
Create and edit subscription plans with their module toggles.
Choose the relevant school, academic session or child before working.
Use the public sample demo to learn this flow. Your assigned ERP account determines access to actual school records.
STEP BY STEP
How the workflow works
01
Open the intended plan
Platform administrator access.
02
Review pricing fields and enabled modules
Plan editor is part of the documented workflow.
03
Save the approved configuration or archive the plan
Review the result in the connected record or workspace before moving on.
Request fields to understand
Source-declared fields used by related operations; each operation has its own validation and scope.
Field
Declared type
Input
name
string
Required by declaration
code
string
Required by declaration
description
string
Optional
billingCycle
string
Optional
priceMonthly
number
Optional
priceYearly
number
Optional
trialDays
number
Optional
maxStudents
number
Optional
maxStaff
number
Optional
maxSchools
number
Optional
maxBranches
number
Optional
isPublic
boolean
Optional
isActive
boolean
Optional
moduleKeys
string[]
Optional
CURRENT BEHAVIOUR
Rules & current limits
Platform access is distinct from a school role. Online SaaS invoice collection and invitation delivery require configured providers.
Source inventory checked on 11 October 2026. Guide availability confirms documentation publication, not certification of every external service or device flow.
Platform · Screen guide
Platform reports
Generate cross-tenant revenue, usage, churn or activity reports.
Choose the relevant school, academic session or child before working.
Use the public sample demo to learn this flow. Your assigned ERP account determines access to actual school records.
STEP BY STEP
How the workflow works
01
Choose the report type
Platform administrator access.
02
Review the reporting context
JSON/CSV/PDF outputs is part of the documented workflow.
03
Open or export the generated report in an available format
Review the result in the connected record or workspace before moving on.
CURRENT BEHAVIOUR
Rules & current limits
Platform access is distinct from a school role. Online SaaS invoice collection and invitation delivery require configured providers.
Source inventory checked on 11 October 2026. Guide availability confirms documentation publication, not certification of every external service or device flow.
Platform · Screen guide
Tenant subscriptions
Review subscriptions and change an approved tenant plan.
Choose the relevant school, academic session or child before working.
Use the public sample demo to learn this flow. Your assigned ERP account determines access to actual school records.
STEP BY STEP
How the workflow works
01
Locate the tenant subscription
Platform administrator access.
02
Review its current plan and state
Current plan is part of the documented workflow.
03
Apply the approved plan change and check usage implications
Review the result in the connected record or workspace before moving on.
Request fields to understand
Source-declared fields used by related operations; each operation has its own validation and scope.
Field
Declared type
Input
planCode
string
Required by declaration
name
string
Required by declaration
code
string
Required by declaration
description
string
Optional
billingCycle
string
Optional
priceMonthly
number
Optional
priceYearly
number
Optional
trialDays
number
Optional
maxStudents
number
Optional
maxStaff
number
Optional
maxSchools
number
Optional
maxBranches
number
Optional
isPublic
boolean
Optional
isActive
boolean
Optional
moduleKeys
string[]
Optional
CURRENT BEHAVIOUR
Rules & current limits
Platform access is distinct from a school role. Online SaaS invoice collection and invitation delivery require configured providers.
Source inventory checked on 11 October 2026. Guide availability confirms documentation publication, not certification of every external service or device flow.
Platform · Screen guide
Tenant & school onboarding
Search tenants, inspect their health and provision approved school workspaces.
Choose the relevant school, academic session or child before working.
Use the public sample demo to learn this flow. Your assigned ERP account determines access to actual school records.
STEP BY STEP
How the workflow works
01
Search for the tenant before creating one
Platform administrator access.
02
Review school, owner and plan details
Onboarding is part of the documented workflow.
03
Onboard or update the intended tenant
School creation is part of the documented workflow.
04
Inspect the resulting tenant detail
Review the result in the connected record or workspace before moving on.
Request fields to understand
Source-declared fields used by related operations; each operation has its own validation and scope.
Field
Declared type
Input
tenantName
string
Required by declaration
slug
string
Required by declaration
schoolName
string
Required by declaration
schoolCode
string
Required by declaration
board
string
Optional
type
string
Optional
adminEmail
string
Required by declaration
adminPassword
string
Required by declaration
adminFirstName
string
Required by declaration
adminLastName
string
Optional
planCode
string
Optional
status
string
Required by declaration
ids
string[]
Required by declaration
action
'ACTIVATE' | 'SUSPEND' | 'CANCEL'
Required by declaration
CURRENT BEHAVIOUR
Rules & current limits
Platform access is distinct from a school role. Online SaaS invoice collection and invitation delivery require configured providers.
Source inventory checked on 11 October 2026. Guide availability confirms documentation publication, not certification of every external service or device flow.
Platform · Screen guide
Tenant detail & branding
Review tenant schools, subscription and quotas and maintain supported branding.
Choose the relevant school, academic session or child before working.
Use the public sample demo to learn this flow. Your assigned ERP account determines access to actual school records.
STEP BY STEP
How the workflow works
01
Open the tenant from the list
Platform administrator access.
02
Review its schools and subscription
Subscription and counts is part of the documented workflow.
03
Save approved branding or add a school within quota
Branding is part of the documented workflow.
04
Verify domain setup separately before relying on it
Review the result in the connected record or workspace before moving on.
Request fields to understand
Source-declared fields used by related operations; each operation has its own validation and scope.
Field
Declared type
Input
code
string
Required by declaration
name
string
Required by declaration
type
string
Optional
board
string
Optional
adminEmail
string
Optional
adminPassword
string
Optional
adminFirstName
string
Optional
adminLastName
string
Optional
brandName
string
Optional
primaryColor
string
Optional
faviconUrl
string
Optional
domain
string
Required by declaration
CURRENT BEHAVIOUR
Rules & current limits
Platform access is distinct from a school role. Online SaaS invoice collection and invitation delivery require configured providers.
Source inventory checked on 11 October 2026. Guide availability confirms documentation publication, not certification of every external service or device flow.
Platform · Screen guide
Platform plan usage
Review quota and module usage against platform plan limits.
Choose the relevant school, academic session or child before working.
Use the public sample demo to learn this flow. Your assigned ERP account determines access to actual school records.
STEP BY STEP
How the workflow works
01
Choose the tenant or scope available to the view
Platform administrator access.
02
Compare usage with the plan limits
Current usage is part of the documented workflow.
03
Review upgrades or cleanup through the appropriate workflow
Review the result in the connected record or workspace before moving on.
CURRENT BEHAVIOUR
Rules & current limits
Platform access is distinct from a school role. Online SaaS invoice collection and invitation delivery require configured providers.
Source inventory checked on 11 October 2026. Guide availability confirms documentation publication, not certification of every external service or device flow.
Platform · Screen guide
Website Analytics
Review privacy-aware website activity and accepted walkthrough conversions for a UTC period.
Choose the relevant school, academic session or child before working.
Use the public sample demo to learn this flow. Your assigned ERP account determines access to actual school records.
STEP BY STEP
How the workflow works
01
Select a UTC period of up to 90 days
Platform administrator access.
02
Review traffic and the form funnel
CTA/form activity is part of the documented workflow.
03
Compare sources, campaigns and devices
Source and campaign is part of the documented workflow.
04
Export the aggregate report if needed
Review the result in the connected record or workspace before moving on.
CURRENT BEHAVIOUR
Rules & current limits
Campaign links are tracked only where collection is enabled. In-app reminders do not send outbound messages. Marketing administration requires the platform-admin flag.
Source inventory checked on 11 October 2026. Guide availability confirms documentation publication, not certification of every external service or device flow.
Academics · Screen guide
Sessions, classes & subjects
Use sessions, classes & subjects in the school workspace. Create the academic structure that attendance, admissions, examinations and timetables share.
Use the public sample demo to learn this flow. Your assigned ERP account determines access to actual school records.
STEP BY STEP
How the workflow works
01
Create an academic session with dates
A school account with the permissions shown below.
02
Add classes and their sections
Create Session is part of the documented workflow.
03
Create subjects and select the current session
List Classes is part of the documented workflow.
04
Close the books only after the year-end review
Review the result in the connected record or workspace before moving on.
Fields & controls
The screen exposes the following context or input controls. Required fields are validated by the live application.
Name
Start
End
Session
Level
Class
Capacity
Code
Type
CURRENT BEHAVIOUR
Rules & current limits
Session ownership and closed-year checks apply to connected workflows.
Source inventory checked on 11 October 2026. Guide availability confirms documentation publication, not certification of every external service or device flow.
Academics · Screen guide
Adaptive exam attempt detail
Use adaptive exam attempt detail in the school workspace. Plan examinations and seating, record marks, review rechecks and publish report cards.
Intended access: Assigned account with the required permissions.
A school account with the permissions shown below.
Choose the relevant school, academic session or child before working.
Required permission keys
exam:view
Use the public sample demo to learn this flow. Your assigned ERP account determines access to actual school records.
STEP BY STEP
How the workflow works
01
Create the exam and its subject schedules
A school account with the permissions shown below.
02
Review the candidates, seating and completion status
Marks entry and history is part of the documented workflow.
03
Record and verify marks, then generate report cards
Completion status is part of the documented workflow.
04
Publish approved results; use the correction workflow when required
Review the result in the connected record or workspace before moving on.
CURRENT BEHAVIOUR
Rules & current limits
Published results are distinct from draft marks. Adaptive question attempts and paper rechecks have separate workflows.
Source inventory checked on 11 October 2026. Guide availability confirms documentation publication, not certification of every external service or device flow.
Academics · Screen guide
Adaptive online exams
Use adaptive online exams in the school workspace. Plan examinations and seating, record marks, review rechecks and publish report cards.
Published results are distinct from draft marks. Adaptive question attempts and paper rechecks have separate workflows.
Source inventory checked on 11 October 2026. Guide availability confirms documentation publication, not certification of every external service or device flow.
School office · Screen guide
Admissions & applicant journey
Use admissions & applicant journey in the school workspace. Connect family enquiries, counsellor follow-ups, reviewed applications and student admission.
Use the public sample demo to learn this flow. Your assigned ERP account determines access to actual school records.
STEP BY STEP
How the workflow works
01
Record or select an enquiry and log the next follow-up
A school account with the permissions shown below.
02
Open a linked application and review guardian details
Log call is part of the documented workflow.
03
Receive and verify required documents and review readiness
Review application is part of the documented workflow.
04
Select session, class and section before admitting the applicant
Review the result in the connected record or workspace before moving on.
Fields & controls
The screen exposes the following context or input controls. Required fields are validated by the live application.
Student name
Parent name
Phone
Guardian email
Enquiry source
Class applying
Include leads never scheduled
Find an applicant
Guardian name
Email for parent portal
Relationship
Visit date and time
CURRENT BEHAVIOUR
Rules & current limits
Application access links and parent invitations are separate from an existing family login. Admission is subject to readiness and school/session ownership.
Source inventory checked on 11 October 2026. Guide availability confirms documentation publication, not certification of every external service or device flow.
Intelligence · Screen guide
AI governance & trust
Use the ai governance & trust workspace to review its saved runs, context and available actions.
Use the public sample demo to learn this flow. Your assigned ERP account determines access to actual school records.
STEP BY STEP
How the workflow works
01
Review the input context and provider/data state
A school account with the permissions shown below.
02
Run or open the relevant saved result
Saved result review is part of the documented workflow.
03
Inspect the available evidence and comparison
Available history and comparisons is part of the documented workflow.
04
Review the outcome before acting on it
Review the result in the connected record or workspace before moving on.
Request fields to understand
Source-declared fields used by related operations; each operation has its own validation and scope.
Field
Declared type
Input
visitorLogId
string
Optional
studentId
string
Optional
vehicleId
string
Optional
days
number
Optional
requestId
string
Required by declaration
decision
string
Required by declaration
note
string
Optional
correctedText
string
Optional
biometricEnabled
boolean
Optional
faceMatchEnabled
boolean
Optional
biometricRetentionDays
number
Optional
parentOptOutDefault
boolean
Optional
consentRequiredFeatures
string[]
Optional
CURRENT BEHAVIOUR
Rules & current limits
The current provider can return sample output. Configured credentials do not prove a verified provider, live GPS feed or reliable prediction.
Source inventory checked on 11 October 2026. Guide availability confirms documentation publication, not certification of every external service or device flow.
Intelligence · Screen guide
School AI tools
Use school ai tools in the school workspace. Use assisted writing, learning support and forecasts while reviewing the provider state and human decisions.
Use the public sample demo to learn this flow. Your assigned ERP account determines access to actual school records.
STEP BY STEP
How the workflow works
01
Review the provider-status banner before requesting assistance
A school account with the permissions shown below.
02
Choose the school context, topic or forecast period
Generate Remark is part of the documented workflow.
03
Run the relevant tool and inspect its output and evidence
Attendance Anomalies is part of the documented workflow.
04
Review or edit the result before using it with learners
Review the result in the connected record or workspace before moving on.
Fields & controls
The screen exposes the following context or input controls. Required fields are validated by the live application.
AI readiness
CURRENT BEHAVIOUR
Rules & current limits
The current provider can return sample output. Configured credentials do not prove a verified provider, live GPS feed or reliable prediction.
Source inventory checked on 11 October 2026. Guide availability confirms documentation publication, not certification of every external service or device flow.
Community · Screen guide
Alumni records
Use alumni records in the school workspace. Maintain alumni information and keep former learners connected to the school community.
Intended access: Assigned account with the required permissions.
A school account with the permissions shown below.
Choose the relevant school, academic session or child before working.
Required permission keys
student:viewstudent:create
Use the public sample demo to learn this flow. Your assigned ERP account determines access to actual school records.
STEP BY STEP
How the workflow works
01
Open the alumni directory
A school account with the permissions shown below.
02
Add the alumnus and relevant year/contact details
Record creation is part of the documented workflow.
03
Update the record as information changes
Profile updates is part of the documented workflow.
04
Review scope before removing an entry
Review the result in the connected record or workspace before moving on.
Fields & controls
The screen exposes the following context or input controls. Required fields are validated by the live application.
First name
Last name
Phone
CURRENT BEHAVIOUR
Rules & current limits
A directory record does not automatically provision an alumni login or send invitations.
Source inventory checked on 11 October 2026. Guide availability confirms documentation publication, not certification of every external service or device flow.
Community · Screen guide
Notices, announcements & messages
Use notices, announcements & messages in the school workspace. Coordinate school notices, events, complaints, audience-based announcements and direct conversations.
Use the public sample demo to learn this flow. Your assigned ERP account determines access to actual school records.
STEP BY STEP
How the workflow works
01
Choose the notice, announcement or conversation workflow
A school account with the permissions shown below.
02
Select the permitted audience and prepare the content
List Templates is part of the documented workflow.
03
Preview reachability before sending where available
Create Template is part of the documented workflow.
04
Review delivery reports, replies or complaint status
Review the result in the connected record or workspace before moving on.
Fields & controls
The screen exposes the following context or input controls. Required fields are validated by the live application.
Use a template (optional)
Title
Message
Audience
Class
Section
CURRENT BEHAVIOUR
Rules & current limits
External SMS, email and WhatsApp delivery requires configured providers. A saved record is not evidence that every recipient received it.
Source inventory checked on 11 October 2026. Guide availability confirms documentation publication, not certification of every external service or device flow.
Academics · Screen guide
Homework & assignments
Use homework & assignments in the school workspace. Create and distribute class work, collect student submissions and record grading feedback.
Use the public sample demo to learn this flow. Your assigned ERP account determines access to actual school records.
STEP BY STEP
How the workflow works
01
Select the teaching section and create an assignment
A school account with the permissions shown below.
02
Add the instructions, due date and supported files
Create assignment is part of the documented workflow.
03
Review submitted or pending work
Save grade is part of the documented workflow.
04
Grade the submission and review the activity history
Review the result in the connected record or workspace before moving on.
Fields & controls
The screen exposes the following context or input controls. Required fields are validated by the live application.
Title
Assignment class
Assignment section
Subject
Due date & time
Maximum marks
Visibility
Instructions
Filter class
Filter section
Status
Marks for
CURRENT BEHAVIOUR
Rules & current limits
Attachment access and learner submissions follow school and child ownership. Reminder delivery depends on the configured channel.
Source inventory checked on 11 October 2026. Guide availability confirms documentation publication, not certification of every external service or device flow.
Academics · Screen guide
Assignment detail & submission review
Use assignment detail & submission review in the school workspace. Create and distribute class work, collect student submissions and record grading feedback.
Use the public sample demo to learn this flow. Your assigned ERP account determines access to actual school records.
STEP BY STEP
How the workflow works
01
Select the teaching section and create an assignment
A school account with the permissions shown below.
02
Add the instructions, due date and supported files
Create assignment is part of the documented workflow.
03
Review submitted or pending work
Save grade is part of the documented workflow.
04
Grade the submission and review the activity history
Review the result in the connected record or workspace before moving on.
Fields & controls
The screen exposes the following context or input controls. Required fields are validated by the live application.
Title
Assignment class
Assignment section
Subject
Due date & time
Maximum marks
Visibility
Instructions
Filter class
Filter section
Status
Marks for
CURRENT BEHAVIOUR
Rules & current limits
Attachment access and learner submissions follow school and child ownership. Reminder delivery depends on the configured channel.
Source inventory checked on 11 October 2026. Guide availability confirms documentation publication, not certification of every external service or device flow.
Academics · Screen guide
Student attendance
Use student attendance in the school workspace. Complete a daily class register and review attendance history, shortages and family alerts.
Tell absent students' guardians, once per student per day
05
Students below the required attendance percentage
06
Warn guardians of students below the required percentage
07
What has already been sent to families
BEFORE YOU BEGIN
Access & setup
Intended access: Assigned account with the required permissions.
A school account with the permissions shown below.
Choose the relevant school, academic session or child before working.
Required permission keys
attendance:viewattendance:createattendance:manage
Use the public sample demo to learn this flow. Your assigned ERP account determines access to actual school records.
STEP BY STEP
How the workflow works
01
Choose a permitted section and date
A school account with the permissions shown below.
02
Mark the roster and review the section completion summary
Students of a section + their status for a date is part of the documented workflow.
03
Save the register and inspect corrections/history
Mark/replace attendance for a section + date is part of the documented workflow.
04
Review shortages and recorded alerts before reminding families
Review the result in the connected record or workspace before moving on.
Fields & controls
The screen exposes the following context or input controls. Required fields are validated by the live application.
Class / section
Attendance date
Session
Correction reason
Notify absent students’ guardians in-app on save
CURRENT BEHAVIOUR
Rules & current limits
Holiday and attendance policy affect denominators. Only permitted sections are visible; recording an absence is distinct from approving leave.
Source inventory checked on 11 October 2026. Guide availability confirms documentation publication, not certification of every external service or device flow.
Administration · Screen guide
Audit trail
Use audit trail in the school workspace. Review the recorded actions taken on school records and trace related entities.
Intended access: Assigned account with the required permissions.
A school account with the permissions shown below.
Choose the relevant school, academic session or child before working.
Required permission keys
settings:view
Use the public sample demo to learn this flow. Your assigned ERP account determines access to actual school records.
STEP BY STEP
How the workflow works
01
Select an entity or activity filter
A school account with the permissions shown below.
02
Locate the relevant actor and time
Actor and action is part of the documented workflow.
03
Open the recorded change and its entity reference
Entity references is part of the documented workflow.
04
Compare the trail with the current record
Review the result in the connected record or workspace before moving on.
Fields & controls
The screen exposes the following context or input controls. Required fields are validated by the live application.
Entity
Action
From
CURRENT BEHAVIOUR
Rules & current limits
The audit view records permitted activity; it is not an editor for rewriting historical actions.
Source inventory checked on 11 October 2026. Guide availability confirms documentation publication, not certification of every external service or device flow.
School office · Screen guide
Branch & campus management
Use branch & campus management in the school workspace. See school-wide priorities and manage the campus context used by the ERP.
Use the public sample demo to learn this flow. Your assigned ERP account determines access to actual school records.
STEP BY STEP
How the workflow works
01
Review the school dashboard and current session
A school account with the permissions shown below.
02
Open an outstanding action in the relevant module
Per-branch student/staff counts and fee collection is part of the documented workflow.
03
Inspect the campus counts and permitted branch settings
Open another campus (counts against the plan) is part of the documented workflow.
04
Review the consequences before closing a campus
Review the result in the connected record or workspace before moving on.
Request fields to understand
Source-declared fields used by related operations; each operation has its own validation and scope.
Field
Declared type
Input
code
string
Required by declaration
name
string
Required by declaration
addressLine1
string
Optional
city
string
Optional
phone
string
Optional
isMain
boolean
Optional
CURRENT BEHAVIOUR
Rules & current limits
Closing a populated campus is refused. The dashboard aggregates scoped records rather than replacing each module workflow.
Source inventory checked on 11 October 2026. Guide availability confirms documentation publication, not certification of every external service or device flow.
School office · Screen guide
School calendar & holidays
Use school calendar & holidays in the school workspace. Publish the dates, events and holiday settings that support school planning and attendance.
Use the public sample demo to learn this flow. Your assigned ERP account determines access to actual school records.
STEP BY STEP
How the workflow works
01
Review the selected calendar period
A school account with the permissions shown below.
02
Add or update a permitted holiday or event
( ) is part of the documented workflow.
03
Check applicability to students and staff
Remove is part of the documented workflow.
04
Review working days and RSVP summaries
Review the result in the connected record or workspace before moving on.
Fields & controls
The screen exposes the following context or input controls. Required fields are validated by the live application.
guests
CURRENT BEHAVIOUR
Rules & current limits
Declaring a holiday requires its own permission. The attendance and timetable workflows use their documented calendar rules.
Source inventory checked on 11 October 2026. Guide availability confirms documentation publication, not certification of every external service or device flow.
Intelligence · Screen guide
Cashflow prediction
Use the cashflow prediction workspace to review its saved runs, context and available actions.
Intended access: Assigned account with the required permissions.
A school account with the permissions shown below.
Choose the relevant school, academic session or child before working.
Required permission keys
fee:manage
Use the public sample demo to learn this flow. Your assigned ERP account determines access to actual school records.
STEP BY STEP
How the workflow works
01
Review the input context and provider/data state
A school account with the permissions shown below.
02
Run or open the relevant saved result
Saved result review is part of the documented workflow.
03
Inspect the available evidence and comparison
Available history and comparisons is part of the documented workflow.
04
Review the outcome before acting on it
Review the result in the connected record or workspace before moving on.
Request fields to understand
Source-declared fields used by related operations; each operation has its own validation and scope.
Field
Declared type
Input
scholarshipPct
number
Optional
months
number
Optional
collectionRatePct
number
Optional
label
string
Optional
CURRENT BEHAVIOUR
Rules & current limits
The current provider can return sample output. Configured credentials do not prove a verified provider, live GPS feed or reliable prediction.
Source inventory checked on 11 October 2026. Guide availability confirms documentation publication, not certification of every external service or device flow.
School office · Screen guide
Certificates & verification
Use certificates & verification in the school workspace. Manage certificate templates, issue documents and provide token-based verification.
Use the public sample demo to learn this flow. Your assigned ERP account determines access to actual school records.
STEP BY STEP
How the workflow works
01
Choose or create a certificate template
A school account with the permissions shown below.
02
Select the eligible recipient and issue the document
List Templates is part of the documented workflow.
03
Review the generated certificate record
Create Template is part of the documented workflow.
04
Use the document verification token to check validity
Review the result in the connected record or workspace before moving on.
Fields & controls
The screen exposes the following context or input controls. Required fields are validated by the live application.
Name
Type
Student
CURRENT BEHAVIOUR
Rules & current limits
Verification requires an actual generated token. Sample demo certificates are not school-issued documents.
Source inventory checked on 11 October 2026. Guide availability confirms documentation publication, not certification of every external service or device flow.
Institutions · Screen guide
College administration
Use college administration in the school workspace. Manage department and semester structures, electives, internal marks, placements and research records.
Use the public sample demo to learn this flow. Your assigned ERP account determines access to actual school records.
STEP BY STEP
How the workflow works
01
Create the department and semester structure
A school account with the permissions shown below.
02
Offer electives with the required limits
Remove is part of the documented workflow.
03
Record eligible enrollments and internal marks
Offer is part of the documented workflow.
04
Maintain placement and research records
Review the result in the connected record or workspace before moving on.
Request fields to understand
Source-declared fields used by related operations; each operation has its own validation and scope.
Field
Declared type
Input
name
string
Required by declaration
code
string
Required by declaration
hodStaffId
string
Optional
description
string
Optional
totalSeats
number
Optional
departmentId
string
Required by declaration
semesterNo
number
Required by declaration
type
SemesterType
Required by declaration
startDate
string
Optional
endDate
string
Optional
totalCredits
number
Optional
subjectId
string
Required by declaration
semesterId
string
Required by declaration
maxStudents
number
Optional
credits
number
Optional
teacherStaffId
string
Optional
studentId
string
Required by declaration
assignment1
number
Optional
assignment2
number
Optional
midSem
number
Optional
attendance
number
Optional
practical
number
Optional
maxMarks
number
Optional
companyName
string
Required by declaration
CURRENT BEHAVIOUR
Rules & current limits
College workflows share the school account and permission context; college-specific setup must exist.
Source inventory checked on 11 October 2026. Guide availability confirms documentation publication, not certification of every external service or device flow.
Community · Screen guide
Notices, announcements & messages
Use notices, announcements & messages in the school workspace. Coordinate school notices, events, complaints, audience-based announcements and direct conversations.
Use the public sample demo to learn this flow. Your assigned ERP account determines access to actual school records.
STEP BY STEP
How the workflow works
01
Choose the notice, announcement or conversation workflow
A school account with the permissions shown below.
02
Select the permitted audience and prepare the content
Create Notice is part of the documented workflow.
03
Preview reachability before sending where available
Events is part of the documented workflow.
04
Review delivery reports, replies or complaint status
Review the result in the connected record or workspace before moving on.
Fields & controls
The screen exposes the following context or input controls. Required fields are validated by the live application.
Title
Message
Audience
Date
Venue
Subject
Details
Priority
CURRENT BEHAVIOUR
Rules & current limits
External SMS, email and WhatsApp delivery requires configured providers. A saved record is not evidence that every recipient received it.
Source inventory checked on 11 October 2026. Guide availability confirms documentation publication, not certification of every external service or device flow.
Student care · Screen guide
Discipline & behaviour
Use discipline & behaviour in the school workspace. Record incidents, review student standing and manage sanctions through dedicated access.
Use the public sample demo to learn this flow. Your assigned ERP account determines access to actual school records.
STEP BY STEP
How the workflow works
01
Locate the student within your permitted scope
A school account with the permissions shown below.
02
Record the incident and relevant context
Served is part of the documented workflow.
03
Review standing and any suggested threshold action
Waive is part of the documented workflow.
04
Schedule or close the appropriate sanction
Review the result in the connected record or workspace before moving on.
Fields & controls
The screen exposes the following context or input controls. Required fields are validated by the live application.
Description
Tell the family about every incident, not only escalations
CURRENT BEHAVIOUR
Rules & current limits
Behaviour records have dedicated sensitive-data permissions; general student access does not imply access.
Source inventory checked on 11 October 2026. Guide availability confirms documentation publication, not certification of every external service or device flow.
Intelligence · Screen guide
Enrolment & capacity forecast
Use the enrolment & capacity forecast workspace to review its saved runs, context and available actions.
Intended access: Assigned account with the required permissions.
A school account with the permissions shown below.
Choose the relevant school, academic session or child before working.
Required permission keys
student:manage
Use the public sample demo to learn this flow. Your assigned ERP account determines access to actual school records.
STEP BY STEP
How the workflow works
01
Review the input context and provider/data state
A school account with the permissions shown below.
02
Run or open the relevant saved result
Saved result review is part of the documented workflow.
03
Inspect the available evidence and comparison
Available history and comparisons is part of the documented workflow.
04
Review the outcome before acting on it
Review the result in the connected record or workspace before moving on.
Request fields to understand
Source-declared fields used by related operations; each operation has its own validation and scope.
Field
Declared type
Input
conversionPct
number
Optional
defaultSectionCapacity
number
Optional
studentsPerTeacher
number
Optional
label
string
Optional
CURRENT BEHAVIOUR
Rules & current limits
The current provider can return sample output. Configured credentials do not prove a verified provider, live GPS feed or reliable prediction.
Source inventory checked on 11 October 2026. Guide availability confirms documentation publication, not certification of every external service or device flow.
Academics · Screen guide
Exam seating & invigilation
Use exam seating & invigilation in the school workspace. Plan examinations and seating, record marks, review rechecks and publish report cards.
Intended access: Assigned account with the required permissions.
A school account with the permissions shown below.
Choose the relevant school, academic session or child before working.
Required permission keys
exam:viewexam:createexam:manageexam:update
Use the public sample demo to learn this flow. Your assigned ERP account determines access to actual school records.
STEP BY STEP
How the workflow works
01
Create the required exam rooms
A school account with the permissions shown below.
02
Select the paper and allocate candidate seating
Room capacity is part of the documented workflow.
03
Assign the invigilators and review the seating chart
Review the result in the connected record or workspace before moving on.
Request fields to understand
Source-declared fields used by related operations; each operation has its own validation and scope.
Field
Declared type
Input
name
string
Required by declaration
rows
number
Optional
seatsPerRow
number
Optional
blockedSeats
number
Optional
building
string
Optional
floor
string
Optional
scheduleId
string
Required by declaration
roomIds
string[]
Optional
replace
boolean
Optional
roomId
string
Required by declaration
staffId
string
Required by declaration
role
string
Optional
examType
string
Optional
sessionId
string
Optional
termId
string
Optional
startDate
string
Optional
endDate
string
Optional
classId
string
Required by declaration
sectionId
string
Optional
subjectId
string
Required by declaration
examDate
string
Optional
startTime
string
Optional
endTime
string
Optional
maxMarks
number
Required by declaration
CURRENT BEHAVIOUR
Rules & current limits
Published results are distinct from draft marks. Adaptive question attempts and paper rechecks have separate workflows.
Source inventory checked on 11 October 2026. Guide availability confirms documentation publication, not certification of every external service or device flow.
Academics · Screen guide
Examinations & results
Use examinations & results in the school workspace. Plan examinations and seating, record marks, review rechecks and publish report cards.
Intended access: Assigned account with the required permissions.
A school account with the permissions shown below.
Choose the relevant school, academic session or child before working.
Required permission keys
exam:viewexam:create
Use the public sample demo to learn this flow. Your assigned ERP account determines access to actual school records.
STEP BY STEP
How the workflow works
01
Create the exam and its subject schedules
A school account with the permissions shown below.
02
Review the candidates, seating and completion status
Marks entry and history is part of the documented workflow.
03
Record and verify marks, then generate report cards
Completion status is part of the documented workflow.
04
Publish approved results; use the correction workflow when required
Review the result in the connected record or workspace before moving on.
Fields & controls
The screen exposes the following context or input controls. Required fields are validated by the live application.
Exam name
Start date
End date
Type
CURRENT BEHAVIOUR
Rules & current limits
Published results are distinct from draft marks. Adaptive question attempts and paper rechecks have separate workflows.
Source inventory checked on 11 October 2026. Guide availability confirms documentation publication, not certification of every external service or device flow.
Academics · Screen guide
Exam marks & report-card workspace
Use exam marks & report-card workspace in the school workspace. Plan examinations and seating, record marks, review rechecks and publish report cards.
Intended access: Assigned account with the required permissions.
A school account with the permissions shown below.
Choose the relevant school, academic session or child before working.
Required permission keys
exam:viewexam:updateexam:delete
Use the public sample demo to learn this flow. Your assigned ERP account determines access to actual school records.
STEP BY STEP
How the workflow works
01
Create the exam and its subject schedules
A school account with the permissions shown below.
02
Review the candidates, seating and completion status
Marks is part of the documented workflow.
03
Record and verify marks, then generate report cards
Edit is part of the documented workflow.
04
Publish approved results; use the correction workflow when required
Review the result in the connected record or workspace before moving on.
Fields & controls
The screen exposes the following context or input controls. Required fields are validated by the live application.
Class
Section
Subject
Subject paper
Correction reason (required when changing saved marks)
Correction reason
Report card section
Withdrawal reason
Report card
CURRENT BEHAVIOUR
Rules & current limits
Published results are distinct from draft marks. Adaptive question attempts and paper rechecks have separate workflows.
Source inventory checked on 11 October 2026. Guide availability confirms documentation publication, not certification of every external service or device flow.
Intelligence · Screen guide
Executive Copilot
Use the executive copilot workspace to review its saved runs, context and available actions.
Intended access: Assigned account with the required permissions.
A school account with the permissions shown below.
Choose the relevant school, academic session or child before working.
Required permission keys
dashboard:view
Use the public sample demo to learn this flow. Your assigned ERP account determines access to actual school records.
STEP BY STEP
How the workflow works
01
Review the input context and provider/data state
A school account with the permissions shown below.
02
Run or open the relevant saved result
Saved result review is part of the documented workflow.
03
Inspect the available evidence and comparison
Available history and comparisons is part of the documented workflow.
04
Review the outcome before acting on it
Review the result in the connected record or workspace before moving on.
Request fields to understand
Source-declared fields used by related operations; each operation has its own validation and scope.
Field
Declared type
Input
question
string
Required by declaration
board
string
Optional
purpose
string
Optional
CURRENT BEHAVIOUR
Rules & current limits
The current provider can return sample output. Configured credentials do not prove a verified provider, live GPS feed or reliable prediction.
Source inventory checked on 11 October 2026. Guide availability confirms documentation publication, not certification of every external service or device flow.
Finance · Screen guide
Fee structures & billing setup
Define fee types, installment amounts and eligible billing structures.
Intended access: Assigned account with the required permissions.
A school account with the permissions shown below.
Choose the relevant school, academic session or child before working.
Required permission keys
fee:viewfee:createfee:manage
Use the public sample demo to learn this flow. Your assigned ERP account determines access to actual school records.
STEP BY STEP
How the workflow works
01
Review the academic scope and fee types
A school account with the permissions shown below.
02
Create a structure with installments
Structure editor is part of the documented workflow.
03
Preview eligible students and existing invoices
Installments is part of the documented workflow.
04
Generate the reviewed billing
Review the result in the connected record or workspace before moving on.
Request fields to understand
Source-declared fields used by related operations; each operation has its own validation and scope.
Field
Declared type
Input
name
string
Required by declaration
code
string
Optional
isRecurring
boolean
Optional
isOptional
boolean
Optional
classId
string
Optional
studentId
string
Optional
sessionId
string
Optional
items
FeeStructureItemDto[]
Required by declaration
structureId
string
Required by declaration
installmentNo
number
Optional
sectionId
string
Optional
dueDate
string
Optional
notes
string
Optional
CURRENT BEHAVIOUR
Rules & current limits
A collection record is distinct from online gateway settlement. Adjustment and refund actions require the appropriate permission and validation.
Source inventory checked on 11 October 2026. Guide availability confirms documentation publication, not certification of every external service or device flow.
Finance · Screen guide
Fee collections & dues
Use fee collections & dues in the school workspace. Configure charges, preview billing, issue invoices and record collections and adjustments.
Intended access: Assigned account with the required permissions.
A school account with the permissions shown below.
Choose the relevant school, academic session or child before working.
Required permission keys
fee:viewfee:managefee:createfee:update
Use the public sample demo to learn this flow. Your assigned ERP account determines access to actual school records.
STEP BY STEP
How the workflow works
01
Create the required fee structure and installments
A school account with the permissions shown below.
02
Preview eligible students and existing invoices
Apply discount is part of the documented workflow.
03
Generate invoices and record a valid collection
Add late fee is part of the documented workflow.
04
Review the receipt, remaining balance and adjustment history
Review the result in the connected record or workspace before moving on.
Fields & controls
The screen exposes the following context or input controls. Required fields are validated by the live application.
Due date
Pending longer than
Collect fee payment
Amount received
Payment method
Transaction reference
Collection notes
Payment receipt
Reconciliation
Receipt, reference or student
Reconcile collection
Cash-book / statement reference
CURRENT BEHAVIOUR
Rules & current limits
A collection record is distinct from online gateway settlement. Adjustment and refund actions require the appropriate permission and validation.
Source inventory checked on 11 October 2026. Guide availability confirms documentation publication, not certification of every external service or device flow.
Intelligence · Screen guide
Operational forecasts
Run and inspect the available operational forecast records.
Intended access: Assigned account with the required permissions.
A school account with the permissions shown below.
Choose the relevant school, academic session or child before working.
Required permission keys
inventory:view
Use the public sample demo to learn this flow. Your assigned ERP account determines access to actual school records.
STEP BY STEP
How the workflow works
01
Select the available forecast and context
A school account with the permissions shown below.
02
Review provider and data readiness
Latest run is part of the documented workflow.
03
Run and compare the returned result with actual records
Review the result in the connected record or workspace before moving on.
CURRENT BEHAVIOUR
Rules & current limits
The current provider can return sample output. Configured credentials do not prove a verified provider, live GPS feed or reliable prediction.
Source inventory checked on 11 October 2026. Guide availability confirms documentation publication, not certification of every external service or device flow.
School office · Screen guide
Campus gate passes
Use campus gate passes in the school workspace. Maintain student profiles, guardians and documents, and manage campus release or school exit.
Use the public sample demo to learn this flow. Your assigned ERP account determines access to actual school records.
STEP BY STEP
How the workflow works
01
Choose the student and request reason
A school account with the permissions shown below.
02
Review the pickup person and decide the request
Decision and reason is part of the documented workflow.
03
Record authorised release at the gate
Authorised pickup is part of the documented workflow.
04
Record return or inspect the currently-out register
Review the result in the connected record or workspace before moving on.
Request fields to understand
Source-declared fields used by related operations; each operation has its own validation and scope.
Field
Declared type
Input
studentId
string
Required by declaration
reason
string
Optional
expectedOutAt
string
Optional
expectedBackAt
string
Optional
releaseToName
string
Optional
releaseToGuardianId
string
Optional
approve
boolean
Required by declaration
guardianId
string
Optional
releaseRelation
string
Optional
overrideReason
string
Optional
notes
string
Optional
firstName
string
Required by declaration
middleName
string
Optional
lastName
string
Optional
admissionNo
string
Required by declaration
rollNo
string
Optional
gender
string
Optional
dateOfBirth
string
Optional
bloodGroup
string
Optional
sessionId
string
Optional
classId
string
Optional
sectionId
string
Optional
admissionDate
string
Optional
phone
string
Optional
CURRENT BEHAVIOUR
Rules & current limits
Campus release is distinct from withdrawal from the school rolls. Transfer certificates require a valid exited record.
Source inventory checked on 11 October 2026. Guide availability confirms documentation publication, not certification of every external service or device flow.
Student care · Screen guide
Health records & infirmary
Use health records & infirmary in the school workspace. Maintain school health information and record infirmary visits, medication entries and closures.
Access is restricted by dedicated health permissions. Sample walkthrough information is fictional and is not medical advice.
Source inventory checked on 11 October 2026. Guide availability confirms documentation publication, not certification of every external service or device flow.
Campus · Screen guide
Hostel, rooms & roll call
Use hostel, rooms & roll call in the school workspace. Manage residence capacity, room/bed allocations, visitor logs and nightly attendance.
Intended access: Assigned account with the required permissions.
A school account with the permissions shown below.
Choose the relevant school, academic session or child before working.
Required permission keys
hostel:viewhostel:createhostel:update
Use the public sample demo to learn this flow. Your assigned ERP account determines access to actual school records.
STEP BY STEP
How the workflow works
01
Set up the hostel, rooms and beds
A school account with the permissions shown below.
02
Allocate eligible residents to available accommodation
Create Hostel is part of the documented workflow.
03
Record and check out permitted visitors
List Rooms is part of the documented workflow.
04
Open the roll call, mark residents and close the register
Review the result in the connected record or workspace before moving on.
Fields & controls
The screen exposes the following context or input controls. Required fields are validated by the live application.
Name
Type
Capacity
Room
CURRENT BEHAVIOUR
Rules & current limits
Capacity and allocation state must be reviewed before assignment. Family notification delivery depends on the available channel.
Source inventory checked on 11 October 2026. Guide availability confirms documentation publication, not certification of every external service or device flow.
Administration · Screen guide
Notifications & integrations
Use notifications & integrations in the school workspace. Review notifications, integration settings, webhook records and shared AI request state.
Intended access: Assigned account with the required permissions.
A school account with the permissions shown below.
Choose the relevant school, academic session or child before working.
Required permission keys
settings:viewsettings:create
Use the public sample demo to learn this flow. Your assigned ERP account determines access to actual school records.
STEP BY STEP
How the workflow works
01
Open the relevant integration or notification view
A school account with the permissions shown below.
02
Review status and permitted settings
Integration status is part of the documented workflow.
03
Configure a provider using approved credentials outside public documentation
Integration configuration is part of the documented workflow.
04
Use a controlled test and inspect the actual result
Review the result in the connected record or workspace before moving on.
Fields & controls
The screen exposes the following context or input controls. Required fields are validated by the live application.
Title
CURRENT BEHAVIOUR
Rules & current limits
Saving settings is not proof of external delivery. No credential values are included in this documentation.
Source inventory checked on 11 October 2026. Guide availability confirms documentation publication, not certification of every external service or device flow.
Campus · Screen guide
Inventory & purchases
Use inventory & purchases in the school workspace. Manage supplies, procurement, stock movements and issued school property.
Intended access: Super Admin, School Admin, Principal, Vice Principal, Management, Accountant, Store Keeper, Inventory Manager.
A school account with the permissions shown below.
Choose the relevant school, academic session or child before working.
Required permission keys
inventory:view
Use the public sample demo to learn this flow. Your assigned ERP account determines access to actual school records.
STEP BY STEP
How the workflow works
01
Create an item and supplier with the relevant stock unit
A school account with the permissions shown below.
02
Prepare and submit a purchase order for review
Add order line is part of the documented workflow.
03
Receive accepted quantities and inspect stock movements
Add item is part of the documented workflow.
04
Issue or return property and review outstanding balances
Review the result in the connected record or workspace before moving on.
Fields & controls
The screen exposes the following context or input controls. Required fields are validated by the live application.
Order item
| Ordered , received
Vendor filter
CURRENT BEHAVIOUR
Rules & current limits
Purchase totals exclude tax/freight and supplier accounting. Valuation uses reference prices, not FIFO or weighted-average accounting.
Source inventory checked on 11 October 2026. Guide availability confirms documentation publication, not certification of every external service or device flow.
Intelligence · Screen guide
Hostel & inventory forecast
Use the hostel & inventory forecast workspace to review its saved runs, context and available actions.
Intended access: Assigned account with the required permissions.
A school account with the permissions shown below.
Choose the relevant school, academic session or child before working.
Required permission keys
inventory:view
Use the public sample demo to learn this flow. Your assigned ERP account determines access to actual school records.
STEP BY STEP
How the workflow works
01
Review the input context and provider/data state
A school account with the permissions shown below.
02
Run or open the relevant saved result
Saved result review is part of the documented workflow.
03
Inspect the available evidence and comparison
Available history and comparisons is part of the documented workflow.
04
Review the outcome before acting on it
Review the result in the connected record or workspace before moving on.
Request fields to understand
Source-declared fields used by related operations; each operation has its own validation and scope.
Field
Declared type
Input
lookbackDays
number
Optional
horizonDays
number
Optional
occupancyBoostPct
number
Optional
category
string
Optional
label
string
Optional
CURRENT BEHAVIOUR
Rules & current limits
The current provider can return sample output. Configured credentials do not prove a verified provider, live GPS feed or reliable prediction.
Source inventory checked on 11 October 2026. Guide availability confirms documentation publication, not certification of every external service or device flow.
Intelligence · Screen guide
Early learning gaps
Use the early learning gaps workspace to review its saved runs, context and available actions.
The current provider can return sample output. Configured credentials do not prove a verified provider, live GPS feed or reliable prediction.
Source inventory checked on 11 October 2026. Guide availability confirms documentation publication, not certification of every external service or device flow.
Finance · Screen guide
General ledger
Use general ledger in the school workspace. Maintain account records and post balanced double-entry journals with auditable reversals.
Create a standard chart of accounts, skipping what exists
07
List Journals
08
Post a balanced double-entry transaction
09
Post the mirror image; the original stays on the record
BEFORE YOU BEGIN
Access & setup
Intended access: Assigned account with the required permissions.
A school account with the permissions shown below.
Choose the relevant school, academic session or child before working.
Required permission keys
fee:viewfee:manage
Use the public sample demo to learn this flow. Your assigned ERP account determines access to actual school records.
STEP BY STEP
How the workflow works
01
Review or seed the chart of accounts
A school account with the permissions shown below.
02
Prepare matching debit and credit lines
Add line is part of the documented workflow.
03
Post the balanced journal and inspect its record
Reverse is part of the documented workflow.
04
Use a reversal to correct an entry without erasing the original
Review the result in the connected record or workspace before moving on.
Request fields to understand
Source-declared fields used by related operations; each operation has its own validation and scope.
Field
Declared type
Input
name
string
Required by declaration
code
string
Optional
type
string
Required by declaration
parentId
string
Optional
isPostable
boolean
Optional
lines
JournalLineDto[]
Required by declaration
entryDate
string
Optional
narration
string
Optional
source
string
Optional
sourceRef
string
Optional
CURRENT BEHAVIOUR
Rules & current limits
Debits and credits must balance. Ledger recording is not a bank settlement or a statutory filing.
Source inventory checked on 11 October 2026. Guide availability confirms documentation publication, not certification of every external service or device flow.
Intelligence · Screen guide
AI lesson planner
Use the ai lesson planner workspace to review its saved runs, context and available actions.
Intended access: Assigned account with the required permissions.
A school account with the permissions shown below.
Choose the relevant school, academic session or child before working.
Required permission keys
timetable:view
Use the public sample demo to learn this flow. Your assigned ERP account determines access to actual school records.
STEP BY STEP
How the workflow works
01
Review the input context and provider/data state
A school account with the permissions shown below.
02
Run or open the relevant saved result
Saved result review is part of the documented workflow.
03
Inspect the available evidence and comparison
Available history and comparisons is part of the documented workflow.
04
Review the outcome before acting on it
Review the result in the connected record or workspace before moving on.
Request fields to understand
Source-declared fields used by related operations; each operation has its own validation and scope.
Field
Declared type
Input
classId
string
Required by declaration
subjectId
string
Required by declaration
topic
string
Optional
weekOf
string
Optional
sectionId
string
Optional
regenerate
boolean
Optional
objectives
string[]
Optional
activities
string[]
Optional
worksheet
string
Optional
exitTicket
string
Optional
notes
string
Optional
homework
string
Optional
assessmentTip
string
Optional
summary
string
Optional
status
'DRAFT' | 'PUBLISHED' | 'ARCHIVED'
Required by declaration
CURRENT BEHAVIOUR
Rules & current limits
The current provider can return sample output. Configured credentials do not prove a verified provider, live GPS feed or reliable prediction.
Source inventory checked on 11 October 2026. Guide availability confirms documentation publication, not certification of every external service or device flow.
Campus · Screen guide
Library & circulation
Use library & circulation in the school workspace. Maintain titles and copies, lend books, manage reservations and handle fines.
Intended access: Super Admin, School Admin, Principal, Vice Principal, Management, Librarian.
A school account with the permissions shown below.
Choose the relevant school, academic session or child before working.
Required permission keys
library:view
Use the public sample demo to learn this flow. Your assigned ERP account determines access to actual school records.
STEP BY STEP
How the workflow works
01
Create a title and its physical copies
A school account with the permissions shown below.
02
Check borrower eligibility and issue an available copy
Add copy is part of the documented workflow.
03
Return or renew the loan and review reservations
Issue a book is part of the documented workflow.
04
Review overdue items and any permitted fine action
Review the result in the connected record or workspace before moving on.
CURRENT BEHAVIOUR
Rules & current limits
Availability, borrower policy and reservation rules affect issue/renewal. A fine record is distinct from a fee gateway payment.
Source inventory checked on 11 October 2026. Guide availability confirms documentation publication, not certification of every external service or device flow.
Academics · Screen guide
Live classes & recordings
Use live classes & recordings in the school workspace. Schedule live lessons, manage their lifecycle and maintain recordings where configured.
Intended access: Assigned account with the required permissions.
A school account with the permissions shown below.
Choose the relevant school, academic session or child before working.
Required permission keys
live-class:viewlive-class:createlive-class:update
Use the public sample demo to learn this flow. Your assigned ERP account determines access to actual school records.
STEP BY STEP
How the workflow works
01
Create the class for the intended learners
A school account with the permissions shown below.
02
Review the scheduled time and class details
Create is part of the documented workflow.
03
Start the class and use the available joining experience
Cancel is part of the documented workflow.
04
End the session and review an available recording
Review the result in the connected record or workspace before moving on.
Request fields to understand
Source-declared fields used by related operations; each operation has its own validation and scope.
Field
Declared type
Input
title
string
Required by declaration
classId
string
Required by declaration
sectionId
string
Optional
subjectId
string
Optional
scheduledAt
string
Required by declaration
durationMin
number
Optional
CURRENT BEHAVIOUR
Rules & current limits
Camera/microphone, media delivery and recordings depend on browser permissions and service configuration; a schedule alone does not prove media connectivity.
Source inventory checked on 11 October 2026. Guide availability confirms documentation publication, not certification of every external service or device flow.
Academics · Screen guide
Live-class workspace
Use live-class workspace in the school workspace. Schedule live lessons, manage their lifecycle and maintain recordings where configured.
Intended access: Assigned account with the required permissions.
A school account with the permissions shown below.
Choose the relevant school, academic session or child before working.
Required permission keys
live-class:viewlive-class:updatelive-class:delete
Use the public sample demo to learn this flow. Your assigned ERP account determines access to actual school records.
STEP BY STEP
How the workflow works
01
Create the class for the intended learners
A school account with the permissions shown below.
02
Review the scheduled time and class details
Update is part of the documented workflow.
03
Start the class and use the available joining experience
Remove is part of the documented workflow.
04
End the session and review an available recording
Review the result in the connected record or workspace before moving on.
Request fields to understand
Source-declared fields used by related operations; each operation has its own validation and scope.
Field
Declared type
Input
title
string
Optional
scheduledAt
string
Optional
durationMin
number
Optional
CURRENT BEHAVIOUR
Rules & current limits
Camera/microphone, media delivery and recordings depend on browser permissions and service configuration; a schedule alone does not prove media connectivity.
Source inventory checked on 11 October 2026. Guide availability confirms documentation publication, not certification of every external service or device flow.
Academics · Screen guide
Courses & lessons
Use courses & lessons in the school workspace. Build a course structure and let learners open lessons and record progress.
Intended access: Assigned account with the required permissions.
A school account with the permissions shown below.
Choose the relevant school, academic session or child before working.
Required permission keys
lms:viewlms:create
Use the public sample demo to learn this flow. Your assigned ERP account determines access to actual school records.
STEP BY STEP
How the workflow works
01
Create a course and its details
A school account with the permissions shown below.
02
Add modules and lessons in the intended order
Modules is part of the documented workflow.
03
Attach supported learning media and review visibility
Lessons is part of the documented workflow.
04
Open the learner course view and track lesson progress
Review the result in the connected record or workspace before moving on.
Fields & controls
The screen exposes the following context or input controls. Required fields are validated by the live application.
Course title
Description
CURRENT BEHAVIOUR
Rules & current limits
A course must be available to the learner before it appears in self-service. Video delivery depends on the stored asset and browser support.
Source inventory checked on 11 October 2026. Guide availability confirms documentation publication, not certification of every external service or device flow.
Academics · Screen guide
Course modules & lesson editor
Use course modules & lesson editor in the school workspace. Build a course structure and let learners open lessons and record progress.
Intended access: Assigned account with the required permissions.
A school account with the permissions shown below.
Choose the relevant school, academic session or child before working.
Required permission keys
lms:viewlms:updatelms:delete
Use the public sample demo to learn this flow. Your assigned ERP account determines access to actual school records.
STEP BY STEP
How the workflow works
01
Create a course and its details
A school account with the permissions shown below.
02
Add modules and lessons in the intended order
Add lesson is part of the documented workflow.
03
Attach supported learning media and review visibility
Get Course is part of the documented workflow.
04
Open the learner course view and track lesson progress
Review the result in the connected record or workspace before moving on.
Request fields to understand
Source-declared fields used by related operations; each operation has its own validation and scope.
Field
Declared type
Input
isPublished
boolean
Optional
title
string
Required by declaration
sortOrder
number
Optional
contentType
string
Required by declaration
videoUrl
string
Optional
body
string
Optional
durationMin
number
Optional
CURRENT BEHAVIOUR
Rules & current limits
A course must be available to the learner before it appears in self-service. Video delivery depends on the stored asset and browser support.
Source inventory checked on 11 October 2026. Guide availability confirms documentation publication, not certification of every external service or device flow.
Academics · Screen guide
Mark rechecks
Use mark rechecks in the school workspace. Plan examinations and seating, record marks, review rechecks and publish report cards.
Intended access: Assigned account with the required permissions.
A school account with the permissions shown below.
Choose the relevant school, academic session or child before working.
Required permission keys
exam:viewexam:manage
Use the public sample demo to learn this flow. Your assigned ERP account determines access to actual school records.
STEP BY STEP
How the workflow works
01
Locate the published mark query
A school account with the permissions shown below.
02
Acknowledge review of the paper
Review acknowledgement is part of the documented workflow.
03
Record the permitted decision and review its result
Review the result in the connected record or workspace before moving on.
Request fields to understand
Source-declared fields used by related operations; each operation has its own validation and scope.
Field
Declared type
Input
examScheduleId
string
Required by declaration
studentId
string
Required by declaration
reason
string
Required by declaration
outcome
'UPHELD' | 'REVISED' | 'REJECTED'
Required by declaration
revisedMarks
number
Optional
notes
string
Optional
CURRENT BEHAVIOUR
Rules & current limits
Published results are distinct from draft marks. Adaptive question attempts and paper rechecks have separate workflows.
Source inventory checked on 11 October 2026. Guide availability confirms documentation publication, not certification of every external service or device flow.
Community · Screen guide
Notices, announcements & messages
Use notices, announcements & messages in the school workspace. Coordinate school notices, events, complaints, audience-based announcements and direct conversations.
Intended access: Assigned account with the required permissions.
A school account with the permissions shown below.
Choose the relevant school, academic session or child before working.
Use the public sample demo to learn this flow. Your assigned ERP account determines access to actual school records.
STEP BY STEP
How the workflow works
01
Choose the notice, announcement or conversation workflow
A school account with the permissions shown below.
02
Select the permitted audience and prepare the content
withdraw is part of the documented workflow.
03
Preview reachability before sending where available
Addressable contacts for the signed-in user is part of the documented workflow.
04
Review delivery reports, replies or complaint status
Review the result in the connected record or workspace before moving on.
Request fields to understand
Source-declared fields used by related operations; each operation has its own validation and scope.
Field
Declared type
Input
toUserId
string
Required by declaration
body
string
Required by declaration
subject
string
Optional
studentId
string
Optional
muted
boolean
Required by declaration
CURRENT BEHAVIOUR
Rules & current limits
External SMS, email and WhatsApp delivery requires configured providers. A saved record is not evidence that every recipient received it.
Source inventory checked on 11 October 2026. Guide availability confirms documentation publication, not certification of every external service or device flow.
Intelligence · Screen guide
Multilingual explanations
Use the multilingual explanations workspace to review its saved runs, context and available actions.
Intended access: Assigned account with the required permissions.
A school account with the permissions shown below.
Choose the relevant school, academic session or child before working.
Required permission keys
lms:view
Use the public sample demo to learn this flow. Your assigned ERP account determines access to actual school records.
STEP BY STEP
How the workflow works
01
Review the input context and provider/data state
A school account with the permissions shown below.
02
Run or open the relevant saved result
Saved result review is part of the documented workflow.
03
Inspect the available evidence and comparison
Available history and comparisons is part of the documented workflow.
04
Review the outcome before acting on it
Review the result in the connected record or workspace before moving on.
Request fields to understand
Source-declared fields used by related operations; each operation has its own validation and scope.
Field
Declared type
Input
concept
string
Optional
level
string
Optional
languages
string[]
Optional
subjectId
string | null
Optional
classId
string | null
Optional
audience
'STUDENT' | 'PARENT' | 'BOTH'
Optional
publish
boolean
Optional
title
string
Optional
body
string
Optional
parentTip
string
Optional
status
'DRAFT' | 'PUBLISHED' | 'PRIVATE' | 'ARCHIVED'
Required by declaration
CURRENT BEHAVIOUR
Rules & current limits
The current provider can return sample output. Configured credentials do not prove a verified provider, live GPS feed or reliable prediction.
Source inventory checked on 11 October 2026. Guide availability confirms documentation publication, not certification of every external service or device flow.
Family portal · Screen guide
My department team
Use my department team in the school workspace. Let families, learners and staff see only their linked children or personal records.
Intended access: Assigned account with the required permissions.
A school account with the permissions shown below.
Choose the relevant school, academic session or child before working.
Use the public sample demo to learn this flow. Your assigned ERP account determines access to actual school records.
STEP BY STEP
How the workflow works
01
Sign in with the assigned department context
A school account with the permissions shown below.
02
Review your department and team
Attendance and fees is part of the documented workflow.
03
Use the displayed information within your own scope
Review the result in the connected record or workspace before moving on.
CURRENT BEHAVIOUR
Rules & current limits
Child ownership is resolved on the server. Family views omit staff-only notes, rosters and administrative controls.
Source inventory checked on 11 October 2026. Guide availability confirms documentation publication, not certification of every external service or device flow.
Family portal · Screen guide
My payslips
Use my payslips in the school workspace. Let families, learners and staff see only their linked children or personal records.
Intended access: Assigned account with the required permissions.
A school account with the permissions shown below.
Choose the relevant school, academic session or child before working.
Use the public sample demo to learn this flow. Your assigned ERP account determines access to actual school records.
STEP BY STEP
How the workflow works
01
Sign in with a linked staff account
A school account with the permissions shown below.
02
Select a salary slip for the intended period
Period selection is part of the documented workflow.
03
Review your own available salary breakdown
Review the result in the connected record or workspace before moving on.
CURRENT BEHAVIOUR
Rules & current limits
Child ownership is resolved on the server. Family views omit staff-only notes, rosters and administrative controls.
Source inventory checked on 11 October 2026. Guide availability confirms documentation publication, not certification of every external service or device flow.
School office · Screen guide
School dashboard
Use school dashboard in the school workspace. See school-wide priorities and manage the campus context used by the ERP.
Daily Action Center: everything pending today, scoped to the caller
03
Current school, branches and active session
BEFORE YOU BEGIN
Access & setup
Intended access: Assigned account with the required permissions.
A school account with the permissions shown below.
Choose the relevant school, academic session or child before working.
Required permission keys
dashboard:view
Use the public sample demo to learn this flow. Your assigned ERP account determines access to actual school records.
STEP BY STEP
How the workflow works
01
Review the school dashboard and current session
A school account with the permissions shown below.
02
Open an outstanding action in the relevant module
Daily Action Center: everything pending today, scoped to the caller is part of the documented workflow.
03
Inspect the campus counts and permitted branch settings
Current school, branches and active session is part of the documented workflow.
04
Review the consequences before closing a campus
Review the result in the connected record or workspace before moving on.
CURRENT BEHAVIOUR
Rules & current limits
Closing a populated campus is refused. The dashboard aggregates scoped records rather than replacing each module workflow.
Source inventory checked on 11 October 2026. Guide availability confirms documentation publication, not certification of every external service or device flow.
Finance · Screen guide
Online payments & reconciliation
Use online payments & reconciliation in the school workspace. Create gateway orders, verify callbacks and investigate payments that remain pending.
Intended access: Assigned account with the required permissions.
A school account with the permissions shown below.
Choose the relevant school, academic session or child before working.
Required permission keys
fee:viewfee:create
Use the public sample demo to learn this flow. Your assigned ERP account determines access to actual school records.
STEP BY STEP
How the workflow works
01
Review the invoice and provider readiness
A school account with the permissions shown below.
02
Create an order through the permitted checkout workflow
Callback verification is part of the documented workflow.
03
Verify the gateway response before treating the invoice as paid
Pending payment review is part of the documented workflow.
04
Investigate a pending payment through reconciliation
Review the result in the connected record or workspace before moving on.
Fields & controls
The screen exposes the following context or input controls. Required fields are validated by the live application.
Invoice ID
Amount (blank = full balance)
CURRENT BEHAVIOUR
Rules & current limits
External collection requires approved gateway credentials and verified callbacks. The public guided demo does not charge money.
Source inventory checked on 11 October 2026. Guide availability confirms documentation publication, not certification of every external service or device flow.
People · Screen guide
Payroll & salary structures
Use payroll & salary structures in the school workspace. Prepare salary structures, process payroll, review approvals and maintain salary slips.
Intended access: Assigned account with the required permissions.
A school account with the permissions shown below.
Choose the relevant school, academic session or child before working.
Required permission keys
payroll:manage
Use the public sample demo to learn this flow. Your assigned ERP account determines access to actual school records.
STEP BY STEP
How the workflow works
01
Create the applicable salary structure
A school account with the permissions shown below.
02
Process payroll for the selected period
Payroll processing is part of the documented workflow.
03
Review calculations and approve the run
Approval is part of the documented workflow.
04
Record payment status and review salary slips
Review the result in the connected record or workspace before moving on.
Fields & controls
The screen exposes the following context or input controls. Required fields are validated by the live application.
Name
CURRENT BEHAVIOUR
Rules & current limits
Marking payroll paid records an administrative state; this feature does not by itself transfer money to a bank.
Source inventory checked on 11 October 2026. Guide availability confirms documentation publication, not certification of every external service or device flow.
Platform · Screen guide
School plan & usage
Review your school’s plan, module access and quota usage.
Intended access: Assigned account with the required permissions.
A school account with the permissions shown below.
Choose the relevant school, academic session or child before working.
Use the public sample demo to learn this flow. Your assigned ERP account determines access to actual school records.
STEP BY STEP
How the workflow works
01
Open the school plan view
A school account with the permissions shown below.
02
Review current quota consumption
Usage limits is part of the documented workflow.
03
Contact the platform administrator for a plan change when needed
Review the result in the connected record or workspace before moving on.
CURRENT BEHAVIOUR
Rules & current limits
Platform access is distinct from a school role. Online SaaS invoice collection and invitation delivery require configured providers.
Source inventory checked on 11 October 2026. Guide availability confirms documentation publication, not certification of every external service or device flow.
School office · Screen guide
Year-end rollover
Use year-end rollover in the school workspace. Preview new-session student placement and apply or revert a recorded promotion batch.
Use the public sample demo to learn this flow. Your assigned ERP account determines access to actual school records.
STEP BY STEP
How the workflow works
01
Choose the source and target academic sessions
A school account with the permissions shown below.
02
Clone or prepare the target class structure
Undo is part of the documented workflow.
03
Review the dry-run placement and exceptions
Dry-run a rollover — writes nothing is part of the documented workflow.
04
Commit only the reviewed batch and keep its reversal reference
Review the result in the connected record or workspace before moving on.
Fields & controls
The screen exposes the following context or input controls. Required fields are validated by the live application.
From (closing)
To (new year)
Min attendance %
Min average %
Hold students with dues
CURRENT BEHAVIOUR
Rules & current limits
Preview writes nothing; commit changes enrollment. Locked sessions and school ownership checks still apply.
Source inventory checked on 11 October 2026. Guide availability confirms documentation publication, not certification of every external service or device flow.
Community · Screen guide
Parent–teacher meetings
Use parent–teacher meetings in the school workspace. Publish meeting slots, book families, record discussion outcomes and manage follow-up tasks.
Intended access: Super Admin, School Admin, Principal, Vice Principal, Management, Teacher.
A school account with the permissions shown below.
Choose the relevant school, academic session or child before working.
Required permission keys
communication:view
Use the public sample demo to learn this flow. Your assigned ERP account determines access to actual school records.
STEP BY STEP
How the workflow works
01
Create or choose the permitted teacher meeting slot
A school account with the permissions shown below.
02
Book the linked child and verify availability
Mark is part of the documented workflow.
03
Record the meeting outcome with the correct note visibility
Reschedule meeting is part of the documented workflow.
04
Assign and complete any follow-up action
Review the result in the connected record or workspace before moving on.
Fields & controls
The screen exposes the following context or input controls. Required fields are validated by the live application.
Private staff notes
Feedback shared with family
Outcome / cancellation reason
Move to another slot
Follow-up title
Task owner
Follow-up due date
Meeting month
Meeting teacher
Slot teacher
Student
Booking student
CURRENT BEHAVIOUR
Rules & current limits
Private staff notes and family-visible notes differ. Reminder actions do not guarantee external SMS, email or push delivery.
Source inventory checked on 11 October 2026. Guide availability confirms documentation publication, not certification of every external service or device flow.
Finance · Screen guide
School reports
Use school reports in the school workspace. Review fee summaries, student distribution and examination summaries from permitted school data.
Intended access: Assigned account with the required permissions.
A school account with the permissions shown below.
Choose the relevant school, academic session or child before working.
Required permission keys
report:view
Use the public sample demo to learn this flow. Your assigned ERP account determines access to actual school records.
STEP BY STEP
How the workflow works
01
Choose the report and reporting context
A school account with the permissions shown below.
02
Inspect the totals and available filters
Fee Summary is part of the documented workflow.
03
Compare the summary with the underlying records
Students By Class is part of the documented workflow.
04
Use the available export or print action when present
Review the result in the connected record or workspace before moving on.
CURRENT BEHAVIOUR
Rules & current limits
A summary is only as current as the entered records. Each report uses its implemented date and scope rules.
Source inventory checked on 11 October 2026. Guide availability confirms documentation publication, not certification of every external service or device flow.
Administration · Screen guide
Roles & permissions
Use roles & permissions in the school workspace. Control which school users can view, create, edit, export and manage records.
Intended access: Assigned account with the required permissions.
A school account with the permissions shown below.
Choose the relevant school, academic session or child before working.
Required permission keys
role:viewrole:create
Use the public sample demo to learn this flow. Your assigned ERP account determines access to actual school records.
STEP BY STEP
How the workflow works
01
Open a role and inspect its existing permissions
A school account with the permissions shown below.
02
Choose only the required permission keys
Permission catalogue is part of the documented workflow.
03
Save the role and assign eligible users
Role grants is part of the documented workflow.
04
Sign in as the affected role to review access
Review the result in the connected record or workspace before moving on.
Request fields to understand
Source-declared fields used by related operations; each operation has its own validation and scope.
Field
Declared type
Input
name
string
Required by declaration
key
string
Required by declaration
description
string
Optional
CURRENT BEHAVIOUR
Rules & current limits
A role name alone does not grant platform administration. School scope and explicit guards still apply.
Source inventory checked on 11 October 2026. Guide availability confirms documentation publication, not certification of every external service or device flow.
Administration · Screen guide
Role permissions & user assignments
Use role permissions & user assignments in the school workspace. Control which school users can view, create, edit, export and manage records.
Intended access: Assigned account with the required permissions.
A school account with the permissions shown below.
Choose the relevant school, academic session or child before working.
Required permission keys
role:viewrole:updaterole:deleterole:manage
Use the public sample demo to learn this flow. Your assigned ERP account determines access to actual school records.
STEP BY STEP
How the workflow works
01
Open a role and inspect its existing permissions
A school account with the permissions shown below.
02
Choose only the required permission keys
Get is part of the documented workflow.
03
Save the role and assign eligible users
Update is part of the documented workflow.
04
Sign in as the affected role to review access
Review the result in the connected record or workspace before moving on.
Request fields to understand
Source-declared fields used by related operations; each operation has its own validation and scope.
Field
Declared type
Input
name
string
Optional
description
string
Optional
permissionKeys
string[]
Required by declaration
userId
string
Required by declaration
CURRENT BEHAVIOUR
Rules & current limits
A role name alone does not grant platform administration. School scope and explicit guards still apply.
Source inventory checked on 11 October 2026. Guide availability confirms documentation publication, not certification of every external service or device flow.
People · Screen guide
Staff directory & lifecycle
Use staff directory & lifecycle in the school workspace. Maintain staff profiles, inspect connected responsibilities and record departure or reinstatement.
Intended access: Assigned account with the required permissions.
A school account with the permissions shown below.
Choose the relevant school, academic session or child before working.
Required permission keys
hr:viewhr:createhr:manage
Use the public sample demo to learn this flow. Your assigned ERP account determines access to actual school records.
STEP BY STEP
How the workflow works
01
Find or create the staff profile
A school account with the permissions shown below.
02
Review employment details and linked responsibilities
Reinstate is part of the documented workflow.
03
Inspect clearance before offboarding
Download Template is part of the documented workflow.
04
Use reinstatement when returning a former staff member
Review the result in the connected record or workspace before moving on.
Request fields to understand
Source-declared fields used by related operations; each operation has its own validation and scope.
Field
Declared type
Input
employeeCode
string
Required by declaration
firstName
string
Required by declaration
lastName
string
Optional
gender
string
Optional
dateOfBirth
string
Optional
email
string
Optional
phone
string
Optional
branchId
string
Optional
departmentId
string
Optional
designationId
string
Optional
reportsToId
string
Optional
joiningDate
string
Optional
contractType
string
Optional
qualifications
unknown
Optional
exitStatus
'RESIGNED' | 'TERMINATED' | 'RETIRED'
Optional
exitDate
string
Optional
reason
string
Optional
force
boolean
Optional
CURRENT BEHAVIOUR
Rules & current limits
Offboarding is separate from deleting historical school activity. Permission and dependency checks govern each action.
Source inventory checked on 11 October 2026. Guide availability confirms documentation publication, not certification of every external service or device flow.
People · Screen guide
Staff profile & clearance
Use staff profile & clearance in the school workspace. Maintain staff profiles, inspect connected responsibilities and record departure or reinstatement.
Intended access: Assigned account with the required permissions.
A school account with the permissions shown below.
Choose the relevant school, academic session or child before working.
Required permission keys
hr:view
Use the public sample demo to learn this flow. Your assigned ERP account determines access to actual school records.
STEP BY STEP
How the workflow works
01
Find or create the staff profile
A school account with the permissions shown below.
02
Review employment details and linked responsibilities
Staff creation is part of the documented workflow.
03
Inspect clearance before offboarding
Profile 360 is part of the documented workflow.
04
Use reinstatement when returning a former staff member
Review the result in the connected record or workspace before moving on.
CURRENT BEHAVIOUR
Rules & current limits
Offboarding is separate from deleting historical school activity. Permission and dependency checks govern each action.
Source inventory checked on 11 October 2026. Guide availability confirms documentation publication, not certification of every external service or device flow.
People · Screen guide
Staff attendance
Use staff attendance in the school workspace. Record staff check-in/out and maintain an administrative daily and monthly register.
The caller's own attendance history and check-in state
05
All staff with their status for a date
06
Mark/correct staff attendance for a date
BEFORE YOU BEGIN
Access & setup
Intended access: Assigned account with the required permissions.
A school account with the permissions shown below.
Choose the relevant school, academic session or child before working.
Required permission keys
hr:viewhr:update
Use the public sample demo to learn this flow. Your assigned ERP account determines access to actual school records.
STEP BY STEP
How the workflow works
01
Check the current personal attendance state
A school account with the permissions shown below.
02
Clock in or out through the self-service action
Check out is part of the documented workflow.
03
Use the authorized daily roster to correct records
Mark all present is part of the documented workflow.
04
Review the monthly register and holiday policy
Review the result in the connected record or workspace before moving on.
Fields & controls
The screen exposes the following context or input controls. Required fields are validated by the live application.
Date
CURRENT BEHAVIOUR
Rules & current limits
Self-service acts on the caller’s staff profile. Administrative corrections need separate access.
Source inventory checked on 11 October 2026. Guide availability confirms documentation publication, not certification of every external service or device flow.
People · Screen guide
Staff leave requests
Use staff leave requests in the school workspace. Keep staff leave requests and student absence reports in their respective review workflows.
Self-service: apply for leave (resolves the caller's own staff profile)
04
Self-service: my own leave history
05
Admin: pending leave requests awaiting a decision
06
Admin: approve or reject a leave request
BEFORE YOU BEGIN
Access & setup
Intended access: Assigned account with the required permissions.
A school account with the permissions shown below.
Choose the relevant school, academic session or child before working.
Required permission keys
hr:viewhr:update
Use the public sample demo to learn this flow. Your assigned ERP account determines access to actual school records.
STEP BY STEP
How the workflow works
01
Choose staff leave or student absence reporting
A school account with the permissions shown below.
02
Enter the applicable dates and reason
Decline is part of the documented workflow.
03
Submit or review through the permitted role
Self-service: apply for leave (resolves the caller's own staff profile) is part of the documented workflow.
04
Check the final decision and attendance impact
Review the result in the connected record or workspace before moving on.
Fields & controls
The screen exposes the following context or input controls. Required fields are validated by the live application.
Book the suggested stand-ins, not just plan them
CURRENT BEHAVIOUR
Rules & current limits
Staff and student approval rules differ. The family view resolves linked-child ownership.
Source inventory checked on 11 October 2026. Guide availability confirms documentation publication, not certification of every external service or device flow.
Intelligence · Screen guide
Staff workload
Use the staff workload workspace to review its saved runs, context and available actions.
Intended access: Assigned account with the required permissions.
A school account with the permissions shown below.
Choose the relevant school, academic session or child before working.
Required permission keys
timetable:viewattendance:update
Use the public sample demo to learn this flow. Your assigned ERP account determines access to actual school records.
STEP BY STEP
How the workflow works
01
Review the input context and provider/data state
A school account with the permissions shown below.
02
Run or open the relevant saved result
Saved result review is part of the documented workflow.
03
Inspect the available evidence and comparison
Available history and comparisons is part of the documented workflow.
04
Review the outcome before acting on it
Review the result in the connected record or workspace before moving on.
Request fields to understand
Source-declared fields used by related operations; each operation has its own validation and scope.
Field
Declared type
Input
overloadThreshold
number
Optional
mediumThreshold
number
Optional
underutilizedRatio
number
Optional
label
string
Optional
absentStaffId
string
Required by declaration
date
string
Optional
apply
boolean
Optional
CURRENT BEHAVIOUR
Rules & current limits
The current provider can return sample output. Configured credentials do not prove a verified provider, live GPS feed or reliable prediction.
Source inventory checked on 11 October 2026. Guide availability confirms documentation publication, not certification of every external service or device flow.
School office · Screen guide
Student exit & transfer certificates
Use student exit & transfer certificates in the school workspace. Maintain student profiles, guardians and documents, and manage campus release or school exit.
Use the public sample demo to learn this flow. Your assigned ERP account determines access to actual school records.
STEP BY STEP
How the workflow works
01
Locate the student and review clearance
A school account with the permissions shown below.
02
Resolve blockers before recording the exit
Outstanding dependency checks is part of the documented workflow.
03
Review the allocated TC number and generate the permitted document
Exit register is part of the documented workflow.
04
Use readmission only for an approved reversal
Review the result in the connected record or workspace before moving on.
Request fields to understand
Source-declared fields used by related operations; each operation has its own validation and scope.
Field
Declared type
Input
firstName
string
Required by declaration
middleName
string
Optional
lastName
string
Optional
admissionNo
string
Required by declaration
rollNo
string
Optional
gender
string
Optional
dateOfBirth
string
Optional
bloodGroup
string
Optional
sessionId
string
Optional
classId
string
Optional
sectionId
string
Optional
admissionDate
string
Optional
phone
string
Optional
email
string
Optional
status
string
Required by declaration
exitDate
string
Optional
reason
string
Optional
remark
string
Optional
issueTc
boolean
Optional
force
boolean
Optional
CURRENT BEHAVIOUR
Rules & current limits
Campus release is distinct from withdrawal from the school rolls. Transfer certificates require a valid exited record.
Source inventory checked on 11 October 2026. Guide availability confirms documentation publication, not certification of every external service or device flow.
People · Screen guide
Student absence review
Use student absence review in the school workspace. Keep staff leave requests and student absence reports in their respective review workflows.
Intended access: Assigned account with the required permissions.
A school account with the permissions shown below.
Choose the relevant school, academic session or child before working.
Required permission keys
attendance:viewattendance:manage
Use the public sample demo to learn this flow. Your assigned ERP account determines access to actual school records.
STEP BY STEP
How the workflow works
01
Choose staff leave or student absence reporting
A school account with the permissions shown below.
02
Enter the applicable dates and reason
Decline is part of the documented workflow.
03
Submit or review through the permitted role
Withdraw is part of the documented workflow.
04
Check the final decision and attendance impact
Review the result in the connected record or workspace before moving on.
Request fields to understand
Source-declared fields used by related operations; each operation has its own validation and scope.
Field
Declared type
Input
studentId
string
Required by declaration
fromDate
string
Required by declaration
toDate
string
Optional
reason
string
Optional
leaveType
string
Optional
attachmentUrl
string
Optional
approve
boolean
Required by declaration
CURRENT BEHAVIOUR
Rules & current limits
Staff and student approval rules differ. The family view resolves linked-child ownership.
Source inventory checked on 11 October 2026. Guide availability confirms documentation publication, not certification of every external service or device flow.
School office · Screen guide
Student directory
Use student directory in the school workspace. Maintain student profiles, guardians and documents, and manage campus release or school exit.
Intended access: Assigned account with the required permissions.
A school account with the permissions shown below.
Choose the relevant school, academic session or child before working.
Required permission keys
student:viewstudent:create
Use the public sample demo to learn this flow. Your assigned ERP account determines access to actual school records.
STEP BY STEP
How the workflow works
01
Create or open the student profile
A school account with the permissions shown below.
02
Review guardian contacts and required documents
Export to Excel is part of the documented workflow.
03
Use the gate-pass workflow for an authorized early release
List is part of the documented workflow.
04
Use clearance and exit workflows for withdrawal or transfer
Review the result in the connected record or workspace before moving on.
Fields & controls
The screen exposes the following context or input controls. Required fields are validated by the live application.
Admission No
First name
Last name
Gender
Section
CURRENT BEHAVIOUR
Rules & current limits
Campus release is distinct from withdrawal from the school rolls. Transfer certificates require a valid exited record.
Source inventory checked on 11 October 2026. Guide availability confirms documentation publication, not certification of every external service or device flow.
School office · Screen guide
Student profile & guardians
Use student profile & guardians in the school workspace. Maintain student profiles, guardians and documents, and manage campus release or school exit.
Use the public sample demo to learn this flow. Your assigned ERP account determines access to actual school records.
STEP BY STEP
How the workflow works
01
Create or open the student profile
A school account with the permissions shown below.
02
Review guardian contacts and required documents
Send back is part of the documented workflow.
03
Use the gate-pass workflow for an authorized early release
Remove is part of the documented workflow.
04
Use clearance and exit workflows for withdrawal or transfer
Review the result in the connected record or workspace before moving on.
Request fields to understand
Source-declared fields used by related operations; each operation has its own validation and scope.
Field
Declared type
Input
type
string
Required by declaration
title
string
Optional
expiresAt
string
Optional
reason
string
Required by declaration
CURRENT BEHAVIOUR
Rules & current limits
Campus release is distinct from withdrawal from the school rolls. Transfer certificates require a valid exited record.
Source inventory checked on 11 October 2026. Guide availability confirms documentation publication, not certification of every external service or device flow.
Academics · Screen guide
Teacher cover
Use teacher cover in the school workspace. Build recurring class schedules and arrange dated teacher cover with clash checks.
Who could cover an absent teacher (suggestions only)
06
Record cover for all of an absent teacher's periods on a date
07
Assign one substitute to one period on one date
08
Remove Substitution
BEFORE YOU BEGIN
Access & setup
Intended access: Assigned account with the required permissions.
A school account with the permissions shown below.
Choose the relevant school, academic session or child before working.
Required permission keys
timetable:viewtimetable:createtimetable:delete
Use the public sample demo to learn this flow. Your assigned ERP account determines access to actual school records.
STEP BY STEP
How the workflow works
01
Select the section, teacher and date
A school account with the permissions shown below.
02
Create a period with its subject, time and room
Withdraw is part of the documented workflow.
03
Resolve overlap warnings before saving
A day's timetable with substitutions applied is part of the documented workflow.
04
Arrange dated cover and review the daily plan
Review the result in the connected record or workspace before moving on.
Request fields to understand
Source-declared fields used by related operations; each operation has its own validation and scope.
Field
Declared type
Input
absentStaffId
string
Required by declaration
date
string
Required by declaration
apply
boolean
Optional
reason
string
Optional
autoGenerated
boolean
Optional
periodId
string
Required by declaration
substituteStaffId
string
Required by declaration
CURRENT BEHAVIOUR
Rules & current limits
Workspace checks include section, teacher and room overlaps. Weekly templates retain the recurring teacher; dated cover appears in the daily view.
Source inventory checked on 11 October 2026. Guide availability confirms documentation publication, not certification of every external service or device flow.
Finance · Screen guide
Tally export
Use tally export in the school workspace. Prepare accounting vouchers for the configured Tally integration.
Intended access: Assigned account with the required permissions.
A school account with the permissions shown below.
Choose the relevant school, academic session or child before working.
Required permission keys
settings:viewfee:export
Use the public sample demo to learn this flow. Your assigned ERP account determines access to actual school records.
STEP BY STEP
How the workflow works
01
Review the accounting data and integration settings
A school account with the permissions shown below.
02
Check the configured connection in a controlled environment
Test Connection is part of the documented workflow.
03
Export the selected voucher records
Export Vouchers is part of the documented workflow.
04
Reconcile the receiving system with the exported result
Review the result in the connected record or workspace before moving on.
Fields & controls
The screen exposes the following context or input controls. Required fields are validated by the live application.
From Date
To Date
CURRENT BEHAVIOUR
Rules & current limits
An export endpoint does not prove that a live Tally instance is connected or that vouchers were imported successfully.
Source inventory checked on 11 October 2026. Guide availability confirms documentation publication, not certification of every external service or device flow.
People · Screen guide
Staff tasks
Use staff tasks in the school workspace. Assign work to school staff and let each user complete their own task list.
Intended access: Assigned account with the required permissions.
A school account with the permissions shown below.
Choose the relevant school, academic session or child before working.
Required permission keys
hr:viewhr:create
Use the public sample demo to learn this flow. Your assigned ERP account determines access to actual school records.
STEP BY STEP
How the workflow works
01
Create a task with the intended staff assignment
A school account with the permissions shown below.
02
Review its due date and current state
List is part of the documented workflow.
03
The assigned user opens their own task queue
Create is part of the documented workflow.
04
Complete the task and review the updated record
Review the result in the connected record or workspace before moving on.
Request fields to understand
Source-declared fields used by related operations; each operation has its own validation and scope.
Field
Declared type
Input
title
string
Required by declaration
description
string
Optional
assignedToId
string
Required by declaration
dueDate
string
Optional
priority
string
Optional
category
string
Optional
checklist
ChecklistItemDto[]
Optional
CURRENT BEHAVIOUR
Rules & current limits
School staff tasks are separate from the platform marketing Demo & Follow-up Workspace.
Source inventory checked on 11 October 2026. Guide availability confirms documentation publication, not certification of every external service or device flow.
Academics · Screen guide
Timetable & teacher cover
Use timetable & teacher cover in the school workspace. Build recurring class schedules and arrange dated teacher cover with clash checks.
Intended access: Assigned account with the required permissions.
A school account with the permissions shown below.
Choose the relevant school, academic session or child before working.
Required permission keys
timetable:view
Use the public sample demo to learn this flow. Your assigned ERP account determines access to actual school records.
STEP BY STEP
How the workflow works
01
Select the section, teacher and date
A school account with the permissions shown below.
02
Create a period with its subject, time and room
Save period is part of the documented workflow.
03
Resolve overlap warnings before saving
Save cover is part of the documented workflow.
04
Arrange dated cover and review the daily plan
Review the result in the connected record or workspace before moving on.
Fields & controls
The screen exposes the following context or input controls. Required fields are validated by the live application.
Schedule date
Class / section
Teacher view
Period section
Weekday
Period number
Subject
Period teacher
Period type
Substitute teacher
Cover reason
Cover status
CURRENT BEHAVIOUR
Rules & current limits
Workspace checks include section, teacher and room overlaps. Weekly templates retain the recurring teacher; dated cover appears in the daily view.
Source inventory checked on 11 October 2026. Guide availability confirms documentation publication, not certification of every external service or device flow.
Campus · Screen guide
Transport operations
Use transport operations in the school workspace. Manage buses, routes, stops and student allocations, then run daily boarding registers.
Intended access: Super Admin, School Admin, Principal, Vice Principal, Management, Transport Manager, Driver.
A school account with the permissions shown below.
Choose the relevant school, academic session or child before working.
Required permission keys
transport:viewtransport:create
Use the public sample demo to learn this flow. Your assigned ERP account determines access to actual school records.
STEP BY STEP
How the workflow works
01
Set up the bus, route and ordered stops
A school account with the permissions shown below.
02
Allocate students within the directional seat capacity
Notify families is part of the documented workflow.
03
Start today’s trip and record boarding/drop-off
Complete trip is part of the documented workflow.
04
Complete the run and review family-visible updates
Review the result in the connected record or workspace before moving on.
Fields & controls
The screen exposes the following context or input controls. Required fields are validated by the live application.
Active
Correction reason
Trip closing notes
Trip date
Trip route
Trip direction
Filter route
Bus
Fill-up date
Litres
Amount
Odometer
CURRENT BEHAVIOUR
Rules & current limits
Drivers see only their assigned operations. Recorded GPS points are not proof of an active device feed; no live tracking hardware is provisioned here.
Source inventory checked on 11 October 2026. Guide availability confirms documentation publication, not certification of every external service or device flow.
Intelligence · Screen guide
Transport ETA
Use the transport eta workspace to review its saved runs, context and available actions.
Intended access: Assigned account with the required permissions.
A school account with the permissions shown below.
Choose the relevant school, academic session or child before working.
Required permission keys
transport:view
Use the public sample demo to learn this flow. Your assigned ERP account determines access to actual school records.
STEP BY STEP
How the workflow works
01
Review the input context and provider/data state
A school account with the permissions shown below.
02
Run or open the relevant saved result
Saved result review is part of the documented workflow.
03
Inspect the available evidence and comparison
Available history and comparisons is part of the documented workflow.
04
Review the outcome before acting on it
Review the result in the connected record or workspace before moving on.
Request fields to understand
Source-declared fields used by related operations; each operation has its own validation and scope.
Field
Declared type
Input
vehicleId
string
Optional
routeId
string
Optional
scope
'VEHICLE' | 'FLEET'
Optional
lateThresholdMin
number
Optional
stalePingMin
number
Optional
label
string
Optional
CURRENT BEHAVIOUR
Rules & current limits
The current provider can return sample output. Configured credentials do not prove a verified provider, live GPS feed or reliable prediction.
Source inventory checked on 11 October 2026. Guide availability confirms documentation publication, not certification of every external service or device flow.
Institutions · Screen guide
Tuition batches & demos
Use tuition batches & demos in the school workspace. Manage tuition subjects, teaching batches, student enrollment and prospective demo classes.
Use the public sample demo to learn this flow. Your assigned ERP account determines access to actual school records.
STEP BY STEP
How the workflow works
01
Create the subject and teaching batch
A school account with the permissions shown below.
02
Enroll the eligible student with the applicable terms
Delete is part of the documented workflow.
03
Schedule and review prospective demo classes
Enrol is part of the documented workflow.
04
Maintain progress reports and enrollment state
Review the result in the connected record or workspace before moving on.
Request fields to understand
Source-declared fields used by related operations; each operation has its own validation and scope.
Field
Declared type
Input
name
string
Optional
subjectId
string
Required by declaration
teacherStaffId
string
Optional
type
BatchType
Optional
startDate
string
Required by declaration
endDate
string
Optional
maxStudents
number
Optional
monthlyFee
number
Optional
schedule
string
Optional
roomNo
string
Optional
status
BatchStatus
Optional
batchId
string
Required by declaration
studentId
string
Required by declaration
enrolledAt
string
Optional
discountAmount
number
Optional
notes
string
Optional
prospectName
string
Required by declaration
prospectPhone
string
Required by declaration
prospectEmail
string
Optional
scheduledAt
string
Required by declaration
period
string
Optional
marksObtained
number
Optional
maxMarks
number
Optional
grade
string
Optional
CURRENT BEHAVIOUR
Rules & current limits
Tuition prospect demos are distinct from the platform’s AVKUL ERP product demos.
Source inventory checked on 11 October 2026. Guide availability confirms documentation publication, not certification of every external service or device flow.
Websites · Screen guide
School website CMS
Use school website cms in the school workspace. Manage school themes, content pages and published website information from the ERP.
Use the public sample demo to learn this flow. Your assigned ERP account determines access to actual school records.
STEP BY STEP
How the workflow works
01
Review the school website theme and branding
A school account with the permissions shown below.
02
Create or edit the intended content page
Activate theme is part of the documented workflow.
03
Preview and check the content and contact information
Remove is part of the documented workflow.
04
Publish the page and review the public school URL
Review the result in the connected record or workspace before moving on.
Fields & controls
The screen exposes the following context or input controls. Required fields are validated by the live application.
Name
Title
Type
CURRENT BEHAVIOUR
Rules & current limits
School website content is separate from the platform marketing Landing Page CMS. Publish controls use school ownership and permissions.
Source inventory checked on 11 October 2026. Guide availability confirms documentation publication, not certification of every external service or device flow.
People · Screen guide
Approval workflows
Use approval workflows in the school workspace. Configure approval chains and let the responsible approver act on the current step.
Use the public sample demo to learn this flow. Your assigned ERP account determines access to actual school records.
STEP BY STEP
How the workflow works
01
Create a workflow definition and its ordered steps
A school account with the permissions shown below.
02
Review the workflow linked to the business record
Reject is part of the documented workflow.
03
The current approver opens their pending queue
Remove is part of the documented workflow.
04
Record the decision and inspect the next step
Review the result in the connected record or workspace before moving on.
Request fields to understand
Source-declared fields used by related operations; each operation has its own validation and scope.
Field
Declared type
Input
decision
'APPROVED' | 'REJECTED'
Required by declaration
remark
string
Optional
name
string
Optional
entityType
string
Required by declaration
description
string
Optional
steps
WorkflowStepDto[]
Optional
isActive
boolean
Optional
CURRENT BEHAVIOUR
Rules & current limits
Approval is limited to the current eligible approver; it is separate from directly editing the source business record.
Source inventory checked on 11 October 2026. Guide availability confirms documentation publication, not certification of every external service or device flow.
Administration · Screen guide
ERP sign-in
Sign in to the ERP using your assigned account. The public guided demo runs separately with fictional data.
Intended access: Assigned account with the required permissions.
A school account with the permissions shown below.
Choose the relevant school, academic session or child before working.
Use the public sample demo to learn this flow. Your assigned ERP account determines access to actual school records.
STEP BY STEP
How the workflow works
01
Open the ERP sign-in page
A school account with the permissions shown below.
02
Enter the assigned identifier, password and school code when required
Password is part of the documented workflow.
03
Open the workspace available to your role
School code where required is part of the documented workflow.
04
Log out when finished
Review the result in the connected record or workspace before moving on.
CURRENT BEHAVIOUR
Rules & current limits
Public guided demos do not issue ERP credentials. Impersonation is restricted to platform administrators and is audited.
Source inventory checked on 11 October 2026. Guide availability confirms documentation publication, not certification of every external service or device flow.
Administration · Screen guide
Choose your ERP workspace
Navigate between the platform console, school office and family portal using the signed-in role.
Intended access: Assigned account with the required permissions.
A school account with the permissions shown below.
Choose the relevant school, academic session or child before working.
Use the public sample demo to learn this flow. Your assigned ERP account determines access to actual school records.
STEP BY STEP
How the workflow works
01
Sign in with the assigned account
A school account with the permissions shown below.
02
Open the workspace available to your role
School workspace is part of the documented workflow.
03
Use the navigation to open a permitted module
Review the result in the connected record or workspace before moving on.
CURRENT BEHAVIOUR
Rules & current limits
Public guided demos do not issue ERP credentials. Impersonation is restricted to platform administrators and is audited.
Source inventory checked on 11 October 2026. Guide availability confirms documentation publication, not certification of every external service or device flow.
School office · Screen guide
Public certificate verification
Check a school-issued certificate using its verification link or token.
Intended access: Assigned account with the required permissions.
A school account with the permissions shown below.
Choose the relevant school, academic session or child before working.
Use the public sample demo to learn this flow. Your assigned ERP account determines access to actual school records.
STEP BY STEP
How the workflow works
01
Open the verification link printed on the issued document
A school account with the permissions shown below.
02
Review the returned certificate status
Certificate validity is part of the documented workflow.
03
Ask the issuing school about an invalid or revoked document
Review the result in the connected record or workspace before moving on.
CURRENT BEHAVIOUR
Rules & current limits
Verification requires an actual generated token. Sample demo certificates are not school-issued documents.
Source inventory checked on 11 October 2026. Guide availability confirms documentation publication, not certification of every external service or device flow.
Intelligence · AI tool
Auto Report Card Remarks
Auto Report Card Remarks is an available tool in the School AI Tools workspace (Existing). Review the required context and the returned output before using it.
Intended access: Assigned account with the required permissions.
An authorised school account and the permissions for this tool.
A valid learner, staff, section or topic reference where the tool asks for one.
Required permission keys
exam:update
Use the public sample demo to learn this flow. Your assigned ERP account determines access to actual school records.
STEP BY STEP
How the workflow works
01
Open School AI Tools and select “Auto Report Card Remarks”
An authorised school account and the permissions for this tool.
02
Enter the available student id fields
Available result review is part of the documented workflow.
03
Run the tool and check the provider/sample-output banner
Provider-dependent output is part of the documented workflow.
04
Inspect the result and confirm important details against school records
Review the result in the connected record or workspace before moving on.
Fields & controls
The screen exposes the following context or input controls. Required fields are validated by the live application.
Student Id
CURRENT BEHAVIOUR
Rules & current limits
The documentation demo uses deterministic fictional sample output, not a live AI provider.
Provider configuration, image/voice inputs and live integrations require separate verification. Human review remains necessary.
Individual tool checked in current source. Guide availability confirms documentation publication, not certification of every external service or device flow.
Intelligence · AI tool
Attendance Anomaly Detection
Attendance Anomaly Detection is an available tool in the School AI Tools workspace (Existing). Review the required context and the returned output before using it.
Intended access: Assigned account with the required permissions.
An authorised school account and the permissions for this tool.
A valid learner, staff, section or topic reference where the tool asks for one.
Required permission keys
attendance:view
Use the public sample demo to learn this flow. Your assigned ERP account determines access to actual school records.
STEP BY STEP
How the workflow works
01
Open School AI Tools and select “Attendance Anomaly Detection”
An authorised school account and the permissions for this tool.
02
Enter the available section id fields
Available result review is part of the documented workflow.
03
Run the tool and check the provider/sample-output banner
Provider-dependent output is part of the documented workflow.
04
Inspect the result and confirm important details against school records
Review the result in the connected record or workspace before moving on.
Fields & controls
The screen exposes the following context or input controls. Required fields are validated by the live application.
Section Id
CURRENT BEHAVIOUR
Rules & current limits
The documentation demo uses deterministic fictional sample output, not a live AI provider.
Provider configuration, image/voice inputs and live integrations require separate verification. Human review remains necessary.
Individual tool checked in current source. Guide availability confirms documentation publication, not certification of every external service or device flow.
Intelligence · AI tool
Fee Defaulter Prediction
Fee Defaulter Prediction is an available tool in the School AI Tools workspace (Existing). Review the required context and the returned output before using it.
Intended access: Assigned account with the required permissions.
An authorised school account and the permissions for this tool.
A valid learner, staff, section or topic reference where the tool asks for one.
Required permission keys
fee:view
Use the public sample demo to learn this flow. Your assigned ERP account determines access to actual school records.
STEP BY STEP
How the workflow works
01
Open School AI Tools and select “Fee Defaulter Prediction”
An authorised school account and the permissions for this tool.
02
Review the available school context for this tool
Available result review is part of the documented workflow.
03
Run the tool and check the provider/sample-output banner
Provider-dependent output is part of the documented workflow.
04
Inspect the result and confirm important details against school records
Review the result in the connected record or workspace before moving on.
CURRENT BEHAVIOUR
Rules & current limits
The documentation demo uses deterministic fictional sample output, not a live AI provider.
Provider configuration, image/voice inputs and live integrations require separate verification. Human review remains necessary.
Individual tool checked in current source. Guide availability confirms documentation publication, not certification of every external service or device flow.
Intelligence · AI tool
AI Question Paper Generator
AI Question Paper Generator is an available tool in the School AI Tools workspace (Existing). Review the required context and the returned output before using it.
Intended access: Assigned account with the required permissions.
An authorised school account and the permissions for this tool.
A valid learner, staff, section or topic reference where the tool asks for one.
Required permission keys
exam:create
Use the public sample demo to learn this flow. Your assigned ERP account determines access to actual school records.
STEP BY STEP
How the workflow works
01
Open School AI Tools and select “AI Question Paper Generator”
An authorised school account and the permissions for this tool.
02
Enter the available subject, topic, count, difficulty fields
Available result review is part of the documented workflow.
03
Run the tool and check the provider/sample-output banner
Provider-dependent output is part of the documented workflow.
04
Inspect the result and confirm important details against school records
Review the result in the connected record or workspace before moving on.
Fields & controls
The screen exposes the following context or input controls. Required fields are validated by the live application.
Subject
Topic
Count
Difficulty
CURRENT BEHAVIOUR
Rules & current limits
The documentation demo uses deterministic fictional sample output, not a live AI provider.
Provider configuration, image/voice inputs and live integrations require separate verification. Human review remains necessary.
Individual tool checked in current source. Guide availability confirms documentation publication, not certification of every external service or device flow.
Intelligence · AI tool
Discipline Pattern Detection
Discipline Pattern Detection is an available tool in the School AI Tools workspace (Existing). Review the required context and the returned output before using it.
Intended access: Assigned account with the required permissions.
An authorised school account and the permissions for this tool.
A valid learner, staff, section or topic reference where the tool asks for one.
Required permission keys
student:view
Use the public sample demo to learn this flow. Your assigned ERP account determines access to actual school records.
STEP BY STEP
How the workflow works
01
Open School AI Tools and select “Discipline Pattern Detection”
An authorised school account and the permissions for this tool.
02
Review the available school context for this tool
Available result review is part of the documented workflow.
03
Run the tool and check the provider/sample-output banner
Provider-dependent output is part of the documented workflow.
04
Inspect the result and confirm important details against school records
Review the result in the connected record or workspace before moving on.
CURRENT BEHAVIOUR
Rules & current limits
The documentation demo uses deterministic fictional sample output, not a live AI provider.
Provider configuration, image/voice inputs and live integrations require separate verification. Human review remains necessary.
Individual tool checked in current source. Guide availability confirms documentation publication, not certification of every external service or device flow.
Intelligence · AI tool
Parent Chatbot
Parent Chatbot is an available tool in the School AI Tools workspace (Existing). Review the required context and the returned output before using it.
Intended access: Assigned account with the required permissions.
An authorised school account and the permissions for this tool.
A valid learner, staff, section or topic reference where the tool asks for one.
Required permission keys
dashboard:view
Use the public sample demo to learn this flow. Your assigned ERP account determines access to actual school records.
STEP BY STEP
How the workflow works
01
Open School AI Tools and select “Parent Chatbot”
An authorised school account and the permissions for this tool.
02
Enter the available student id, question fields
Available result review is part of the documented workflow.
03
Run the tool and check the provider/sample-output banner
Provider-dependent output is part of the documented workflow.
04
Inspect the result and confirm important details against school records
Review the result in the connected record or workspace before moving on.
Fields & controls
The screen exposes the following context or input controls. Required fields are validated by the live application.
Student Id
Question
CURRENT BEHAVIOUR
Rules & current limits
The documentation demo uses deterministic fictional sample output, not a live AI provider.
Provider configuration, image/voice inputs and live integrations require separate verification. Human review remains necessary.
Individual tool checked in current source. Guide availability confirms documentation publication, not certification of every external service or device flow.
Intelligence · AI tool
AI Study Buddy
AI Study Buddy is an available tool in the School AI Tools workspace (Existing). Review the required context and the returned output before using it.
Intended access: Assigned account with the required permissions.
An authorised school account and the permissions for this tool.
A valid learner, staff, section or topic reference where the tool asks for one.
Required permission keys
lms:view
Use the public sample demo to learn this flow. Your assigned ERP account determines access to actual school records.
STEP BY STEP
How the workflow works
01
Open School AI Tools and select “AI Study Buddy”
An authorised school account and the permissions for this tool.
02
Enter the available lesson id, question fields
Available result review is part of the documented workflow.
03
Run the tool and check the provider/sample-output banner
Provider-dependent output is part of the documented workflow.
04
Inspect the result and confirm important details against school records
Review the result in the connected record or workspace before moving on.
Fields & controls
The screen exposes the following context or input controls. Required fields are validated by the live application.
Lesson Id
Question
CURRENT BEHAVIOUR
Rules & current limits
The documentation demo uses deterministic fictional sample output, not a live AI provider.
Provider configuration, image/voice inputs and live integrations require separate verification. Human review remains necessary.
Individual tool checked in current source. Guide availability confirms documentation publication, not certification of every external service or device flow.
Intelligence · AI tool
Career/Stream Counselor
Career/Stream Counselor is an available tool in the School AI Tools workspace (Existing). Review the required context and the returned output before using it.
Intended access: Assigned account with the required permissions.
An authorised school account and the permissions for this tool.
A valid learner, staff, section or topic reference where the tool asks for one.
Required permission keys
student:view
Use the public sample demo to learn this flow. Your assigned ERP account determines access to actual school records.
STEP BY STEP
How the workflow works
01
Open School AI Tools and select “Career/Stream Counselor”
An authorised school account and the permissions for this tool.
02
Enter the available student id fields
Available result review is part of the documented workflow.
03
Run the tool and check the provider/sample-output banner
Provider-dependent output is part of the documented workflow.
04
Inspect the result and confirm important details against school records
Review the result in the connected record or workspace before moving on.
Fields & controls
The screen exposes the following context or input controls. Required fields are validated by the live application.
Student Id
CURRENT BEHAVIOUR
Rules & current limits
The documentation demo uses deterministic fictional sample output, not a live AI provider.
Provider configuration, image/voice inputs and live integrations require separate verification. Human review remains necessary.
Individual tool checked in current source. Guide availability confirms documentation publication, not certification of every external service or device flow.
Intelligence · AI tool
Timetable Optimizer
Timetable Optimizer is an available tool in the School AI Tools workspace (Existing). Review the required context and the returned output before using it.
Intended access: Assigned account with the required permissions.
An authorised school account and the permissions for this tool.
A valid learner, staff, section or topic reference where the tool asks for one.
Required permission keys
timetable:view
Use the public sample demo to learn this flow. Your assigned ERP account determines access to actual school records.
STEP BY STEP
How the workflow works
01
Open School AI Tools and select “Timetable Optimizer”
An authorised school account and the permissions for this tool.
02
Enter the available timetable id fields
Available result review is part of the documented workflow.
03
Run the tool and check the provider/sample-output banner
Provider-dependent output is part of the documented workflow.
04
Inspect the result and confirm important details against school records
Review the result in the connected record or workspace before moving on.
Fields & controls
The screen exposes the following context or input controls. Required fields are validated by the live application.
Timetable Id
CURRENT BEHAVIOUR
Rules & current limits
The documentation demo uses deterministic fictional sample output, not a live AI provider.
Provider configuration, image/voice inputs and live integrations require separate verification. Human review remains necessary.
Individual tool checked in current source. Guide availability confirms documentation publication, not certification of every external service or device flow.
Intelligence · AI tool
Smart Inventory Reorder
Smart Inventory Reorder is an available tool in the School AI Tools workspace (Existing). Review the required context and the returned output before using it.
Intended access: Assigned account with the required permissions.
An authorised school account and the permissions for this tool.
A valid learner, staff, section or topic reference where the tool asks for one.
Required permission keys
inventory:view
Use the public sample demo to learn this flow. Your assigned ERP account determines access to actual school records.
STEP BY STEP
How the workflow works
01
Open School AI Tools and select “Smart Inventory Reorder”
An authorised school account and the permissions for this tool.
02
Review the available school context for this tool
Available result review is part of the documented workflow.
03
Run the tool and check the provider/sample-output banner
Provider-dependent output is part of the documented workflow.
04
Inspect the result and confirm important details against school records
Review the result in the connected record or workspace before moving on.
CURRENT BEHAVIOUR
Rules & current limits
The documentation demo uses deterministic fictional sample output, not a live AI provider.
Provider configuration, image/voice inputs and live integrations require separate verification. Human review remains necessary.
Individual tool checked in current source. Guide availability confirms documentation publication, not certification of every external service or device flow.
Intelligence · AI tool
AI Notice/Circular Writer
AI Notice/Circular Writer is an available tool in the School AI Tools workspace (Existing). Review the required context and the returned output before using it.
Intended access: Assigned account with the required permissions.
An authorised school account and the permissions for this tool.
A valid learner, staff, section or topic reference where the tool asks for one.
Required permission keys
communication:create
Use the public sample demo to learn this flow. Your assigned ERP account determines access to actual school records.
STEP BY STEP
How the workflow works
01
Open School AI Tools and select “AI Notice/Circular Writer”
An authorised school account and the permissions for this tool.
02
Enter the available bullet points, language fields
Available result review is part of the documented workflow.
03
Run the tool and check the provider/sample-output banner
Provider-dependent output is part of the documented workflow.
04
Inspect the result and confirm important details against school records
Review the result in the connected record or workspace before moving on.
Fields & controls
The screen exposes the following context or input controls. Required fields are validated by the live application.
Bullet Points
Language
CURRENT BEHAVIOUR
Rules & current limits
The documentation demo uses deterministic fictional sample output, not a live AI provider.
Provider configuration, image/voice inputs and live integrations require separate verification. Human review remains necessary.
Individual tool checked in current source. Guide availability confirms documentation publication, not certification of every external service or device flow.
Intelligence · AI tool
Alumni Mentorship Matching
Alumni Mentorship Matching is an available tool in the School AI Tools workspace (Existing). Review the required context and the returned output before using it.
Intended access: Assigned account with the required permissions.
An authorised school account and the permissions for this tool.
A valid learner, staff, section or topic reference where the tool asks for one.
Required permission keys
student:view
Use the public sample demo to learn this flow. Your assigned ERP account determines access to actual school records.
STEP BY STEP
How the workflow works
01
Open School AI Tools and select “Alumni Mentorship Matching”
An authorised school account and the permissions for this tool.
02
Enter the available student id, interest area fields
Available result review is part of the documented workflow.
03
Run the tool and check the provider/sample-output banner
Provider-dependent output is part of the documented workflow.
04
Inspect the result and confirm important details against school records
Review the result in the connected record or workspace before moving on.
Fields & controls
The screen exposes the following context or input controls. Required fields are validated by the live application.
Student Id
Interest Area
CURRENT BEHAVIOUR
Rules & current limits
The documentation demo uses deterministic fictional sample output, not a live AI provider.
Provider configuration, image/voice inputs and live integrations require separate verification. Human review remains necessary.
Individual tool checked in current source. Guide availability confirms documentation publication, not certification of every external service or device flow.
Intelligence · AI tool
Voice-to-Attendance
Voice-to-Attendance is an available tool in the School AI Tools workspace (Existing). Review the required context and the returned output before using it.
Intended access: Assigned account with the required permissions.
An authorised school account and the permissions for this tool.
A valid learner, staff, section or topic reference where the tool asks for one.
Required permission keys
attendance:create
Use the public sample demo to learn this flow. Your assigned ERP account determines access to actual school records.
STEP BY STEP
How the workflow works
01
Open School AI Tools and select “Voice-to-Attendance”
An authorised school account and the permissions for this tool.
02
Enter the available section id, transcript fields
Available result review is part of the documented workflow.
03
Run the tool and check the provider/sample-output banner
Provider-dependent output is part of the documented workflow.
04
Inspect the result and confirm important details against school records
Review the result in the connected record or workspace before moving on.
Fields & controls
The screen exposes the following context or input controls. Required fields are validated by the live application.
Section Id
Transcript
CURRENT BEHAVIOUR
Rules & current limits
The documentation demo uses deterministic fictional sample output, not a live AI provider.
Provider configuration, image/voice inputs and live integrations require separate verification. Human review remains necessary.
Individual tool checked in current source. Guide availability confirms documentation publication, not certification of every external service or device flow.
Intelligence · AI tool
Photo-based Visitor Verification
Photo-based Visitor Verification is an available tool in the School AI Tools workspace (Existing). Review the required context and the returned output before using it.
Intended access: Assigned account with the required permissions.
An authorised school account and the permissions for this tool.
A valid learner, staff, section or topic reference where the tool asks for one.
Required permission keys
hostel:view
Use the public sample demo to learn this flow. Your assigned ERP account determines access to actual school records.
STEP BY STEP
How the workflow works
01
Open School AI Tools and select “Photo-based Visitor Verification”
An authorised school account and the permissions for this tool.
02
Enter the available image url, claimed name, visitor log id, reference image url fields
Available result review is part of the documented workflow.
03
Run the tool and check the provider/sample-output banner
Provider-dependent output is part of the documented workflow.
04
Inspect the result and confirm important details against school records
Review the result in the connected record or workspace before moving on.
Fields & controls
The screen exposes the following context or input controls. Required fields are validated by the live application.
Image Url
Claimed Name
Visitor Log Id
Reference Image Url
CURRENT BEHAVIOUR
Rules & current limits
The documentation demo uses deterministic fictional sample output, not a live AI provider.
Provider configuration, image/voice inputs and live integrations require separate verification. Human review remains necessary.
Individual tool checked in current source. Guide availability confirms documentation publication, not certification of every external service or device flow.
Intelligence · AI tool
Repeat Visitor Pattern Detection
Repeat Visitor Pattern Detection is an available tool in the School AI Tools workspace (Existing). Review the required context and the returned output before using it.
Intended access: Assigned account with the required permissions.
An authorised school account and the permissions for this tool.
A valid learner, staff, section or topic reference where the tool asks for one.
Required permission keys
hostel:view
Use the public sample demo to learn this flow. Your assigned ERP account determines access to actual school records.
STEP BY STEP
How the workflow works
01
Open School AI Tools and select “Repeat Visitor Pattern Detection”
An authorised school account and the permissions for this tool.
02
Enter the available days fields
Available result review is part of the documented workflow.
03
Run the tool and check the provider/sample-output banner
Provider-dependent output is part of the documented workflow.
04
Inspect the result and confirm important details against school records
Review the result in the connected record or workspace before moving on.
Fields & controls
The screen exposes the following context or input controls. Required fields are validated by the live application.
Days
CURRENT BEHAVIOUR
Rules & current limits
The documentation demo uses deterministic fictional sample output, not a live AI provider.
Provider configuration, image/voice inputs and live integrations require separate verification. Human review remains necessary.
Individual tool checked in current source. Guide availability confirms documentation publication, not certification of every external service or device flow.
Intelligence · AI tool
Biometric Face Match
Biometric Face Match is an available tool in the School AI Tools workspace (Existing). Review the required context and the returned output before using it.
Intended access: Assigned account with the required permissions.
An authorised school account and the permissions for this tool.
A valid learner, staff, section or topic reference where the tool asks for one.
Required permission keys
hostel:view
Use the public sample demo to learn this flow. Your assigned ERP account determines access to actual school records.
STEP BY STEP
How the workflow works
01
Open School AI Tools and select “Biometric Face Match”
An authorised school account and the permissions for this tool.
02
Enter the available source image url, target image url fields
Available result review is part of the documented workflow.
03
Run the tool and check the provider/sample-output banner
Provider-dependent output is part of the documented workflow.
04
Inspect the result and confirm important details against school records
Review the result in the connected record or workspace before moving on.
Fields & controls
The screen exposes the following context or input controls. Required fields are validated by the live application.
Source Image Url
Target Image Url
CURRENT BEHAVIOUR
Rules & current limits
The documentation demo uses deterministic fictional sample output, not a live AI provider.
Provider configuration, image/voice inputs and live integrations require separate verification. Human review remains necessary.
Individual tool checked in current source. Guide availability confirms documentation publication, not certification of every external service or device flow.
Intelligence · AI tool
Predictive Dropout Risk
Predictive Dropout Risk is an available tool in the School AI Tools workspace (Existing). Review the required context and the returned output before using it.
Intended access: Assigned account with the required permissions.
An authorised school account and the permissions for this tool.
A valid learner, staff, section or topic reference where the tool asks for one.
Required permission keys
student:view
Use the public sample demo to learn this flow. Your assigned ERP account determines access to actual school records.
STEP BY STEP
How the workflow works
01
Open School AI Tools and select “Predictive Dropout Risk”
An authorised school account and the permissions for this tool.
02
Review the available school context for this tool
Available result review is part of the documented workflow.
03
Run the tool and check the provider/sample-output banner
Provider-dependent output is part of the documented workflow.
04
Inspect the result and confirm important details against school records
Review the result in the connected record or workspace before moving on.
CURRENT BEHAVIOUR
Rules & current limits
The documentation demo uses deterministic fictional sample output, not a live AI provider.
Provider configuration, image/voice inputs and live integrations require separate verification. Human review remains necessary.
Individual tool checked in current source. Guide availability confirms documentation publication, not certification of every external service or device flow.
Intelligence · AI tool
Personalized Learning Path
Personalized Learning Path is an available tool in the School AI Tools workspace (Academic Intelligence). Review the required context and the returned output before using it.
Intended access: Assigned account with the required permissions.
An authorised school account and the permissions for this tool.
A valid learner, staff, section or topic reference where the tool asks for one.
Required permission keys
lms:view
Use the public sample demo to learn this flow. Your assigned ERP account determines access to actual school records.
STEP BY STEP
How the workflow works
01
Open School AI Tools and select “Personalized Learning Path”
An authorised school account and the permissions for this tool.
02
Enter the available student id, days, regenerate fields
Available result review is part of the documented workflow.
03
Run the tool and check the provider/sample-output banner
Provider-dependent output is part of the documented workflow.
04
Inspect the result and confirm important details against school records
Review the result in the connected record or workspace before moving on.
Fields & controls
The screen exposes the following context or input controls. Required fields are validated by the live application.
Student Id
Days
Regenerate
CURRENT BEHAVIOUR
Rules & current limits
The documentation demo uses deterministic fictional sample output, not a live AI provider.
Provider configuration, image/voice inputs and live integrations require separate verification. Human review remains necessary.
Individual tool checked in current source. Guide availability confirms documentation publication, not certification of every external service or device flow.
Intelligence · AI tool
Early Learning Gap Detection
Early Learning Gap Detection is an available tool in the School AI Tools workspace (Academic Intelligence). Review the required context and the returned output before using it.
Intended access: Assigned account with the required permissions.
An authorised school account and the permissions for this tool.
A valid learner, staff, section or topic reference where the tool asks for one.
Required permission keys
student:viewlms:view
Use the public sample demo to learn this flow. Your assigned ERP account determines access to actual school records.
STEP BY STEP
How the workflow works
01
Open School AI Tools and select “Early Learning Gap Detection”
An authorised school account and the permissions for this tool.
02
Enter the available section id, weeks fields
Available result review is part of the documented workflow.
03
Run the tool and check the provider/sample-output banner
Provider-dependent output is part of the documented workflow.
04
Inspect the result and confirm important details against school records
Review the result in the connected record or workspace before moving on.
Fields & controls
The screen exposes the following context or input controls. Required fields are validated by the live application.
Section Id
Weeks
CURRENT BEHAVIOUR
Rules & current limits
The documentation demo uses deterministic fictional sample output, not a live AI provider.
Provider configuration, image/voice inputs and live integrations require separate verification. Human review remains necessary.
Individual tool checked in current source. Guide availability confirms documentation publication, not certification of every external service or device flow.
Intelligence · AI tool
Adaptive Online Exams
Adaptive Online Exams is an available tool in the School AI Tools workspace (Academic Intelligence). Review the required context and the returned output before using it.
Intended access: Assigned account with the required permissions.
An authorised school account and the permissions for this tool.
A valid learner, staff, section or topic reference where the tool asks for one.
Required permission keys
exam:view
Use the public sample demo to learn this flow. Your assigned ERP account determines access to actual school records.
STEP BY STEP
How the workflow works
01
Open School AI Tools and select “Adaptive Online Exams”
An authorised school account and the permissions for this tool.
02
Enter the available student id, subject id, answers json fields
Available result review is part of the documented workflow.
03
Run the tool and check the provider/sample-output banner
Provider-dependent output is part of the documented workflow.
04
Inspect the result and confirm important details against school records
Review the result in the connected record or workspace before moving on.
Fields & controls
The screen exposes the following context or input controls. Required fields are validated by the live application.
Student Id
Subject Id
Answers Json
CURRENT BEHAVIOUR
Rules & current limits
The documentation demo uses deterministic fictional sample output, not a live AI provider.
Provider configuration, image/voice inputs and live integrations require separate verification. Human review remains necessary.
Individual tool checked in current source. Guide availability confirms documentation publication, not certification of every external service or device flow.
Intelligence · AI tool
AI Lesson Planner
AI Lesson Planner is an available tool in the School AI Tools workspace (Academic Intelligence). Review the required context and the returned output before using it.
Intended access: Assigned account with the required permissions.
An authorised school account and the permissions for this tool.
A valid learner, staff, section or topic reference where the tool asks for one.
Required permission keys
timetable:view
Use the public sample demo to learn this flow. Your assigned ERP account determines access to actual school records.
STEP BY STEP
How the workflow works
01
Open School AI Tools and select “AI Lesson Planner”
An authorised school account and the permissions for this tool.
02
Enter the available class id, subject id, topic, week of, regenerate fields
Available result review is part of the documented workflow.
03
Run the tool and check the provider/sample-output banner
Provider-dependent output is part of the documented workflow.
04
Inspect the result and confirm important details against school records
Review the result in the connected record or workspace before moving on.
Fields & controls
The screen exposes the following context or input controls. Required fields are validated by the live application.
Class Id
Subject Id
Topic
Week Of
Regenerate
CURRENT BEHAVIOUR
Rules & current limits
The documentation demo uses deterministic fictional sample output, not a live AI provider.
Provider configuration, image/voice inputs and live integrations require separate verification. Human review remains necessary.
Individual tool checked in current source. Guide availability confirms documentation publication, not certification of every external service or device flow.
Intelligence · AI tool
Multilingual Explain
Multilingual Explain is an available tool in the School AI Tools workspace (Academic Intelligence). Review the required context and the returned output before using it.
Intended access: Assigned account with the required permissions.
An authorised school account and the permissions for this tool.
A valid learner, staff, section or topic reference where the tool asks for one.
Required permission keys
lms:view
Use the public sample demo to learn this flow. Your assigned ERP account determines access to actual school records.
STEP BY STEP
How the workflow works
01
Open School AI Tools and select “Multilingual Explain”
An authorised school account and the permissions for this tool.
02
Enter the available concept, level, languages, publish fields
Available result review is part of the documented workflow.
03
Run the tool and check the provider/sample-output banner
Provider-dependent output is part of the documented workflow.
04
Inspect the result and confirm important details against school records
Review the result in the connected record or workspace before moving on.
Fields & controls
The screen exposes the following context or input controls. Required fields are validated by the live application.
Concept
Level
Languages
Publish
CURRENT BEHAVIOUR
Rules & current limits
The documentation demo uses deterministic fictional sample output, not a live AI provider.
Provider configuration, image/voice inputs and live integrations require separate verification. Human review remains necessary.
Individual tool checked in current source. Guide availability confirms documentation publication, not certification of every external service or device flow.
Intelligence · AI tool
Enrolment & Capacity Forecast
Enrolment & Capacity Forecast is an available tool in the School AI Tools workspace (Predictive Ops). Review the required context and the returned output before using it.
Intended access: Assigned account with the required permissions.
An authorised school account and the permissions for this tool.
A valid learner, staff, section or topic reference where the tool asks for one.
Required permission keys
student:manage
Use the public sample demo to learn this flow. Your assigned ERP account determines access to actual school records.
STEP BY STEP
How the workflow works
01
Open School AI Tools and select “Enrolment & Capacity Forecast”
An authorised school account and the permissions for this tool.
02
Enter the available conversion pct, default section capacity, students per teacher, label fields
Available result review is part of the documented workflow.
03
Run the tool and check the provider/sample-output banner
Provider-dependent output is part of the documented workflow.
04
Inspect the result and confirm important details against school records
Review the result in the connected record or workspace before moving on.
Fields & controls
The screen exposes the following context or input controls. Required fields are validated by the live application.
Conversion Pct
Default Section Capacity
Students Per Teacher
Label
CURRENT BEHAVIOUR
Rules & current limits
The documentation demo uses deterministic fictional sample output, not a live AI provider.
Provider configuration, image/voice inputs and live integrations require separate verification. Human review remains necessary.
Individual tool checked in current source. Guide availability confirms documentation publication, not certification of every external service or device flow.
Intelligence · AI tool
Cashflow Prediction
Cashflow Prediction is an available tool in the School AI Tools workspace (Predictive Ops). Review the required context and the returned output before using it.
Intended access: Assigned account with the required permissions.
An authorised school account and the permissions for this tool.
A valid learner, staff, section or topic reference where the tool asks for one.
Required permission keys
fee:manage
Use the public sample demo to learn this flow. Your assigned ERP account determines access to actual school records.
STEP BY STEP
How the workflow works
01
Open School AI Tools and select “Cashflow Prediction”
An authorised school account and the permissions for this tool.
02
Enter the available scholarship pct, months, collection rate pct, label fields
Available result review is part of the documented workflow.
03
Run the tool and check the provider/sample-output banner
Provider-dependent output is part of the documented workflow.
04
Inspect the result and confirm important details against school records
Review the result in the connected record or workspace before moving on.
Fields & controls
The screen exposes the following context or input controls. Required fields are validated by the live application.
Scholarship Pct
Months
Collection Rate Pct
Label
CURRENT BEHAVIOUR
Rules & current limits
The documentation demo uses deterministic fictional sample output, not a live AI provider.
Provider configuration, image/voice inputs and live integrations require separate verification. Human review remains necessary.
Individual tool checked in current source. Guide availability confirms documentation publication, not certification of every external service or device flow.
Intelligence · AI tool
Staff Workload Optimizer
Staff Workload Optimizer is an available tool in the School AI Tools workspace (Predictive Ops). Review the required context and the returned output before using it.
Intended access: Assigned account with the required permissions.
An authorised school account and the permissions for this tool.
A valid learner, staff, section or topic reference where the tool asks for one.
Required permission keys
timetable:viewattendance:update
Use the public sample demo to learn this flow. Your assigned ERP account determines access to actual school records.
STEP BY STEP
How the workflow works
01
Open School AI Tools and select “Staff Workload Optimizer”
An authorised school account and the permissions for this tool.
02
Enter the available overload threshold, medium threshold, underutilized ratio, label fields
Available result review is part of the documented workflow.
03
Run the tool and check the provider/sample-output banner
Provider-dependent output is part of the documented workflow.
04
Inspect the result and confirm important details against school records
Review the result in the connected record or workspace before moving on.
Fields & controls
The screen exposes the following context or input controls. Required fields are validated by the live application.
Overload Threshold
Medium Threshold
Underutilized Ratio
Label
CURRENT BEHAVIOUR
Rules & current limits
The documentation demo uses deterministic fictional sample output, not a live AI provider.
Provider configuration, image/voice inputs and live integrations require separate verification. Human review remains necessary.
Individual tool checked in current source. Guide availability confirms documentation publication, not certification of every external service or device flow.
Intelligence · AI tool
Transport ETA + Route AI
Transport ETA + Route AI is an available tool in the School AI Tools workspace (Predictive Ops). Review the required context and the returned output before using it.
Intended access: Assigned account with the required permissions.
An authorised school account and the permissions for this tool.
A valid learner, staff, section or topic reference where the tool asks for one.
Required permission keys
transport:view
Use the public sample demo to learn this flow. Your assigned ERP account determines access to actual school records.
STEP BY STEP
How the workflow works
01
Open School AI Tools and select “Transport ETA + Route AI”
An authorised school account and the permissions for this tool.
02
Enter the available scope, vehicle id, route id, late threshold min, label fields
Available result review is part of the documented workflow.
03
Run the tool and check the provider/sample-output banner
Provider-dependent output is part of the documented workflow.
04
Inspect the result and confirm important details against school records
Review the result in the connected record or workspace before moving on.
Fields & controls
The screen exposes the following context or input controls. Required fields are validated by the live application.
Scope
Vehicle Id
Route Id
Late Threshold Min
Label
CURRENT BEHAVIOUR
Rules & current limits
The documentation demo uses deterministic fictional sample output, not a live AI provider.
Provider configuration, image/voice inputs and live integrations require separate verification. Human review remains necessary.
Individual tool checked in current source. Guide availability confirms documentation publication, not certification of every external service or device flow.
Intelligence · AI tool
Hostel/Inventory Demand Forecast
Hostel/Inventory Demand Forecast is an available tool in the School AI Tools workspace (Predictive Ops). Review the required context and the returned output before using it.
Intended access: Assigned account with the required permissions.
An authorised school account and the permissions for this tool.
A valid learner, staff, section or topic reference where the tool asks for one.
Required permission keys
inventory:view
Use the public sample demo to learn this flow. Your assigned ERP account determines access to actual school records.
STEP BY STEP
How the workflow works
01
Open School AI Tools and select “Hostel/Inventory Demand Forecast”
An authorised school account and the permissions for this tool.
02
Enter the available lookback days, horizon days, occupancy boost pct, category, label fields
Available result review is part of the documented workflow.
03
Run the tool and check the provider/sample-output banner
Provider-dependent output is part of the documented workflow.
04
Inspect the result and confirm important details against school records
Review the result in the connected record or workspace before moving on.
Fields & controls
The screen exposes the following context or input controls. Required fields are validated by the live application.
Lookback Days
Horizon Days
Occupancy Boost Pct
Category
Label
CURRENT BEHAVIOUR
Rules & current limits
The documentation demo uses deterministic fictional sample output, not a live AI provider.
Provider configuration, image/voice inputs and live integrations require separate verification. Human review remains necessary.
Individual tool checked in current source. Guide availability confirms documentation publication, not certification of every external service or device flow.
Intelligence · AI tool
AI Parent Copilot (WhatsApp)
AI Parent Copilot (WhatsApp) is an available tool in the School AI Tools workspace (Parent & Student). Review the required context and the returned output before using it.
Intended access: Assigned account with the required permissions.
An authorised school account and the permissions for this tool.
A valid learner, staff, section or topic reference where the tool asks for one.
Required permission keys
dashboard:view
Use the public sample demo to learn this flow. Your assigned ERP account determines access to actual school records.
STEP BY STEP
How the workflow works
01
Open School AI Tools and select “AI Parent Copilot (WhatsApp)”
An authorised school account and the permissions for this tool.
02
Enter the available student id, question, channel fields
Available result review is part of the documented workflow.
03
Run the tool and check the provider/sample-output banner
Provider-dependent output is part of the documented workflow.
04
Inspect the result and confirm important details against school records
Review the result in the connected record or workspace before moving on.
Fields & controls
The screen exposes the following context or input controls. Required fields are validated by the live application.
Student Id
Question
Channel
CURRENT BEHAVIOUR
Rules & current limits
The documentation demo uses deterministic fictional sample output, not a live AI provider.
Provider configuration, image/voice inputs and live integrations require separate verification. Human review remains necessary.
Individual tool checked in current source. Guide availability confirms documentation publication, not certification of every external service or device flow.
Intelligence · AI tool
WhatsApp Copilot Simulator
WhatsApp Copilot Simulator is an available tool in the School AI Tools workspace (Parent & Student). Review the required context and the returned output before using it.
Intended access: Assigned account with the required permissions.
An authorised school account and the permissions for this tool.
A valid learner, staff, section or topic reference where the tool asks for one.
Required permission keys
dashboard:view
Use the public sample demo to learn this flow. Your assigned ERP account determines access to actual school records.
STEP BY STEP
How the workflow works
01
Open School AI Tools and select “WhatsApp Copilot Simulator”
An authorised school account and the permissions for this tool.
02
Enter the available from, text, dry run fields
Available result review is part of the documented workflow.
03
Run the tool and check the provider/sample-output banner
Provider-dependent output is part of the documented workflow.
04
Inspect the result and confirm important details against school records
Review the result in the connected record or workspace before moving on.
Fields & controls
The screen exposes the following context or input controls. Required fields are validated by the live application.
From
Text
Dry Run
CURRENT BEHAVIOUR
Rules & current limits
The documentation demo uses deterministic fictional sample output, not a live AI provider.
Provider configuration, image/voice inputs and live integrations require separate verification. Human review remains necessary.
Individual tool checked in current source. Guide availability confirms documentation publication, not certification of every external service or device flow.
Intelligence · AI tool
Voice School Assistant
Voice School Assistant is an available tool in the School AI Tools workspace (Parent & Student). Review the required context and the returned output before using it.
Intended access: Assigned account with the required permissions.
An authorised school account and the permissions for this tool.
A valid learner, staff, section or topic reference where the tool asks for one.
Required permission keys
dashboard:view
Use the public sample demo to learn this flow. Your assigned ERP account determines access to actual school records.
STEP BY STEP
How the workflow works
01
Open School AI Tools and select “Voice School Assistant”
An authorised school account and the permissions for this tool.
02
Enter the available student id, transcript fields
Available result review is part of the documented workflow.
03
Run the tool and check the provider/sample-output banner
Provider-dependent output is part of the documented workflow.
04
Inspect the result and confirm important details against school records
Review the result in the connected record or workspace before moving on.
Fields & controls
The screen exposes the following context or input controls. Required fields are validated by the live application.
Student Id
Transcript
CURRENT BEHAVIOUR
Rules & current limits
The documentation demo uses deterministic fictional sample output, not a live AI provider.
Provider configuration, image/voice inputs and live integrations require separate verification. Human review remains necessary.
Individual tool checked in current source. Guide availability confirms documentation publication, not certification of every external service or device flow.
Intelligence · AI tool
Progress Story for Parents
Progress Story for Parents is an available tool in the School AI Tools workspace (Parent & Student). Review the required context and the returned output before using it.
Intended access: Assigned account with the required permissions.
An authorised school account and the permissions for this tool.
A valid learner, staff, section or topic reference where the tool asks for one.
Required permission keys
student:view
Use the public sample demo to learn this flow. Your assigned ERP account determines access to actual school records.
STEP BY STEP
How the workflow works
01
Open School AI Tools and select “Progress Story for Parents”
An authorised school account and the permissions for this tool.
02
Enter the available student id, language fields
Available result review is part of the documented workflow.
03
Run the tool and check the provider/sample-output banner
Provider-dependent output is part of the documented workflow.
04
Inspect the result and confirm important details against school records
Review the result in the connected record or workspace before moving on.
Fields & controls
The screen exposes the following context or input controls. Required fields are validated by the live application.
Student Id
Language
CURRENT BEHAVIOUR
Rules & current limits
The documentation demo uses deterministic fictional sample output, not a live AI provider.
Provider configuration, image/voice inputs and live integrations require separate verification. Human review remains necessary.
Individual tool checked in current source. Guide availability confirms documentation publication, not certification of every external service or device flow.
Intelligence · AI tool
Career Twin
Career Twin is an available tool in the School AI Tools workspace (Parent & Student). Review the required context and the returned output before using it.
Intended access: Assigned account with the required permissions.
An authorised school account and the permissions for this tool.
A valid learner, staff, section or topic reference where the tool asks for one.
Required permission keys
student:view
Use the public sample demo to learn this flow. Your assigned ERP account determines access to actual school records.
STEP BY STEP
How the workflow works
01
Open School AI Tools and select “Career Twin”
An authorised school account and the permissions for this tool.
02
Enter the available student id, interests, psychometric json fields
Available result review is part of the documented workflow.
03
Run the tool and check the provider/sample-output banner
Provider-dependent output is part of the documented workflow.
04
Inspect the result and confirm important details against school records
Review the result in the connected record or workspace before moving on.
Fields & controls
The screen exposes the following context or input controls. Required fields are validated by the live application.
Student Id
Interests
Psychometric Json
CURRENT BEHAVIOUR
Rules & current limits
The documentation demo uses deterministic fictional sample output, not a live AI provider.
Provider configuration, image/voice inputs and live integrations require separate verification. Human review remains necessary.
Individual tool checked in current source. Guide availability confirms documentation publication, not certification of every external service or device flow.
Intelligence · AI tool
Alumni Opportunity Matcher
Alumni Opportunity Matcher is an available tool in the School AI Tools workspace (Parent & Student). Review the required context and the returned output before using it.
Intended access: Assigned account with the required permissions.
An authorised school account and the permissions for this tool.
A valid learner, staff, section or topic reference where the tool asks for one.
Required permission keys
student:view
Use the public sample demo to learn this flow. Your assigned ERP account determines access to actual school records.
STEP BY STEP
How the workflow works
01
Open School AI Tools and select “Alumni Opportunity Matcher”
An authorised school account and the permissions for this tool.
02
Enter the available student id, opportunity type, interest area fields
Available result review is part of the documented workflow.
03
Run the tool and check the provider/sample-output banner
Provider-dependent output is part of the documented workflow.
04
Inspect the result and confirm important details against school records
Review the result in the connected record or workspace before moving on.
Fields & controls
The screen exposes the following context or input controls. Required fields are validated by the live application.
Student Id
Opportunity Type
Interest Area
CURRENT BEHAVIOUR
Rules & current limits
The documentation demo uses deterministic fictional sample output, not a live AI provider.
Provider configuration, image/voice inputs and live integrations require separate verification. Human review remains necessary.
Individual tool checked in current source. Guide availability confirms documentation publication, not certification of every external service or device flow.
Intelligence · AI tool
Campus Safety AI
Campus Safety AI is an available tool in the School AI Tools workspace (Safety & Trust). Review the required context and the returned output before using it.
Intended access: Assigned account with the required permissions.
An authorised school account and the permissions for this tool.
A valid learner, staff, section or topic reference where the tool asks for one.
Required permission keys
hostel:view
Use the public sample demo to learn this flow. Your assigned ERP account determines access to actual school records.
STEP BY STEP
How the workflow works
01
Open School AI Tools and select “Campus Safety AI”
An authorised school account and the permissions for this tool.
02
Enter the available vehicle id, days fields
Available result review is part of the documented workflow.
03
Run the tool and check the provider/sample-output banner
Provider-dependent output is part of the documented workflow.
04
Inspect the result and confirm important details against school records
Review the result in the connected record or workspace before moving on.
Fields & controls
The screen exposes the following context or input controls. Required fields are validated by the live application.
Vehicle Id
Days
CURRENT BEHAVIOUR
Rules & current limits
The documentation demo uses deterministic fictional sample output, not a live AI provider.
Provider configuration, image/voice inputs and live integrations require separate verification. Human review remains necessary.
Individual tool checked in current source. Guide availability confirms documentation publication, not certification of every external service or device flow.
Intelligence · AI tool
Wellbeing / Sentiment Radar
Wellbeing / Sentiment Radar is an available tool in the School AI Tools workspace (Safety & Trust). Review the required context and the returned output before using it.
Intended access: Assigned account with the required permissions.
An authorised school account and the permissions for this tool.
A valid learner, staff, section or topic reference where the tool asks for one.
Required permission keys
health:manage
Use the public sample demo to learn this flow. Your assigned ERP account determines access to actual school records.
STEP BY STEP
How the workflow works
01
Open School AI Tools and select “Wellbeing / Sentiment Radar”
An authorised school account and the permissions for this tool.
02
Review the available school context for this tool
Available result review is part of the documented workflow.
03
Run the tool and check the provider/sample-output banner
Provider-dependent output is part of the documented workflow.
04
Inspect the result and confirm important details against school records
Review the result in the connected record or workspace before moving on.
CURRENT BEHAVIOUR
Rules & current limits
The documentation demo uses deterministic fictional sample output, not a live AI provider.
Provider configuration, image/voice inputs and live integrations require separate verification. Human review remains necessary.
Individual tool checked in current source. Guide availability confirms documentation publication, not certification of every external service or device flow.
Intelligence · AI tool
AI Audit Trail
AI Audit Trail is an available tool in the School AI Tools workspace (Safety & Trust). Review the required context and the returned output before using it.
Intended access: Assigned account with the required permissions.
An authorised school account and the permissions for this tool.
A valid learner, staff, section or topic reference where the tool asks for one.
Required permission keys
dashboard:view
Use the public sample demo to learn this flow. Your assigned ERP account determines access to actual school records.
STEP BY STEP
How the workflow works
01
Open School AI Tools and select “AI Audit Trail”
An authorised school account and the permissions for this tool.
02
Enter the available decision, request id, note, corrected text, feature fields
Available result review is part of the documented workflow.
03
Run the tool and check the provider/sample-output banner
Provider-dependent output is part of the documented workflow.
04
Inspect the result and confirm important details against school records
Review the result in the connected record or workspace before moving on.
Fields & controls
The screen exposes the following context or input controls. Required fields are validated by the live application.
Decision
Request Id
Note
Corrected Text
Feature
CURRENT BEHAVIOUR
Rules & current limits
The documentation demo uses deterministic fictional sample output, not a live AI provider.
Provider configuration, image/voice inputs and live integrations require separate verification. Human review remains necessary.
Individual tool checked in current source. Guide availability confirms documentation publication, not certification of every external service or device flow.
Intelligence · AI tool
Fairness Monitor
Fairness Monitor is an available tool in the School AI Tools workspace (Safety & Trust). Review the required context and the returned output before using it.
Intended access: Assigned account with the required permissions.
An authorised school account and the permissions for this tool.
A valid learner, staff, section or topic reference where the tool asks for one.
Required permission keys
student:manage
Use the public sample demo to learn this flow. Your assigned ERP account determines access to actual school records.
STEP BY STEP
How the workflow works
01
Open School AI Tools and select “Fairness Monitor”
An authorised school account and the permissions for this tool.
02
Review the available school context for this tool
Available result review is part of the documented workflow.
03
Run the tool and check the provider/sample-output banner
Provider-dependent output is part of the documented workflow.
04
Inspect the result and confirm important details against school records
Review the result in the connected record or workspace before moving on.
CURRENT BEHAVIOUR
Rules & current limits
The documentation demo uses deterministic fictional sample output, not a live AI provider.
Provider configuration, image/voice inputs and live integrations require separate verification. Human review remains necessary.
Individual tool checked in current source. Guide availability confirms documentation publication, not certification of every external service or device flow.
Intelligence · AI tool
Data Minimization Mode
Data Minimization Mode is an available tool in the School AI Tools workspace (Safety & Trust). Review the required context and the returned output before using it.
Intended access: Assigned account with the required permissions.
An authorised school account and the permissions for this tool.
A valid learner, staff, section or topic reference where the tool asks for one.
Required permission keys
dashboard:viewsettings:update
Use the public sample demo to learn this flow. Your assigned ERP account determines access to actual school records.
STEP BY STEP
How the workflow works
01
Open School AI Tools and select “Data Minimization Mode”
An authorised school account and the permissions for this tool.
02
Enter the available save, biometric enabled, face match enabled, biometric retention days, parent opt out default fields
Available result review is part of the documented workflow.
03
Run the tool and check the provider/sample-output banner
Provider-dependent output is part of the documented workflow.
04
Inspect the result and confirm important details against school records
Review the result in the connected record or workspace before moving on.
Fields & controls
The screen exposes the following context or input controls. Required fields are validated by the live application.
Save
Biometric Enabled
Face Match Enabled
Biometric Retention Days
Parent Opt Out Default
CURRENT BEHAVIOUR
Rules & current limits
The documentation demo uses deterministic fictional sample output, not a live AI provider.
Provider configuration, image/voice inputs and live integrations require separate verification. Human review remains necessary.
Individual tool checked in current source. Guide availability confirms documentation publication, not certification of every external service or device flow.
Intelligence · AI tool
Auto Grading + Rubric Feedback
Auto Grading + Rubric Feedback is an available tool in the School AI Tools workspace (Teacher Productivity). Review the required context and the returned output before using it.
Intended access: Assigned account with the required permissions.
An authorised school account and the permissions for this tool.
A valid learner, staff, section or topic reference where the tool asks for one.
Required permission keys
exam:update
Use the public sample demo to learn this flow. Your assigned ERP account determines access to actual school records.
STEP BY STEP
How the workflow works
01
Open School AI Tools and select “Auto Grading + Rubric Feedback”
An authorised school account and the permissions for this tool.
02
Enter the available assignment id, student id, submission text, publish fields
Available result review is part of the documented workflow.
03
Run the tool and check the provider/sample-output banner
Provider-dependent output is part of the documented workflow.
04
Inspect the result and confirm important details against school records
Review the result in the connected record or workspace before moving on.
Fields & controls
The screen exposes the following context or input controls. Required fields are validated by the live application.
Assignment Id
Student Id
Submission Text
Publish
CURRENT BEHAVIOUR
Rules & current limits
The documentation demo uses deterministic fictional sample output, not a live AI provider.
Provider configuration, image/voice inputs and live integrations require separate verification. Human review remains necessary.
Individual tool checked in current source. Guide availability confirms documentation publication, not certification of every external service or device flow.
Intelligence · AI tool
Classroom Insight Board
Classroom Insight Board is an available tool in the School AI Tools workspace (Teacher Productivity). Review the required context and the returned output before using it.
Intended access: Assigned account with the required permissions.
An authorised school account and the permissions for this tool.
A valid learner, staff, section or topic reference where the tool asks for one.
Required permission keys
attendance:view
Use the public sample demo to learn this flow. Your assigned ERP account determines access to actual school records.
STEP BY STEP
How the workflow works
01
Open School AI Tools and select “Classroom Insight Board”
An authorised school account and the permissions for this tool.
02
Enter the available section id fields
Available result review is part of the documented workflow.
03
Run the tool and check the provider/sample-output banner
Provider-dependent output is part of the documented workflow.
04
Inspect the result and confirm important details against school records
Review the result in the connected record or workspace before moving on.
Fields & controls
The screen exposes the following context or input controls. Required fields are validated by the live application.
Section Id
CURRENT BEHAVIOUR
Rules & current limits
The documentation demo uses deterministic fictional sample output, not a live AI provider.
Provider configuration, image/voice inputs and live integrations require separate verification. Human review remains necessary.
Individual tool checked in current source. Guide availability confirms documentation publication, not certification of every external service or device flow.
Intelligence · AI tool
Substitution Brain
Substitution Brain is an available tool in the School AI Tools workspace (Teacher Productivity). Review the required context and the returned output before using it.
Intended access: Assigned account with the required permissions.
An authorised school account and the permissions for this tool.
A valid learner, staff, section or topic reference where the tool asks for one.
Required permission keys
timetable:view
Use the public sample demo to learn this flow. Your assigned ERP account determines access to actual school records.
STEP BY STEP
How the workflow works
01
Open School AI Tools and select “Substitution Brain”
An authorised school account and the permissions for this tool.
02
Enter the available absent staff id, date fields
Available result review is part of the documented workflow.
03
Run the tool and check the provider/sample-output banner
Provider-dependent output is part of the documented workflow.
04
Inspect the result and confirm important details against school records
Review the result in the connected record or workspace before moving on.
Fields & controls
The screen exposes the following context or input controls. Required fields are validated by the live application.
Absent Staff Id
Date
CURRENT BEHAVIOUR
Rules & current limits
The documentation demo uses deterministic fictional sample output, not a live AI provider.
Provider configuration, image/voice inputs and live integrations require separate verification. Human review remains necessary.
Individual tool checked in current source. Guide availability confirms documentation publication, not certification of every external service or device flow.
Intelligence · AI tool
Question Bank Intelligence
Question Bank Intelligence is an available tool in the School AI Tools workspace (Teacher Productivity). Review the required context and the returned output before using it.
Intended access: Assigned account with the required permissions.
An authorised school account and the permissions for this tool.
A valid learner, staff, section or topic reference where the tool asks for one.
Required permission keys
exam:view
Use the public sample demo to learn this flow. Your assigned ERP account determines access to actual school records.
STEP BY STEP
How the workflow works
01
Open School AI Tools and select “Question Bank Intelligence”
An authorised school account and the permissions for this tool.
02
Enter the available subject id, paper size fields
Available result review is part of the documented workflow.
03
Run the tool and check the provider/sample-output banner
Provider-dependent output is part of the documented workflow.
04
Inspect the result and confirm important details against school records
Review the result in the connected record or workspace before moving on.
Fields & controls
The screen exposes the following context or input controls. Required fields are validated by the live application.
Subject Id
Paper Size
CURRENT BEHAVIOUR
Rules & current limits
The documentation demo uses deterministic fictional sample output, not a live AI provider.
Provider configuration, image/voice inputs and live integrations require separate verification. Human review remains necessary.
Individual tool checked in current source. Guide availability confirms documentation publication, not certification of every external service or device flow.
Intelligence · AI tool
Meeting Notes → Actions
Meeting Notes → Actions is an available tool in the School AI Tools workspace (Teacher Productivity). Review the required context and the returned output before using it.
Intended access: Assigned account with the required permissions.
An authorised school account and the permissions for this tool.
A valid learner, staff, section or topic reference where the tool asks for one.
Required permission keys
communication:create
Use the public sample demo to learn this flow. Your assigned ERP account determines access to actual school records.
STEP BY STEP
How the workflow works
01
Open School AI Tools and select “Meeting Notes → Actions”
An authorised school account and the permissions for this tool.
02
Enter the available transcript, meeting type fields
Available result review is part of the documented workflow.
03
Run the tool and check the provider/sample-output banner
Provider-dependent output is part of the documented workflow.
04
Inspect the result and confirm important details against school records
Review the result in the connected record or workspace before moving on.
Fields & controls
The screen exposes the following context or input controls. Required fields are validated by the live application.
Transcript
Meeting Type
CURRENT BEHAVIOUR
Rules & current limits
The documentation demo uses deterministic fictional sample output, not a live AI provider.
Provider configuration, image/voice inputs and live integrations require separate verification. Human review remains necessary.
Individual tool checked in current source. Guide availability confirms documentation publication, not certification of every external service or device flow.
Intelligence · AI tool
School Twin Benchmarking
School Twin Benchmarking is an available tool in the School AI Tools workspace (SaaS Moat). Review the required context and the returned output before using it.
Intended access: Assigned account with the required permissions.
An authorised school account and the permissions for this tool.
A valid learner, staff, section or topic reference where the tool asks for one.
Required permission keys
dashboard:view
Use the public sample demo to learn this flow. Your assigned ERP account determines access to actual school records.
STEP BY STEP
How the workflow works
01
Open School AI Tools and select “School Twin Benchmarking”
An authorised school account and the permissions for this tool.
02
Review the available school context for this tool
Available result review is part of the documented workflow.
03
Run the tool and check the provider/sample-output banner
Provider-dependent output is part of the documented workflow.
04
Inspect the result and confirm important details against school records
Review the result in the connected record or workspace before moving on.
CURRENT BEHAVIOUR
Rules & current limits
The documentation demo uses deterministic fictional sample output, not a live AI provider.
Provider configuration, image/voice inputs and live integrations require separate verification. Human review remains necessary.
Individual tool checked in current source. Guide availability confirms documentation publication, not certification of every external service or device flow.
Intelligence · AI tool
Policy Copilot
Policy Copilot is an available tool in the School AI Tools workspace (SaaS Moat). Review the required context and the returned output before using it.
Intended access: Assigned account with the required permissions.
An authorised school account and the permissions for this tool.
A valid learner, staff, section or topic reference where the tool asks for one.
Required permission keys
dashboard:view
Use the public sample demo to learn this flow. Your assigned ERP account determines access to actual school records.
STEP BY STEP
How the workflow works
01
Open School AI Tools and select “Policy Copilot”
An authorised school account and the permissions for this tool.
02
Enter the available question, board fields
Available result review is part of the documented workflow.
03
Run the tool and check the provider/sample-output banner
Provider-dependent output is part of the documented workflow.
04
Inspect the result and confirm important details against school records
Review the result in the connected record or workspace before moving on.
Fields & controls
The screen exposes the following context or input controls. Required fields are validated by the live application.
Question
Board
CURRENT BEHAVIOUR
Rules & current limits
The documentation demo uses deterministic fictional sample output, not a live AI provider.
Provider configuration, image/voice inputs and live integrations require separate verification. Human review remains necessary.
Individual tool checked in current source. Guide availability confirms documentation publication, not certification of every external service or device flow.
Intelligence · AI tool
Auto Accreditation Pack
Auto Accreditation Pack is an available tool in the School AI Tools workspace (SaaS Moat). Review the required context and the returned output before using it.
Intended access: Assigned account with the required permissions.
An authorised school account and the permissions for this tool.
A valid learner, staff, section or topic reference where the tool asks for one.
Required permission keys
dashboard:view
Use the public sample demo to learn this flow. Your assigned ERP account determines access to actual school records.
STEP BY STEP
How the workflow works
01
Open School AI Tools and select “Auto Accreditation Pack”
An authorised school account and the permissions for this tool.
02
Enter the available purpose fields
Available result review is part of the documented workflow.
03
Run the tool and check the provider/sample-output banner
Provider-dependent output is part of the documented workflow.
04
Inspect the result and confirm important details against school records
Review the result in the connected record or workspace before moving on.
Fields & controls
The screen exposes the following context or input controls. Required fields are validated by the live application.
Purpose
CURRENT BEHAVIOUR
Rules & current limits
The documentation demo uses deterministic fictional sample output, not a live AI provider.
Provider configuration, image/voice inputs and live integrations require separate verification. Human review remains necessary.
Individual tool checked in current source. Guide availability confirms documentation publication, not certification of every external service or device flow.
Intelligence · AI tool
Branch Performance Copilot
Branch Performance Copilot is an available tool in the School AI Tools workspace (SaaS Moat). Review the required context and the returned output before using it.
Intended access: Assigned account with the required permissions.
An authorised school account and the permissions for this tool.
A valid learner, staff, section or topic reference where the tool asks for one.
Required permission keys
dashboard:view
Use the public sample demo to learn this flow. Your assigned ERP account determines access to actual school records.
STEP BY STEP
How the workflow works
01
Open School AI Tools and select “Branch Performance Copilot”
An authorised school account and the permissions for this tool.
02
Review the available school context for this tool
Available result review is part of the documented workflow.
03
Run the tool and check the provider/sample-output banner
Provider-dependent output is part of the documented workflow.
04
Inspect the result and confirm important details against school records
Review the result in the connected record or workspace before moving on.
CURRENT BEHAVIOUR
Rules & current limits
The documentation demo uses deterministic fictional sample output, not a live AI provider.
Provider configuration, image/voice inputs and live integrations require separate verification. Human review remains necessary.
Individual tool checked in current source. Guide availability confirms documentation publication, not certification of every external service or device flow.
Websites · Website guide
School website: Homepage
Home at D&D International School — knowledge, character and community.
No ERP account is required to read the public page.
Use the public sample demo to learn this flow. Your assigned ERP account determines access to actual school records.
STEP BY STEP
How the workflow works
01
Open the published page
No ERP account is required to read the public page.
02
Read the available school content
School navigation is part of the documented workflow.
03
Use the school navigation or contact link for the next step
Review the result in the connected record or workspace before moving on.
CURRENT BEHAVIOUR
Rules & current limits
School content and illustrative campus imagery are subject to the school’s confirmation.
School-owned content is edited through the permitted website CMS.
Published page metadata checked live on 11 October 2026. Guide availability confirms documentation publication, not certification of every external service or device flow.
Websites · Website guide
School website: About our school
About our school at D&D International School — knowledge, character and community.
No ERP account is required to read the public page.
Use the public sample demo to learn this flow. Your assigned ERP account determines access to actual school records.
STEP BY STEP
How the workflow works
01
Open the published page
No ERP account is required to read the public page.
02
Read the available school content
School navigation is part of the documented workflow.
03
Use the school navigation or contact link for the next step
Review the result in the connected record or workspace before moving on.
CURRENT BEHAVIOUR
Rules & current limits
School content and illustrative campus imagery are subject to the school’s confirmation.
School-owned content is edited through the permitted website CMS.
Published page metadata checked live on 11 October 2026. Guide availability confirms documentation publication, not certification of every external service or device flow.
Websites · Website guide
School website: Vision & mission
Vision & mission at D&D International School — knowledge, character and community.
No ERP account is required to read the public page.
Use the public sample demo to learn this flow. Your assigned ERP account determines access to actual school records.
STEP BY STEP
How the workflow works
01
Open the published page
No ERP account is required to read the public page.
02
Read the available school content
School navigation is part of the documented workflow.
03
Use the school navigation or contact link for the next step
Review the result in the connected record or workspace before moving on.
CURRENT BEHAVIOUR
Rules & current limits
School content and illustrative campus imagery are subject to the school’s confirmation.
School-owned content is edited through the permitted website CMS.
Published page metadata checked live on 11 October 2026. Guide availability confirms documentation publication, not certification of every external service or device flow.
Websites · Website guide
School website: Principal’s message
Principal’s message at D&D International School — knowledge, character and community.
No ERP account is required to read the public page.
Use the public sample demo to learn this flow. Your assigned ERP account determines access to actual school records.
STEP BY STEP
How the workflow works
01
Open the published page
No ERP account is required to read the public page.
02
Read the available school content
School navigation is part of the documented workflow.
03
Use the school navigation or contact link for the next step
Review the result in the connected record or workspace before moving on.
CURRENT BEHAVIOUR
Rules & current limits
School content and illustrative campus imagery are subject to the school’s confirmation.
School-owned content is edited through the permitted website CMS.
Published page metadata checked live on 11 October 2026. Guide availability confirms documentation publication, not certification of every external service or device flow.
Websites · Website guide
School website: Academics
Academics at D&D International School — knowledge, character and community.
No ERP account is required to read the public page.
Use the public sample demo to learn this flow. Your assigned ERP account determines access to actual school records.
STEP BY STEP
How the workflow works
01
Open the published page
No ERP account is required to read the public page.
02
Read the available school content
School navigation is part of the documented workflow.
03
Use the school navigation or contact link for the next step
Review the result in the connected record or workspace before moving on.
CURRENT BEHAVIOUR
Rules & current limits
School content and illustrative campus imagery are subject to the school’s confirmation.
School-owned content is edited through the permitted website CMS.
Published page metadata checked live on 11 October 2026. Guide availability confirms documentation publication, not certification of every external service or device flow.
Websites · Website guide
School website: Curriculum & learning
Curriculum & learning at D&D International School — knowledge, character and community.
No ERP account is required to read the public page.
Use the public sample demo to learn this flow. Your assigned ERP account determines access to actual school records.
STEP BY STEP
How the workflow works
01
Open the published page
No ERP account is required to read the public page.
02
Read the available school content
School navigation is part of the documented workflow.
03
Use the school navigation or contact link for the next step
Review the result in the connected record or workspace before moving on.
CURRENT BEHAVIOUR
Rules & current limits
School content and illustrative campus imagery are subject to the school’s confirmation.
School-owned content is edited through the permitted website CMS.
Published page metadata checked live on 11 October 2026. Guide availability confirms documentation publication, not certification of every external service or device flow.
Websites · Website guide
School website: Campus & facilities
Campus & facilities at D&D International School — knowledge, character and community.
No ERP account is required to read the public page.
Use the public sample demo to learn this flow. Your assigned ERP account determines access to actual school records.
STEP BY STEP
How the workflow works
01
Open the published page
No ERP account is required to read the public page.
02
Read the available school content
School navigation is part of the documented workflow.
03
Use the school navigation or contact link for the next step
Review the result in the connected record or workspace before moving on.
CURRENT BEHAVIOUR
Rules & current limits
School content and illustrative campus imagery are subject to the school’s confirmation.
School-owned content is edited through the permitted website CMS.
Published page metadata checked live on 11 October 2026. Guide availability confirms documentation publication, not certification of every external service or device flow.
Websites · Website guide
School website: Campus life
Campus life at D&D International School — knowledge, character and community.
No ERP account is required to read the public page.
Use the public sample demo to learn this flow. Your assigned ERP account determines access to actual school records.
STEP BY STEP
How the workflow works
01
Open the published page
No ERP account is required to read the public page.
02
Read the available school content
School navigation is part of the documented workflow.
03
Use the school navigation or contact link for the next step
Review the result in the connected record or workspace before moving on.
CURRENT BEHAVIOUR
Rules & current limits
School content and illustrative campus imagery are subject to the school’s confirmation.
School-owned content is edited through the permitted website CMS.
Published page metadata checked live on 11 October 2026. Guide availability confirms documentation publication, not certification of every external service or device flow.
Websites · Website guide
School website: Events & celebrations
Events & celebrations at D&D International School — knowledge, character and community.
No ERP account is required to read the public page.
Use the public sample demo to learn this flow. Your assigned ERP account determines access to actual school records.
STEP BY STEP
How the workflow works
01
Open the published page
No ERP account is required to read the public page.
02
Read the available school content
School navigation is part of the documented workflow.
03
Use the school navigation or contact link for the next step
Review the result in the connected record or workspace before moving on.
CURRENT BEHAVIOUR
Rules & current limits
School content and illustrative campus imagery are subject to the school’s confirmation.
School-owned content is edited through the permitted website CMS.
Published page metadata checked live on 11 October 2026. Guide availability confirms documentation publication, not certification of every external service or device flow.
Websites · Website guide
School website: Gallery
Gallery at D&D International School — knowledge, character and community.
No ERP account is required to read the public page.
Use the public sample demo to learn this flow. Your assigned ERP account determines access to actual school records.
STEP BY STEP
How the workflow works
01
Open the gallery page
No ERP account is required to read the public page.
02
Browse the available school images
Responsive image display is part of the documented workflow.
03
Use the gallery controls to explore individual images
Review the result in the connected record or workspace before moving on.
CURRENT BEHAVIOUR
Rules & current limits
School content and illustrative campus imagery are subject to the school’s confirmation.
School-owned content is edited through the permitted website CMS.
Published page metadata checked live on 11 October 2026. Guide availability confirms documentation publication, not certification of every external service or device flow.
Websites · Website guide
School website: School journal
School journal at D&D International School — knowledge, character and community.
No ERP account is required to read the public page.
Use the public sample demo to learn this flow. Your assigned ERP account determines access to actual school records.
STEP BY STEP
How the workflow works
01
Open the published page
No ERP account is required to read the public page.
02
Read the available school content
School navigation is part of the documented workflow.
03
Use the school navigation or contact link for the next step
Review the result in the connected record or workspace before moving on.
CURRENT BEHAVIOUR
Rules & current limits
School content and illustrative campus imagery are subject to the school’s confirmation.
School-owned content is edited through the permitted website CMS.
Published page metadata checked live on 11 October 2026. Guide availability confirms documentation publication, not certification of every external service or device flow.
Websites · Website guide
School website: Admissions
Admissions at D&D International School — knowledge, character and community.
No ERP account is required to read the public page.
Use the public sample demo to learn this flow. Your assigned ERP account determines access to actual school records.
STEP BY STEP
How the workflow works
01
Open the public school page
No ERP account is required to read the public page.
02
Review school information and complete the enquiry fields
Consented enquiry form is part of the documented workflow.
03
Give consent and submit the request
Receipt reference is part of the documented workflow.
04
Keep the receipt reference; school staff manage the enquiry in ERP
Review the result in the connected record or workspace before moving on.
Fields & controls
The screen exposes the following context or input controls. Required fields are validated by the live application.
Guardian/contact name
Contact details
Enquiry message
Consent
CURRENT BEHAVIOUR
Rules & current limits
School content and illustrative campus imagery are subject to the school’s confirmation.
Submitting an enquiry creates a request; it does not automatically admit a student or send a payment.
Published page metadata checked live on 11 October 2026. Guide availability confirms documentation publication, not certification of every external service or device flow.
Websites · Website guide
School website: Fees & scholarships
Fees & scholarships at D&D International School — knowledge, character and community.
No ERP account is required to read the public page.
Use the public sample demo to learn this flow. Your assigned ERP account determines access to actual school records.
STEP BY STEP
How the workflow works
01
Open the published page
No ERP account is required to read the public page.
02
Read the available school content
School navigation is part of the documented workflow.
03
Use the school navigation or contact link for the next step
Review the result in the connected record or workspace before moving on.
CURRENT BEHAVIOUR
Rules & current limits
School content and illustrative campus imagery are subject to the school’s confirmation.
School-owned content is edited through the permitted website CMS.
Published page metadata checked live on 11 October 2026. Guide availability confirms documentation publication, not certification of every external service or device flow.
Websites · Website guide
School website: School transport
School transport at D&D International School — knowledge, character and community.
No ERP account is required to read the public page.
Use the public sample demo to learn this flow. Your assigned ERP account determines access to actual school records.
STEP BY STEP
How the workflow works
01
Open the published page
No ERP account is required to read the public page.
02
Read the available school content
School navigation is part of the documented workflow.
03
Use the school navigation or contact link for the next step
Review the result in the connected record or workspace before moving on.
CURRENT BEHAVIOUR
Rules & current limits
School content and illustrative campus imagery are subject to the school’s confirmation.
School-owned content is edited through the permitted website CMS.
Published page metadata checked live on 11 October 2026. Guide availability confirms documentation publication, not certification of every external service or device flow.
Websites · Website guide
School website: Parent resources
Parent resources at D&D International School — knowledge, character and community.
No ERP account is required to read the public page.
Use the public sample demo to learn this flow. Your assigned ERP account determines access to actual school records.
STEP BY STEP
How the workflow works
01
Open the published page
No ERP account is required to read the public page.
02
Read the available school content
School navigation is part of the documented workflow.
03
Use the school navigation or contact link for the next step
Review the result in the connected record or workspace before moving on.
CURRENT BEHAVIOUR
Rules & current limits
School content and illustrative campus imagery are subject to the school’s confirmation.
School-owned content is edited through the permitted website CMS.
Published page metadata checked live on 11 October 2026. Guide availability confirms documentation publication, not certification of every external service or device flow.
Websites · Website guide
School website: School calendar
School calendar at D&D International School — knowledge, character and community.
No ERP account is required to read the public page.
Use the public sample demo to learn this flow. Your assigned ERP account determines access to actual school records.
STEP BY STEP
How the workflow works
01
Open the published page
No ERP account is required to read the public page.
02
Read the available school content
School navigation is part of the documented workflow.
03
Use the school navigation or contact link for the next step
Review the result in the connected record or workspace before moving on.
CURRENT BEHAVIOUR
Rules & current limits
School content and illustrative campus imagery are subject to the school’s confirmation.
School-owned content is edited through the permitted website CMS.
Published page metadata checked live on 11 October 2026. Guide availability confirms documentation publication, not certification of every external service or device flow.
Websites · Website guide
School website: Frequently asked questions
Frequently asked questions at D&D International School — knowledge, character and community.
No ERP account is required to read the public page.
Use the public sample demo to learn this flow. Your assigned ERP account determines access to actual school records.
STEP BY STEP
How the workflow works
01
Open the published page
No ERP account is required to read the public page.
02
Read the available school content
School navigation is part of the documented workflow.
03
Use the school navigation or contact link for the next step
Review the result in the connected record or workspace before moving on.
CURRENT BEHAVIOUR
Rules & current limits
School content and illustrative campus imagery are subject to the school’s confirmation.
School-owned content is edited through the permitted website CMS.
Published page metadata checked live on 11 October 2026. Guide availability confirms documentation publication, not certification of every external service or device flow.
Websites · Website guide
School website: Careers
Careers at D&D International School — knowledge, character and community.
No ERP account is required to read the public page.
Use the public sample demo to learn this flow. Your assigned ERP account determines access to actual school records.
STEP BY STEP
How the workflow works
01
Open the published page
No ERP account is required to read the public page.
02
Read the available school content
School navigation is part of the documented workflow.
03
Use the school navigation or contact link for the next step
Review the result in the connected record or workspace before moving on.
CURRENT BEHAVIOUR
Rules & current limits
School content and illustrative campus imagery are subject to the school’s confirmation.
School-owned content is edited through the permitted website CMS.
Published page metadata checked live on 11 October 2026. Guide availability confirms documentation publication, not certification of every external service or device flow.
Websites · Website guide
School website: Contact & visits
Contact & visits at D&D International School — knowledge, character and community.
No ERP account is required to read the public page.
Use the public sample demo to learn this flow. Your assigned ERP account determines access to actual school records.
STEP BY STEP
How the workflow works
01
Open the public school page
No ERP account is required to read the public page.
02
Review school information and complete the enquiry fields
Consented enquiry form is part of the documented workflow.
03
Give consent and submit the request
Receipt reference is part of the documented workflow.
04
Keep the receipt reference; school staff manage the enquiry in ERP
Review the result in the connected record or workspace before moving on.
Fields & controls
The screen exposes the following context or input controls. Required fields are validated by the live application.
Guardian/contact name
Contact details
Enquiry message
Consent
CURRENT BEHAVIOUR
Rules & current limits
School content and illustrative campus imagery are subject to the school’s confirmation.
Submitting an enquiry creates a request; it does not automatically admit a student or send a payment.
Published page metadata checked live on 11 October 2026. Guide availability confirms documentation publication, not certification of every external service or device flow.
Websites · Website guide
School website: Privacy & website information
Privacy & website information at D&D International School — knowledge, character and community.
No ERP account is required to read the public page.
Use the public sample demo to learn this flow. Your assigned ERP account determines access to actual school records.
STEP BY STEP
How the workflow works
01
Open the published page
No ERP account is required to read the public page.
02
Read the available school content
School navigation is part of the documented workflow.
03
Use the school navigation or contact link for the next step
Review the result in the connected record or workspace before moving on.
CURRENT BEHAVIOUR
Rules & current limits
School content and illustrative campus imagery are subject to the school’s confirmation.
School-owned content is edited through the permitted website CMS.
Published page metadata checked live on 11 October 2026. Guide availability confirms documentation publication, not certification of every external service or device flow.
School office · Access guide
Applicant self-service portal
Use a privately issued application link to save a draft, upload documents and request a campus visit.
Intended access: Assigned account with the required permissions.
Use the official link and the applicable access context.
Use the public sample demo to learn this flow. Your assigned ERP account determines access to actual school records.
STEP BY STEP
How the workflow works
01
Open the private link issued by the school
Use the official link and the applicable access context.
02
Save guardian/application details and supported documents
Draft save and resume is part of the documented workflow.
03
Review feedback and resubmit a rejected document if needed
PDF/image documents up to 10 MB is part of the documented workflow.
04
Submit when the required documents are received
Review the result in the connected record or workspace before moving on.
Fields & controls
The screen exposes the following context or input controls. Required fields are validated by the live application.
Application details
Guardian details
Required documents
Visit preferences
CURRENT BEHAVIOUR
Rules & current limits
A bare portal URL requires the private application link; this documentation does not publish capability tokens.
Uploads are reviewed by staff. OCR, malware scanning and gateway collection are not included in this release.
Implementation checked against the delivered release guide. Guide availability confirms documentation publication, not certification of every external service or device flow.
Family portal · Access guide
Parent account invitation
Accept the school’s private post-admission invitation and choose a parent account password.
Intended access: Assigned account with the required permissions.
Use the official link and the applicable access context.
Use the public sample demo to learn this flow. Your assigned ERP account determines access to actual school records.
STEP BY STEP
How the workflow works
01
Open the private invitation from the school after admission
Use the official link and the applicable access context.
02
Choose and confirm the required password
Single-use acceptance is part of the documented workflow.
03
Accept the invitation once
Guardian-chosen password is part of the documented workflow.
04
Sign in with the assigned guardian identifier and school code
Review the result in the connected record or workspace before moving on.
Fields & controls
The screen exposes the following context or input controls. Required fields are validated by the live application.
Password
Password confirmation
CURRENT BEHAVIOUR
Rules & current limits
Existing accounts are not reset through invitations.
Invitations are not automatically delivered by SMS/email and are never included in public documentation.
Implementation checked against the delivered release guide. Guide availability confirms documentation publication, not certification of every external service or device flow.
Mobile · Access guide
AVKUL ERP Android app
Install the published Android app and use the same assigned school account on mobile.
Intended access: Assigned account with the required permissions.
Use the official link and the applicable access context.
Use the public sample demo to learn this flow. Your assigned ERP account determines access to actual school records.
STEP BY STEP
How the workflow works
01
Download the AVKUL ERP Android APK from the official link
Use the official link and the applicable access context.
02
Install on a compatible Android device when permitted by your device policy
Role-based mobile workspaces is part of the documented workflow.
03
Sign in with the assigned account and school code
Shared school account is part of the documented workflow.
04
Use the modules available to your role and log out when finished
Review the result in the connected record or workspace before moving on.
Fields & controls
The screen exposes the following context or input controls. Required fields are validated by the live application.
Identifier
Password
School code
CURRENT BEHAVIOUR
Rules & current limits
The signed Android artifact is published; physical-device camera/microphone/media flows require device-specific testing.
iOS and Play Store distribution are separate releases. Mobile source coverage is not a certification of every native screen.
Implementation checked against the delivered release guide. Guide availability confirms documentation publication, not certification of every external service or device flow.
Websites · Access guide
AVKUL ERP marketing website
Explore platform capabilities and request a product walkthrough from the public AVKUL ERP homepage.
Use the official link and the applicable access context.
Use the public sample demo to learn this flow. Your assigned ERP account determines access to actual school records.
STEP BY STEP
How the workflow works
01
Explore the public platform sections
Use the official link and the applicable access context.
02
Open a documentation guide or guided demo
Stakeholder views is part of the documented workflow.
03
Use Request a walkthrough for a personalised product conversation
Review the result in the connected record or workspace before moving on.
Fields & controls
The screen exposes the following context or input controls. Required fields are validated by the live application.
Name
School
Email
Phone
Student range
Consent
CURRENT BEHAVIOUR
Rules & current limits
A walkthrough enquiry does not create an ERP login.
Analytics collection follows browser privacy preferences and configured collection rules.
Implementation checked against the delivered release guide. Guide availability confirms documentation publication, not certification of every external service or device flow.